We consume a lot of dairy in our household. In fact, my shopping cart almost always has 2 gallons of 2% reduced fat milk (for the kids), 1 gallon of plain soy milk (for us) and at least 1 gallon of buttermilk, with the occasional pint of low fat yogurt thrown in. Oh and everything is
organic [They really should have come up with a different term. I mean, isn't all food organic anyways?!]. And this lasts us for about 10 days.
Quick note on the soy milk--- the husband switched to soy milk a few years ago because he claimed that regular milk made him feel all bloated. And soy milk seemed to work fine. So then he introduced it to me and at first, I hated it. But then, slowly, as with anything else, I got used to it and now I prefer my chai and coffee with soy milk.
A few days ago I did my usual dairy shopping. The next morning, my kids complained that the milk tasted bad. I smelled it and yes indeed, it smelled funny. The first thought that came to my head was, "Great! Now I have to go back to the darn store to return it!" After going back and forth on whether or not it made sense to drive all the way back to the store and waste time (and gasoline!), I decided to pick up some milk from my back-up store--- you know, our neighborhood store. Meanwhile, for some reason, I put that "weird" smelling milk back in the fridge. Well, guess that worked out, because I made
paneer with that milk yesterday and really, I am so proud of myself!
Paneer is basically cottage cheese, except that it is firm, not loose like cottage cheese. Very popular in North Indian cuisine--- am sure you are familiar with dishes such as
Saag Paneer,
Matar Paneer and
Paneer Butter Masala! Yum!
Now many of you might be already adept at making
paneer at home and so this might be a no-brainer to you. But to me, it is quite a deal. This is probably only the second time in my life so far that I have made
paneer at home! So yes, it is a big deal for me!
I took:
1. That gallon of "funny" milk
2. A cup and quarter of vinegar (I used rice vinegar)
The Method:
1. I poured in all that milk into a fairly thick bottomed pot (which happens to be my cooker) and got the heat going. I kept it on low first and then after about 10 minutes, when the milk was beginning to warm up, I increased the flame. This was to prevent any kind of scorching-at-the-bottom-issue.
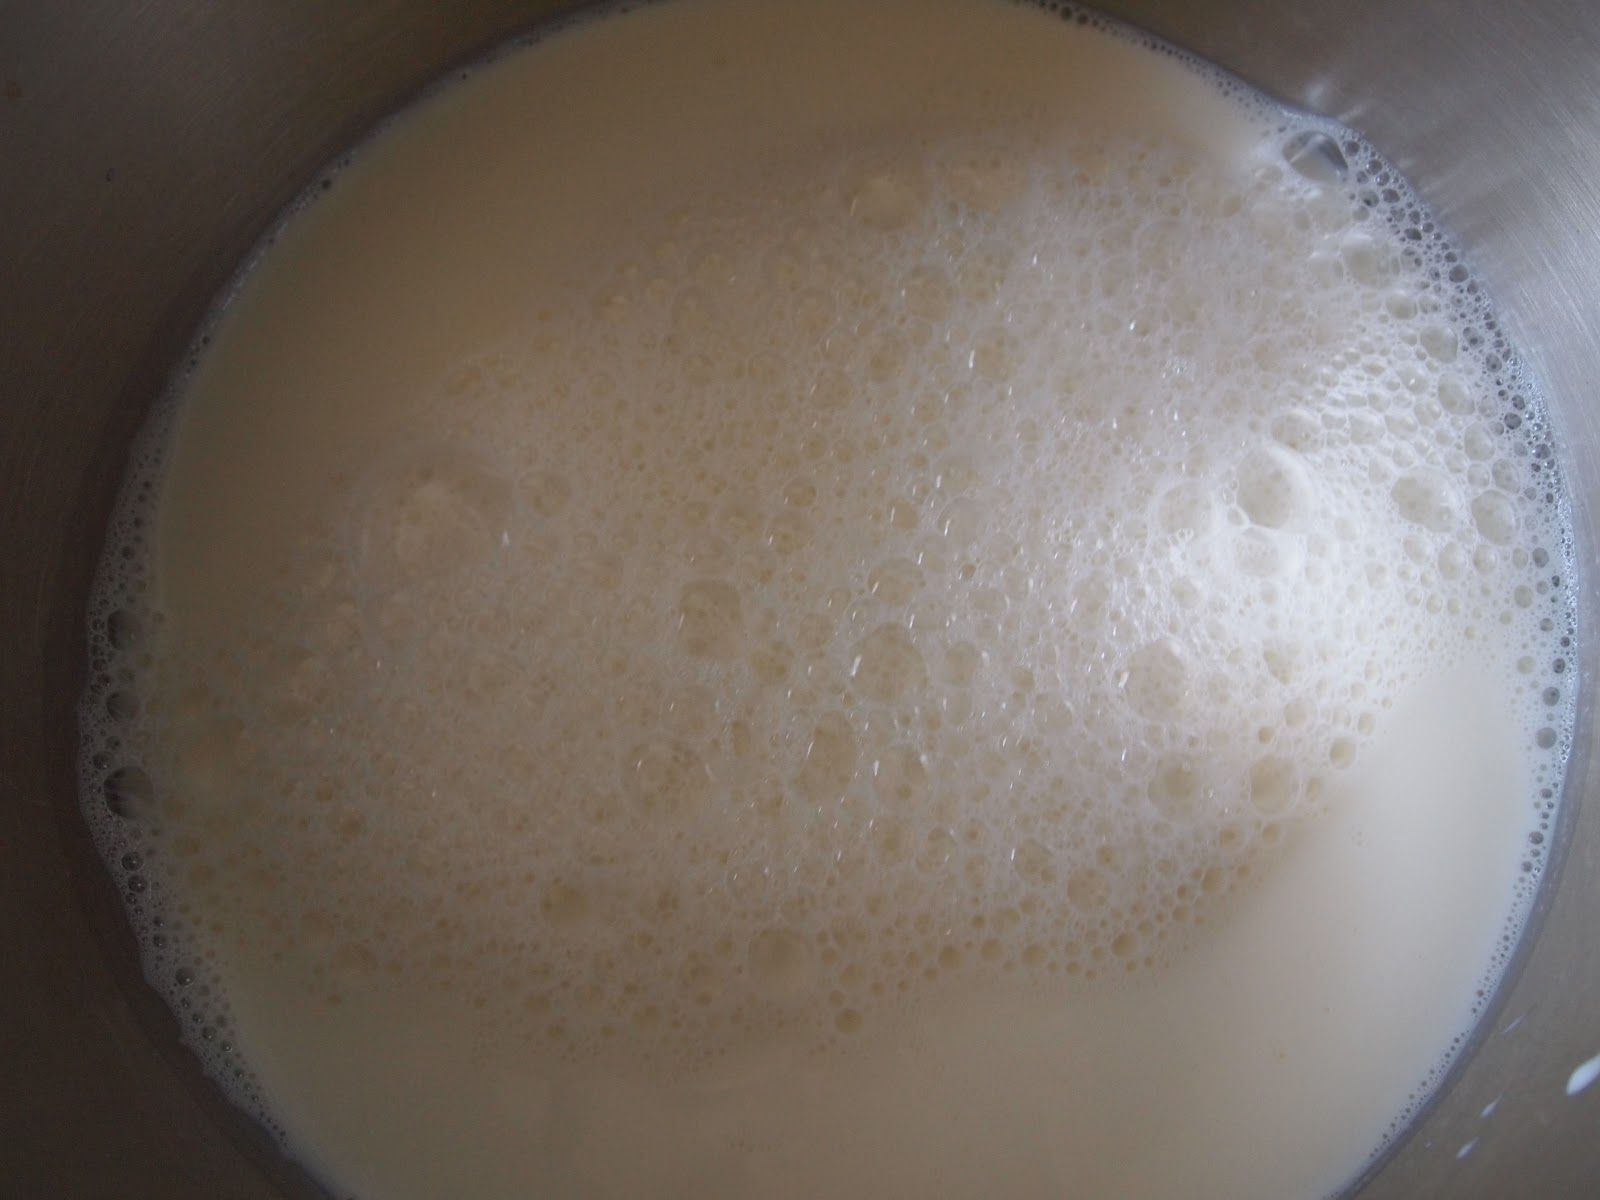
 |
| "Funny" Milk |
2. Soon (this depends on where you live, how intense your stove is, what kind of a pot you use etc) the milk came to a little boil. At this point, I added a tablespoon of vinegar to the milk and immediately, the milk started coagulating.
 |
| Coagulation |
However, something wasn't right. I remembered how my mom used to make
paneer back when we were kids...... and I knew that this wasn't looking quite right. And so I picked up the phone and called my very dear friend, Priya, since she is an expert at
paneer-making. She said that I need to add at least a cup of vinegar and that will lead to complete coagulation, leaving a greenish liquid behind. Aha! Thanks, Priya!
3. And so I added a cup of vinegar, bit by bit, while stirring the milk, until there was some major coagulation action going on and I began to see this translucent greenish colored liquid. I was so excited! That was cottage cheese right there, separating from the whey!
 |
| Now we're talking- cottage cheese in the making! |
4. I needed a muslin cloth to collect the cottage cheese. But since I didn't have any muslin cloth at home (err, I still don't!), I took this fairly thin wash cloth (made sure it wasn't smelling like laundry detergent!) and poured in the contents from the cooker, so as to drain off the greenish liquid, aka, whey, while retaining the cottage cheese in the cloth.
 |
| My substitute for muslin cloth |
 |
| Fresh Cottage Cheese! |
P.S.: I collected the whey in a bowl so I could take a picture and show it to you, if you too happen to be a novice at
paneer-making like me. In the picture it looks more yellowish than greenish because of the lights in my kitchen and I forgot to turn on the flash in my camera!
 |
| The Whey |
5. And then I tied up the cloth, so as to drain any remaining liquid from the cheese. The key to good
paneer is to have it nice and firm and devoid of any whey.
 |
| Draining off excess liquid |
6. I then took this heavy iron tortilla maker and pressed the cheese (that I placed on a plate) with it--- so as to flatten it a bit and of course, drain off every bit of liquid from it.
 |
| Pressing the cheese |
 |
| Top View |
7. I left this on the counter top to set and after 5 hours or so, I checked it. I was overjoyed to see
paneer!! Yes, real
paneer! I took a little piece off and tasted it and it tasted so good!!
 |
| Paneer!!!! |
8. I then wrapped it up with some plastic wrap and put it away in the fridge.
 |
| Home Made Paneer! |
And this is how, ladies and gentlemen, I made
paneer at home from that "funny" milk. Would I do this again? Umm, only if there's weird tasting milk at home. I mean, though this is great, since it is home made, it does take quite a bit of time, effort, and cleaning up, especially the scrubbing you have to do to clean the pot in the end! So I think I'll stick to buying my
paneer from the store.
Note: Not sure what to label this post as....... any suggestions?