Showing posts with label Chutneys/Sauces etc. Show all posts

Thursday, November 14, 2019

Asparagus Chutney

Grilled, oven roasted, steamed, with a squeeze of lime, a drizzle of olive oil, maybe some butter ... all good stuff, but oh-so-meh! Here's a great recipe for asparagus chutney:

Ingredients: 

Mains: 

Asparagus- 20-30

Green chilies: 5-7 (adjust according to your heat level)

Fresh curry leaves (kari patta): 7-10 small leaves

Tamarind pulp: 2 tsp (adjust according to your tang level)

Flavoring agents that impart body to the chutney: 

Sesame seeds: 2 tsp

Fenugreek seeds: 1 tsp

Cumin seeds: 1 tsp

Mustard seeds: 1 tsp

Urad dal (split black gram that is white, lol!): 1 tsp

Dry red chilies: 3/4

Asafoetida (hing): a pinch

Salt to taste

Oil: 2 tsp

Secret Ingredient: 1/2 tsp jaggery powder

Method: 

Prep asparagus by snapping off bottom stalk (if required), chop, and rinse. Chop green chilies, wash curry leaves and keep ready.

In a pan, add oil, heat, splutter mustard and cumin seeds. Followed by fenugreek, urad dal, sesame, dry red chilies, and asafetida. Roast for a couple minutes until everything's nicely browned, and it all smells good. *Add red chilies in the end to avoid burning

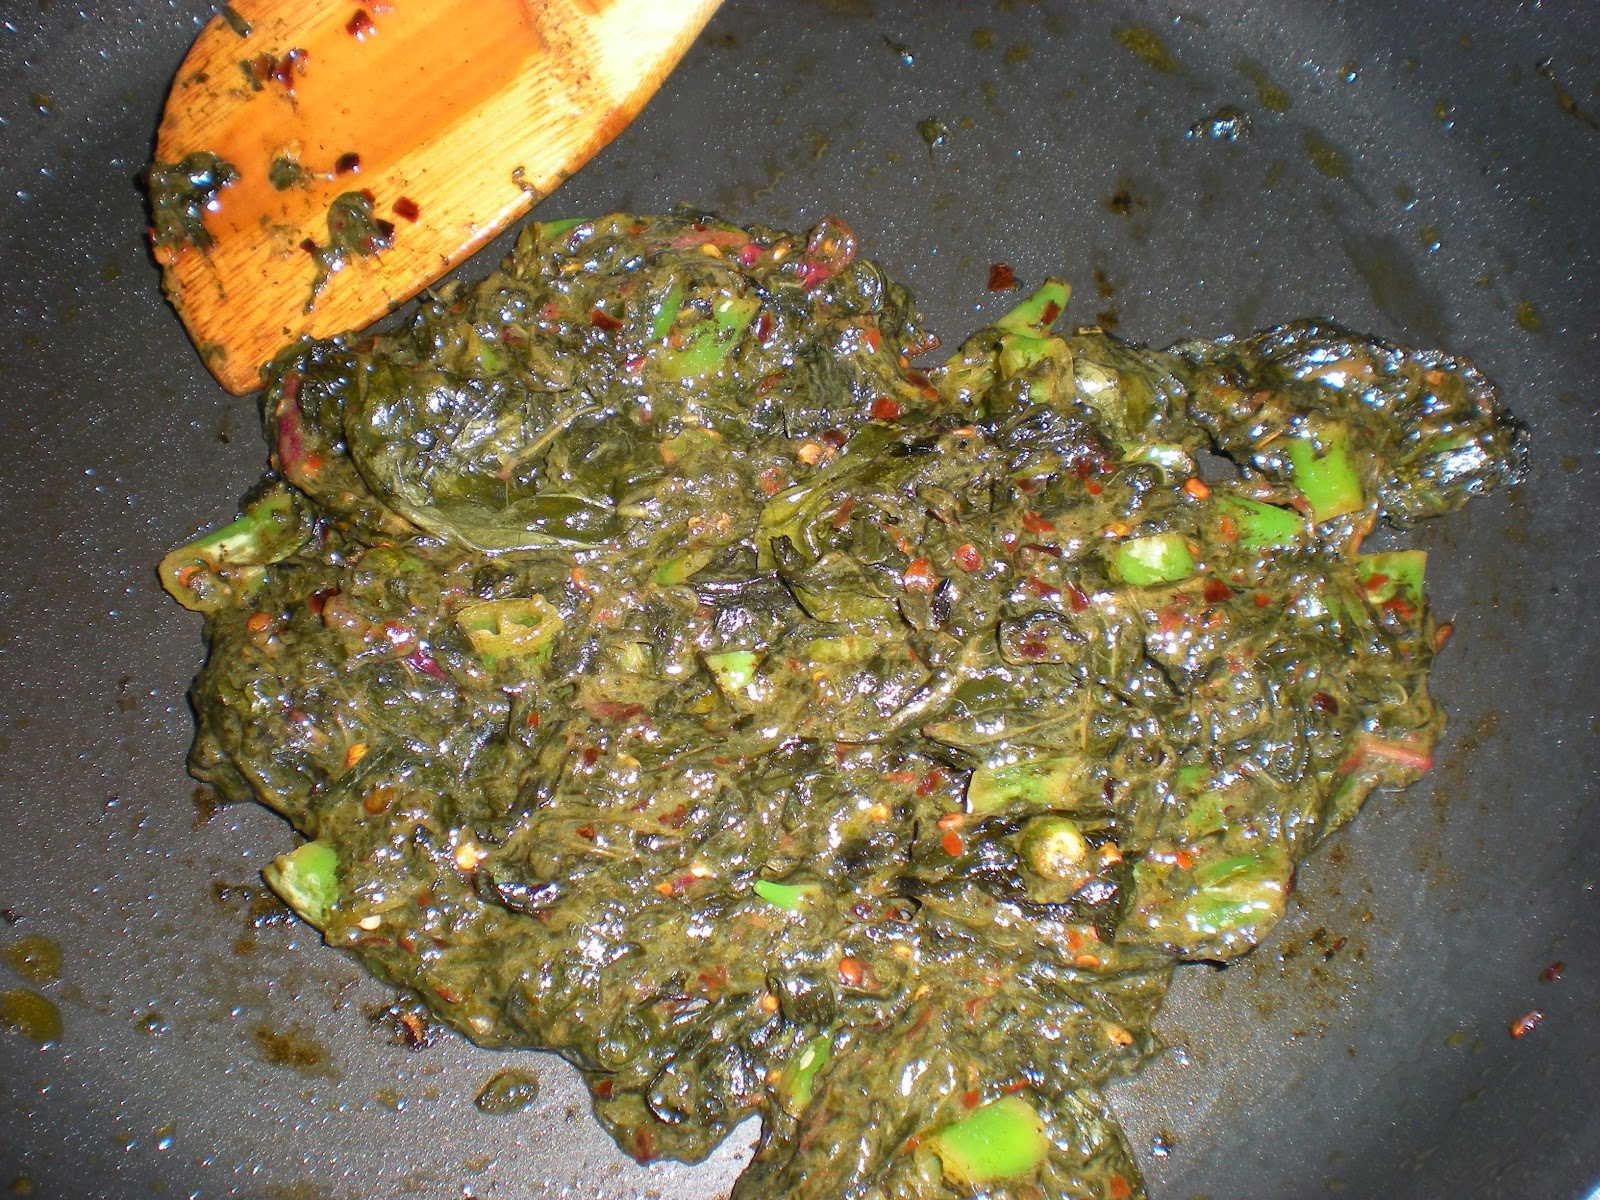
Throw in green chilies and curry leaves, followed by asparagus. Stir fry for a minute or two, add salt,  reduce heat, cover. Cook for 5 minutes. Turn off heat. Add tamarind pulp and the (not so) secret ingredient. Cool.


Blend in food processor. *Doesn't have to be finely ground.

Done!

Add tadka (tempering) of mustard and cumin seeds before serving. YUM! I know my dad will also add some tempered cashews for extra umami and crunch. :D

Eat with plain paratha, or as a true South Indian would love to do- mix with steaming hot rice, add some ghee, and enjoy with a side of papad! NomNom!! It's got a kick, tang, hint of sweet, and is thousand times more exciting than plain old steamed asparagus.

Asparagus Chutney


Monday, March 11, 2019

Mexican Hot Salsa

I love myself a quick snack of warm tortilla chips and spicy salsa. The mild and medium kind ain't gonna do it for me. Fresh salsas are good, but when the ingredients are charred first, and then blended into a salsa- that taste is elevated to a whole new level, and it's mm mm mm!


Ingredients: 

Tomatoes- 4

Red Onion- 1/4 piece

Garlic- 6-8 cloves, skin on

JalapeƱos or any hot pepper of your choice- 2-4 (adjust according to desired level of heat)

Cumin- 1 tsp

Salt to taste

A drizzle of oil

Lemon/Lime

Method: 

1. Place ingredients, except cumin and salt, in an oven safe dish.

2. Drizzle some oil all over.

3. Place under broiler for 10-15 minutes, until peel is charred.


4. Remove from broiler, and cool.

5. Remove charred peel.

6. Put into blender. Add cumin and salt.

Note: If using Vitamix type of food processor, keep the peel on. The flavors will be bolder. 

7. Blend into salsa.

8. Squeeze some lemon/lime juice for zing. 

9. Eat with chips!


Wednesday, January 10, 2018

Food Post #209: Green Mango Cilantro Coconut Green Chile Chutney

This is one vibrant green chutney, hot and spicy and tangy and deeeeelish! Goes very well with idlis, dosas, rotis, bread, etc. Bonus- you can whip it up in under 20 minutes!


Idli Chutney 


Ingredients: 

Green Mango 1, chopped into size good enough for your blender

Cilantro, fresh 1 bunch

Green Chilies (I prefer Thai) 4-6
*Adjust according to desired level of heat

Coconut, fresh grated 1/2 cup

Salt to taste

Jaggery 1/2 tsp

Oil 1 tbs

Mustard seeds 1/2 tsp

Cumin 1/2 tsp

Asafetida a pinch

Method: 

This is basically a 2-step process:

1. Blend green mango, cilantro, green chilies, coconut, jaggery, and salt into a chutney in your nifty blender.

2. Heat a tablespoon of oil, add a pinch of asafetida, followed by tempering some mustard and cumin seeds. Pour this onto the chutney.

Done! Mix and serve with hot spongy idlis, or crispy dosas, or make a sandwich. YUM!

Note: If you find that the green mango is not tangy enough, just squeeze some lemon juice. The chutney should taste tangy, hot, and spicy, with a very slight hint of sweetness.


Thursday, November 30, 2017

Food Post #204: Mediterranean style Muhammara

I am excited to present to you a brand new dish that I made yesterday- Muhammara- a delicious, red colored, peppery, lightly sweet, tart, and nutty Mediterranean style dip. I ate this on a plane ride from Seattle to Dubai a couple years ago, and I quite liked it. It's a great addition to that Mezze platter that you can serve as an appetizer at your next party.

The traditional key ingredients in Muhammara are roasted red bell pepper, aleppo pepper, walnuts, and pomegranate. Now as it often happens in my home kitchen pantry, I don't always have all the ingredients at one time for one dish, and so then I make do with whatever there is available. In this case, I didn't have any walnuts, nor aleppo pepper, so I decided to use almonds instead, and some reaper chilli flakes. My friend had given me some sumac, a tart spice (very similar to the Indian anaardana) a few months ago, and I was delighted because I could finally use some of it in this dish! :)

The only longish step in terms of time is roasting the bell pepper. Once that is done, it takes under 10 minutes to whip up this tasty as well as super healthy dip.


Muhammara 


Ingredients:  

Red Bell Pepper- 2

Almonds- 2 tbs

Garlic- 2 cloves

Pomegranate- 2-4 tbs

Chilli flakes- 1-2 tsp

*If using reaper chilli flakes which are VERY HOT, a pinch will do

Salt to taste

Sumac- a pinch

Method: 

1. Wash bell pepper, wipe dry, brush oil all over the bell pepper, place in an oven safe pan/dish.


2. Broil under high setting for 10-12 minutes each side. The idea is to char the skin of the bell pepper.


3. Set aside to cool.

4. After it has cooled off, remove skin, and the stem. The seeds will come off with the stem, which is exactly what you want.


5. Cut this roasted, peeled red bell pepper into strips, and transfer into your food processor. Add some chili flakes, and salt to taste.


6. Toast some almonds, and add a couple cloves of garlic to the toasted almonds to soften them up a bit.


7. Add the above to the bell pepper in the food processor. Also add some pomegranate seeds to the same. Blend it all into a nice dip.


8. Transfer into serving dish. Garnish with pomegranate seeds, sumac, and a drizzle of good olive oil. Serve with some warm pita, crackers, or vegetables.


Tuesday, November 28, 2017

Food Post #203: When Life gives you Lemons.....

...... set them aside on the countertop for a bit, go back to your refrigerator, open the door, take the container with leftover black beans from the previous night out, shut the refrigerator door, place the container on the countertop beside the lemons, and then just stare at the lemons, and the container with the leftover black beans. Continue staring for a few minutes. Take your time, no rush, it's all good! After a few moments the loud chattering in your brain will slow down, and soon you might experience the brain shutting down, which will result in sheer bliss. And then all of a sudden, it arrives- the eureka moment! You wake up from the blissful stillness, nice and fresh. With that same bliss still lingering inside you, you head to the kitchen drawer where you have stashed away some luscious dark chocolate. You take it out of the drawer, look at it very lovingly, rather lustfully, and then snap a piece off the bar. You know exactly what to do. You know exactly what to make. You put a couple tablespoons of black beans into your nifty blender. There's no need to add any seasoning or flavor to that, because you had already jazzed it up last night.  You go right ahead and process it into a nice thick saucy consistency. You transfer this black bean puree into a tiny pot, get the heat going, and slowly add that dark chocolate into it. As you stir the two together, the chocolate will melt into the black bean puree, and soon you will have created a beautiful dark chocolate colored luscious, delicious, sexy dip. Perfect with some warm tortilla chips, or warm bread sticks, or with sesame toast. Yum! As for those lemons, you have a few options:

Option 1: You pick them all up one by one, and put them back in the fridge. They'll still be there, though, mind you!

Option 2: I guess you could make lemonade, and drink it up.

Option 3: Even better, make margarita. It'll go well with that black bean chocolate dip and warm chips!


Black Bean Chocolate Dip 


Wednesday, January 18, 2017

Raw Mango Relish

Not sure what the real name of this dish is, because some call it aam ki sabzi, some aam ki chutney, some aam ka achaar, and therefore I'll just call it raw mango relish. I mean, I could possibly call it A's Amazing Aout Auf Azis Aworld.... okay, okay, let's just stick with raw mango relish. It's easy, quick, tasty, and has a decent shelf life of about 7-10 days in the refrigerator. It can be eaten with rotis, chapatis, parathas, bread, or even on the side with some rice and lentils. It is hot, sweet, as well as sour, and perfect for these still-chilly January days.  

Ingredients: 

1. Unripe (raw) mango (available in Indian Store): 2, chopped into bite sized pieces. 

Note: Some recipes call for the mango be peeled. I think that's such a waste of the beautiful fruit. I also save the mango pits for later. I use them in rasam.   

2. Cumin Seeds: 1-2 tsp

3. Fennel Seeds: 1-2 tsp

4. Mustard Seeds: 1 tsp

5. Nigella Seeds: 1 tsp

6. Fenugreek Seeds: 1 tsp 

Note: Can use the Bengali panch-phoron if you happen to have it in your pantry

7. Red Chili powder: 2-4 tsp (or according to your liking)

8. Turmeric powder: a pinch

9. Salt to taste

10. Jaggery (grated): 2-4 tsp. Again, this is more of a personal taste. So adjust accordingly. 

Alternatives to jaggery: Sugar, brown sugar, or agave syrup 

11. Cooking oil: 2 tsp 

12. Water: Just enough to cover the mango

Method: 

1. Splutter cumin, fennel, mustard, nigella, and fenugreek seeds in oil, and throw in the chopped raw mango, followed by salt to taste, turmeric powder, red chili powder, and jaggery. Stir for about a minute or so. Then add water just enough to cover the mango. Bring it to a boil, cover, simmer for 7-10 minutes. 


Unripe Mango

Mango, Spices and Water


2. At the end of 10 minutes, uncover. The mango will have softened up nicely, and the sauce will have thickened up a bit. Gently smash some of the cooked mango with a spoon, so that there's whole pieces, as well as smushed up mango. Garnish with fresh cilantro, and the hot, sweet, and sour mango relish is ready to be err, relished. Come on now, that's chuckle-worthy!! ;)  


Ready! 

Delicious! 


Monday, June 6, 2016

Dukkah- Egyptian Spice Mix

Last week we went to this restaurant called Cichetti and although it was quite a rip-off, the Egyptian fried egg and the lamb keftas were extremely delicious. It was quite a rip-off however. Oh wait, I said that already. 

The Egyptian fried egg was basically a soft boiled egg, coated with a beautiful nutty, spicy mixture, placed on a bed of tender asparagus, drizzled with olive oil. It was aromatic, delicious, addictive, and was gone in less than thirty seconds. It was that outer spice coating that took the dish to a whole new level. 

Upon googling I learned that it is called Duqqa or Dukkah, not to be confused with dukkha i.e. suffering (hey, just clarifying!). The Egyptian spice mix Dukkah is made with toasted nuts, seeds, and herbs. They usually use hazelnuts, but pistachios, almonds, and pine nuts can be used too.

Recipe for Dukkah aka Duqqa, Egyptian Spice Mix:   

This is my version, and it tastes pretty darn good. Feel free to experiment. The ingredients that you absolutely need are nuts (hazelnuts or almonds or pistachios), coriander seeds, cumin seeds, sesame seeds, and black peppercorn.

Ingredients: 

Almonds- 2 tbs

Coriander Seeds- 2 tbs

Cumin Seeds- 2 tbs

Sesame Seeds- 2 tbs

Fennel Seeds- 2 tbs

Nigella Seeds- 2 tbs

Caraway Seeds- 2 tbs

Black Peppercorn- 2 tsp (increase or decrease qty to taste)

Green Cardamom- 2 pods

Dried Oregano*- 1 tsp 

*A tsp of Italian seasoning will work just fine

Salt to taste

Optional: Red pepper flakes


Dukkah Spice Mix with almonds


Method: 

1. Toast all the ingredients, starting with the nuts. Cool.

2. In a spice grinder (coffee grinder works fine too), give it all a quick pulse, about a couple times. Need not be very fine. 

That's it! 


Dukkah Spice Mix


Ways to incorporate Dukkah in your cooking: 

*Mix with some olive oil and use as dip or spread on toast. 

*Coat boiled eggs with the mixture and make your own Egyptian fried eggs at home. 

*Sprinkle on pasta, baked potatoes and other veggies. 

*Use as a dry rub on meats and grill. Yum! Goes well with seafood too. 

*Use in curries. That's what I did this weekend. I made chicken curry, and instead of using garam masala, I used Dukkah. The result was extremely aromatic, flavorful, and simply delicious.


Dukkah Chicken Curry

Corny Joke Alert:

Try Dukkah in your cooking today. It is guaranteed to reduce some of your dukkha!

Yeah, yeah, I know that was pathetic........


Thursday, December 10, 2015

Cranberry Pickle

Here's a great recipe for cranberry pickle, Indian style.

Ingredients:

Fresh tart Cranberries: 1 cup

Mustard seeds (available at Indian Store): 3 tablespoons

Fenugreek Seeds (available at Indian Store): 1 tablespoon

Red Chili Powder: 1-2 tbs

Turmeric Powder: 3 tsp

Asafetida (asafoetida or hing) (available at Indian store): 1-2 tsp

Salt to taste

Water: 3/4 cup

Cooking oil: 1 tsp

Method: 

1. With a teaspoon of oil in a pan, lightly roast cranberries for 2 minutes. If you live in a warm, sunny place, keep the cranberries out in the sun for a couple hours- that's the real way to do it.

2. Meanwhile add turmeric, asafetida and red chili powder to water and bring to boil. Boil for about 3-4 minutes and then allow to cool to room temperature.

3. Transfer the roasted cranberries into a jar that you plan to use to store the pickle. Then pour in 3/4 cup of the turmeric+asafetida+red chili powder water into the jar and give it a stir. Some of the cranberries will float and that's okay.

4. Make a fine powder out of mustard and fenugreek seeds in your blender. A coffee grinder works well for this purpose.

5. Add the above powder into the pickle jar. Add salt to taste. Then stir everything together to get the flavors going.

6. Cover the jar with some plastic wrap/cling film and then cover tightly with the lid. Set aside for 2 days. On the 3rd day, remove lid and wrap and stir the pickle a few times. Give it a taste and adjust salt if needed. Cover again and set aside for 1 more day.

*When you open the lid, you should be able to smell the mustard and fenugreek--- it smells divine!*

At the end of Day 4 Cranberry Pickle is ready to be eaten. Serve with Indian bread (chapatis, paranthas, etc) or as a side to basmati rice and lentils. It's easy to make, tastes delicious, and only gets better with age. I'd say it is quite healthy too, if you look at the ingredients. I liked it a lot. Hope you like it too!


Delicious Cranberry Pickle

A closer look


Wednesday, April 1, 2015

Cucumber Raita

Raita is a condiment made with yogurt and usually includes a vegetable/fruit such as cucumber, spinach, tomato, pineapple, carrot, pumpkin, beet, onion, potato, etc. seasoned with salt and pepper. The main purpose of raita is to cool off the stomach after a rich, spicy meal. 

Cucumber raita is very simple to make, and has quite a few health benefits to it:

1. Yogurt, as we all know, is packed with all those friendly microbes that are so good for the stomach. In addition, you get calcium.

2. Cucumber, believe it or not, is packed with Vitamins B, C, and K, and is rich in Manganese and Potassium. It has anti-inflammatory properties and also improves memory and protects nerve cells from age related decline. Now that's a good deal! 

Yield: 2 cups

Ingredients: 

1. Cucumber- 1, grated or finely diced

2. Yogurt (of your choice)- 2 cups 

3. Green chili- 1 (finely chopped or slit lengthwise)

4. Salt to taste

5. Cumin powder- a pinch

6. Red chili powder- a pinch (optional)

Method:

This is super easy:

1. Mix up grated or finely diced cucumber with yogurt, and stir it well, so as to get a smooth consistency. 

2. Add salt to taste. Can also add a green chili chopped fine or slit lengthwise for some kick. 

3. Garnish with pinch of cumin powder and red chili powder, and fresh cilantro on top. 

Serve as a side, or just eat as it is. 

A cool as a cucumber (raita)!


Tuesday, January 13, 2015

Garlic Scapes Chutney

Garlic scapes or spears are tender garlic shoots. They taste like garlic of course, but much more vibrant. When cooked, they are sweet and mellow. They definitely smell quite pungent, and so if storing in the refrigerator, I suggest you wrap them up well in plastic wrap or maybe just store them in a ziplock bag to prevent that smell from invading your fridge! 

Here's an easy recipe for Garlic Scapes Chutney:

Ingredients:

1. Garlic Scapes- 1 bunch 

2. Peanuts- 1 handful

3. Green Chilies (I prefer thai green chilies)- 4-5 (adjust according to your liking)

4. Cumin seeds- 1 tsp

5. Salt per taste

6. Cooking oil- 2-3 tsp

Method:

1. Wash the garlic scapes and pat dry. Chop roughly. 

2. Roast a handful of peanuts, and set aside to cool.

3. Meanwhile, put 2-3 teaspoons of cooking oil into a little pan, and get the heat going. Splutter 1 tsp of cumin seeds, and then throw in the chopped garlic scapes, with the thai green chilies, and stir fry for about 5 minutes. Add salt per taste. The pungent smell will have mellowed down into a delicious aroma. 

4. With the help of a food processor, grind the cooked scapes and the peanuts into a beautiful chutney.   You could add a tablespoon of water just to help with the grinding, if needed. That's it! It is now ready to be served. Squeeze some fresh lime to spruce it up. 


Garlic Scapes


Mellowing down


Peanuts


Garlic Scapes Chutney

Swap the peanuts with almonds or pine nuts, and voila! You can use it like pesto. Or this can be eaten like a dip with pita chips. You could even make sandwiches with this chutney. It of course goes well with Indian chapati. Garlic, green chilies, and peanuts, with a hint of cumin and lime- it is all good!

Wednesday, January 29, 2014

Mediterranean Garlic Sauce

My daughter and I are crazy about that insanely delicious garlic sauce they give in Mediterranean restaurants. We can eat bowls and bowls of that sauce- not exaggerating! You dip a piece of pita bread into that sauce, and place it in your mouth- and boom! there is an explosion of this garlicky-with-a-hint-of-tangy goodness that just makes your taste buds ecstatic, and then you just don't want to stop...... yeah, that's how good it is.

I don't know how they actually make this stuff, and I did not do any internet searches for the recipe either. I just whipped up my own recipe, just from remembering how it tastes, and it turned out pretty good. And there couldn't be an easier recipe than this. Here it is:

You Need: 

1. Fresh garlic- you can go crazy with this. I use about 7-8 cloves for a small bowl full of sauce.

2. Sesame seeds- toasted, about 3-4 teaspoons.

3. Thick yogurt- Greek is great, any other yogurt is fine too, and buttermilk works just as good. Say about 3-4 tablespoons.

4. Salt per taste.

5. A pinch of Oregano- fresh would be great, dried works fine too. You can even use a pinch of italian seasoning.

6. 1 lime.

Method:

There's only one step to this- Put all the 6 ingredients into your blender (I have a nice small little one that works well for small quantities), and blend it all into a beautiful sauce. Yeah, that's it!

You could drizzle some olive oil, sprinkle a pinch of red cayenne pepper powder, maybe throw in a couple olives, and voila! you got yourself some real good garlic sauce (guess, you could call it a garlic-tahini sauce).


Mediterranean Garlic Sauce- my take

This sauce is bound to be a hit at your next party. Just serve as a dip with pita, pita chips, or even some fries. Make that garlic fries! ;) Or you could do what I did- spread it onto roasted cauliflower, and serve as a side dish. Delicious!! My daughter likes to mix it up with her mashed potatoes, and that tastes pretty darn good too.


Roasted cauliflower topped with my Mediterranean Garlic Sauce- YUM! 

Friendly Advice: Don't forget to brush and floss, and rinse your mouth with mouthwash after having indulged in this garlic affair! ;)

Sunday, May 27, 2012

Tomato Pachadi

The parents came, stayed, and left. I was pretty much out of the kitchen, as the mother completely took over. The first couple days I was needed- you know, to show her around the kitchen, etc. But thereon, she completely took over. Oh wait, I said that already.

The highlight of this time's visit was my introduction to various ancient grains, that my parents have incorporated into their diet, thanks to diabetes. Rice and wheat are now banned, because of their high GI values, and it is all about millets, oats, the proper kind, not the ooey-gooey instant kind, buckwheat, quinoa, etc. They got introduced to quinoa here, and they simply loved it. In their shopping this time, guess what they took back? I learned some pretty neat recipes from my mom, that I shall be trying out in the following weeks. We all had a wonderful time, and as with all holidays, this one came to an end exactly a week ago- last Sunday, to be precise. After a bit of moping, now it is back to square one!

Sun Dried Tomato Pachadi:

"Pachadi" is a very telugu preparation, that can be made with pretty much any vegetable, all spiced up and pounded up. OK, as much as I tell myself not to do it, I did in fact end up looking for "pachadi" on Wiki. So, dear ardent reader(s), if you don't already know what pachadi is, please don't hesitate to look it up on good old Wikipedia.

Now, speaking of tomato pachadi- traditionally the preparation of tomato pachadi is quite tedious and time consuming. I mean, first you gotta buy a good amount of tomatoes, wash them, dry them, salt them, spice them, and dry them again, this time in the sun. And then you pound the sun-dried tomatoes into pulp. Then you heat up sesame oil, as in smoke it, literally. Then you cool this oil overnight. And finally you pour this smoked and cooled sesame oil into the pounded sun-dried tomatoes, mix it all up, keep it away for a few days. Finally when it is time to eat it, you probably would have forgotten all about it!

Now, I have the time (yes!), but hey, I lack the patience needed for such time-consuming food preparation. And besides, I barely get any sunshine in this wonderful place (please note the sarcasm), so the whole dry-the-tomatoes-in-the-sun thing ain't gonna work for me!

Therefore, one fine afternoon, my mom suggested why not try making this awesome pachadi with sun dried tomatoes? Good idea! So off we went to the store, bought a couple small packets of sun dried tomatoes and tried it out. The result was quite a success, except that the final texture was a bit on the dry side. No problem! The next time, that was just a couple days ago, I bought sun dried tomatoes soaked in extra virgin olive oil. The result: Perfect Tomato Pachadi, that I shall be making regularly henceforth.

Ingredients: 

1.  A jar of sun-dried tomatoes soaked in EVOO

The main ingredient (don't worry about the herbs- they are quite undetectable in the end product)
2. 1-1.5 teaspoons of Fenugreek Seeds, roasted

Fenugreek Seeds (aka Methi seeds)
3. 1-2 teaspoons of mustard seeds

Mustard Seeds
4. Salt to taste

5. Red Chilli powder (per tolerance)

Red Chilli Powder (this one's extra hot!)
6. 2-3 tablespoons of tamarind pulp (if it is tamarind concentrate, I would use just about a teaspoonful)

Tamarind Pulp (if concentrate, the color will be darker)

7. Sesame oil- you can get this at any Indian or Asian store.

Method: 

1. I take my nifty little spice-grinder (originally coffee-grinder) and grind up fenugreek and mustard seeds into a lovely powder, leaving it just a tad bit coarse. If you prefer, you could grind it into a fine powder.

Fenugreek+Mustard Seeds Powder
2. I then transfer the sun-dried tomatoes (in EVOO) into my food processor, add salt to taste, red chilli powder to taste as well as the tamarind pulp. I also add the freshly ground fenugreek and mustard seeds powder.

3. And finally a few pulses in the food processor, and the tomato pachadi is almost ready!

4. I smoke some sesame oil in  my sweet little "kadhai" (I have mentioned it in one of my previous posts: http://yetanotherfoodie.blogspot.com/2010/05/grab-some-mint.html) and also splutter some mustard seeds and set it aside to cool off. The cooling happens quite quickly, in less than 30 minutes, if you keep it on the counter or near an open window.

P.S.: Do make sure that your smoke alarm is disabled, just to avoid all the noise and confusion it may cause in the household! My mom set off the smoke alarm while cooking one day, and got all freaked out. Yes, we ultimately had to disable it, since she was in-charge of the kitchen!

5. Finally, I pour this cooled sesame oil with mustard seeds into the pachadi (step 3) and mix it all up. I give it a quick taste (very important for a chef to taste his/her creation, before serving it to others, you see!) and add any additional salt/chilli powder/tamarind if required. That's it! Sun Dried Tomato Pachadi is ready!

Sun Dried Tomato Pachadi
I store this very beautiful pachadi in a bottle/jar (hey, could most certainly re-use the jar that the sun-dried tomatoes came in!) in a cool, dark place (one of my kitchen cabinets). The spicy-tangy sun dried tomato pachadi is quite versatile. Spread some on a slice of bread (enriched bleached white bread would be really good!), or eat with rotis/chapatis, dosas, or best is the good old way of mixing it up with some steaming hot white rice, with a little bit of ghee (clarified butter) and just eat away, enjoying every bit of it......... mm mm!

Now let me see what the time is- aah, 6:40 am in Bangalore. Time to sign off- gotta call up my folks!  


Thursday, May 26, 2011

Pineapple Raita

Here's another Raita recipe, courtesy: Mom-in-law. I tried it yesterday and liked it quite a bit. Very cooling and delicious.

The basic ingredients are the same as used for Spinach Raita (http://yetanotherfoodie.blogspot.com/2011/04/spinach-raita.html), except of course you use pineapple instead of spinach.

Needs:

1. Pineapple chopped up into tiny chunks. If you want to go absolute fresh with this, that is great! As for me, I think canned pineapple works just fine
2. Nice and thick plain yogurt
3. Pinch of salt
4. Pinch of Chaat Masala* (I used red chilli powder and cumin powder as I did not have chaat masala, nor did I have all the ingredients that make up chaat masala) OR you could use freshly ground black pepper

*Chaat Masala is a spice mix that consists of a powdered mixture of dried mango, cumin, coriander, dried ginger, salt, pepper, asafoetida, red chilli powder and most important of all, this special salt called "kala namak" that literally stands for black salt. It is this black salt that imparts that very characteristic pungent sulfurous odor and taste to chaat masala. Not everybody likes this black salt, but it is very often used in raitas, fruit salads and other snacks in India. Supposedly cools the tummy and as they say about almost every other spice, good for digestion!

Method:

The method is so simple and straightforward that I could probably just insert the final picture here and you will know what to do! Well, I shall write it down here, nevertheless:

1. Chop up some pineapple into tiny chunks (easy to do this with pineapple from a can).

Pineapple chunks from a can
Chopped up further
2. Take some plain yogurt (should be nice and thick) and add a pinch of salt and a pinch of chaat masala, if you have-- else red chilli plus cumin powder will work. If you prefer, you could just add some freshly ground black pepper. To this add a few tablespoons of the pineapple juice from the can. Whip it all up until nice and smooth.

3. Fold in the pineapple chunks and voila! your pineapple raita is ready!

Sweet-tangy Pineapple Raita
This raita is perfect with a little bit of sweet, a little bit of tang as well as a hint of spice and biting into those pineapple chunks simply brings joy to your palate! It can not only be eaten as an accompaniment to spicy Indian food, but can also be eaten all by itself. It could work as your morning breakfast. You have your calcium from the yogurt and you have a good dose of manganese and Vitamin C from the pineapple. What a healthy and delicious way to kick-start your day! Oh and it can work as dessert too. And what a guilt-free dessert this is!

Thanks for this cool recipe, Mom. I love it!

Tuesday, April 5, 2011

Spinach Raita

"Raita" is a yogurt-based dip that typically goes well with spicy Indian food. The standard kind is the one with onions and tomatoes and then there is the "boondi" raita, cucumber raita (quite similar to the Greek tzatziki) and the very delicious mint raita. There's the even more delicious beet raita and you can even make apple or pomegranate raita! So yeah, as you probably guessed it- you can make raita with pretty much any vegetable or fruit.

I make spinach raita quite often. Mostly because it literally takes 2 minutes and of course, is delicious. Also note that it is pretty healthy. I mean, think about it- you have that spinach loaded with Vitamins A and C plus calcium as well as iron and a lot of other good stuff. Mixed with that yogurt loaded with tummy-friendly lactobacillus. How much healthier can it get?!

I take:

1. Spinach- I just use the baby organic spinach that is all clean and ready to use. Frozen spinach will work just fine (thawed, of course)

2. Plain yogurt

3. Some oil, dried red chillies, salt, mustard seeds (you may omit this if you are going totally oil-less), Salt to taste.

Method:

1. I take a bowl and throw in chopped spinach. Sprinkle some salt (you don't need much salt- spinach by itself is a bit salty). Run this in the microwave for about a minute. Yep, that's all it takes to shrivel up the spinach. You don't even need water as the spinach will release water as it heats up. You want to retain that green color.

Spinach ready for the yogurt!
2. Next I spoon in the yogurt into this spinach and mix it all up.

Spinach+Yogurt
At this point, it is pretty much ready. But then, if I am having a party, I like to dress it up a bit with some good old "tadka."

3. The Tadka: I take my cute little wok (http://yetanotherfoodie.blogspot.com/2010/05/grab-some-mint.html)
and pour in a teaspoon of oil and get it going on the stove. I then put in some mustard seeds. Once the mustard seeds begin to splutter, I quickly add one or two dried red chillies (broken up) and I pour this onto the beautiful spinach raita.

The Tadka
Dressing up the Spinach Raita
4. Before serving, I give it a quick stir. Delicious!

Delicious, Healthy and Cool on your Tummy!
The next time you make some spicy Indian food, do make this raita. Even if you don't make some spicy Indian food, do make this raita and eat it!

Sunday, November 28, 2010

Gongura Pachadi

The plan was to go visit my brother and his wife this weekend. And so we set off. Loaded the minivan with sleeping bags for the kids, a couple pillows, some clothes and the stuff from the Indian store. The place they live in does not have one single Indian grocery store! And so they usually buy all their stock when they visit us. Now since we were going to visit them, they gave me a tiny list, that included kari patta (curry leaves) and I do know that my sister-in-law is quite fond of gongura leaves as well and so I just bought a couple bunches of gongura as well. Now thankfully I was sensible enough to call my bro when we left the house to tell him that we were on our way. Apparently there was a winter storm warning and he suggested that it would be better for us not to go. Oh well and so we came back home and unloaded everything and I put the perishables back in the refrigerator. So much for our weekend trip!

The botanical name for Gongura is Hibiscus cannabinus and well, I am not sure what the common English term is. I think Red Sorrel leaves.........not sure. Anyway, the leaves are sour like heck and the most popular dish made out of Gongura is Gongura Pachadi, a chutney of sorts, in the southern state of Andhra Pradesh in India.

I was thinking that perhaps I could give the gongura to one of our friends who might actually cook it, rather than letting it rot in the fridge. But I surprised myself by actually going ahead and cooking it myself! My cousin, my sister-in-law and my mom--- all of them gave me one basic recipe that sounded very easy and so I went ahead and made Gongura Pachadi for the very first time in my life!!

 Gongura Leaves

Ingredients:
  • Gongura leaves
  • Green Chillies
  • Red Crushed pepper (my substitute for red chillies- I was out of red chillies......)
  • salt
  • oil 
Method: 
  • I separated the green leaves from their red stems and washed the leaves. I then dabbed the leaves with paper towel to sort of dry them (I must admit that I was a little impatient and so a lot more dabbing would have actually worked better.......).
  • I took a nice big pan and poured several teaspoons of oil into it; note: several teaspoons. And got the heat going.
  • I then threw in the washed and dried (err, sort-of-dried in this case) gongura leaves into the hot oil along with the green chillies and the red crushed pepper. I added salt to taste.
  • Fried everything together. Within a minute or so of frying, the green leaves started to turn really dark. My sis-in-law had told me that it would happen. Good, so I was on the right track!
  • Now my mom had told me to fry it all until the leaves turn crispy dry. However, the impatient me (no, no, not lazy!!) decided to stop frying mid-way. Anyway, this was my first time and basically an experiment, right?
  • I turned off the stove and let the fried leaves sit to cool off. I then transferred it into my food processor and pulsed it a couple times into a chutney consistency. There and that's it! The pachadi was ready and hopefully my experiment was a success!
 Gongura leaves washed and dabbed dry with paper towel

All fried up and ready

Gongura Pachadi ready to be eaten!

The Real Way to Eat this Stuff: 

My cousin P had suggested that the real way to eat this stuff is by mixing it with fresh hot steaming rice, a little bit of ghee (clarified butter) and some finely chopped raw onion. That is exactly how my husband and I ate it. It was pretty darn good! There was that sour thing going on as well as the kick from the green and red chillies. As for the onion-- the crunch totally added a joy-factor to the eating!

So my experiment was successful and guess from now on I shall be buying these sour leaves more often. Oh yeah! And I did not let the gongura rot in the fridge.

Now I gotta figure out what I'm going to do with the four packets of curry leaves that are lying in the fridge!!

Friday, September 10, 2010

Tomato Chutney

This is another chutney made frequently by yours truly. Involves a little more "cooking" than the onion chutney as well as a few extra ingredients. Still very simple and delicious, of course!

Required: 

Tomato, cumin seeds, mustard seeds, peanuts or sesame seeds- your choice, green or red chillies- again, your choice, salt and oh, some oil.


Method:
  1. Roughly chop up a nice juicy tomato.
  2. Heat some oil in a pan and splutter mustard seeds and cumin seeds and throw in the chopped tomato and the chillies.
  3. Add salt to taste, stir and cook the tomato--- takes about 3 to 5 minutes. Set it aside to cool.
  4. Take a handful of peanuts in a m-wave safe bowl and run the m-wave until the nuts are roasted. If you use sesame seeds, do the same. One thing to note is that sesame seeds tend to "jump" as they heat up, so don't be surprised if you find some sesame jumping action going on inside the m-wave!
  5. Then I put the roasted peanuts/sesame seeds into the food processor and run it a couple times until the peanuts/sesame seeds are powdered. Then I add the cooled tomato into this and blend it all into a nice chutney.
  6. To finish off with that extra touch, splutter some mustard seeds and maybe some kari patta and pour onto/into the chutney. 
Finally, eat and enjoy!

Deilicious Tomato Chutney, sans that extra touch of spluttered mustard seeds.........

Thursday, September 9, 2010

Onion chutney- the 5 minute deal

Now a days when I make dosas I make this excellent chutney with onion, red chillies and coconut. It literally takes 5 minutes to make and tastes outstanding.

I use:

1 medium onion, a few red chillies (if I am out of red chillies, I just use red crushed pepper), grated coconut, tamarind paste and salt. (The grated coconut and tamarind paste is available at any IGS).

On their way to becoming a chutney

My Method:
  1. I roughly chop up the onion and throw it in the food processor followed by a tablespoon or so of grated coconut, 5-6 red chillies (or a tablespoon of red crushed pepper), a teaspoon of tamarind paste and salt to taste. (I sometimes add some jaggery too for a hint of sweetness in the background. Jaggery is available again at any IGS. If not jaggery, sugar is fine too).
  2. I run the food processor to finely blend everything together into a chutney.
Err, yeah! That's it! The chutney is ready. If I am in the mood, I temper some mustard seeds separately and mix it up with the chutney for added taste.

The 5 minute Onion Chutney

This chutney can be eaten with dosas or chappatis. Works in sandwiches too. Perfect balance of flavors- the bite from the onion, the heat from the red chillies and the tang from the tamarind. And best of all, takes only 5 minutes to make! Heck, if you think about it, there is absolutely NO COOKING involved!! How cool is that!

Note: Don't forget to brush your teeth and floss too, if possible, after eating this chutney..........