Showing posts with label Breakfast. Show all posts

Thursday, June 4, 2015

Egg-in-the-Hole

May is National Egg Month and apparently, June 3rd was National Egg Day. Well, how would I know- I mean, out here, pretty much everyday is egg day! I think that every human being should know how to cook an egg. If you haven't taught your children how to cook an egg, I suggest you wait no more, and teach them!

Here's an easy, quick, healthy, and delicious recipe for egg-any-time-of-the-day, simply called Egg-in-the-Hole:

Yield: 1 serving

Ingredients: 

Bread- 1 slice 

Egg- 1 

Cooking oil or Pam- a few drops/1 good spray

Salt and Pepper to taste

Method:

1. Spray your pan with some Pam or put a few drops of cooking oil. Get the heat going. 

2. Cut a "hole" in a slice of bread. You can make it fun by cutting out different shapes such as heart, mickey or minnie mouse, or a skull! Save the cut-out bread piece. 

3. Place this slice of bread with the hole onto the heated pan. Then crack an egg into this hole. Add salt and pepper to taste. Place the cut-out bread piece very gently back into the hole with the egg (avoid pressing it). Cook for about a minute on low flame, and then flip. The bread will have become nice and brown and crisp on that side. 

4. After flipping, cook for an additional 30 seconds to a minute. If you like the yolk runny, half a minute will do. 

5. That's it, egg-in-the-hole is ready to be enjoyed! 

Psst: if nobody is watching, you may lick the plate clean! ;) 


The Hole

Egg cracked into the hole

Salt and Pepper

Place the "heart" back to cover the hole

Golden brown and crisp, then flip

Ready to eat! 

Delicious yolk under the "heart" 

Mm mm! 

Dunk and eat!

Last bits.....

Devoured! 


Tuesday, July 29, 2014

Quinoa Dosa

Yessss, I did it, finally! I managed to successfully make quinoa dosas! They turned out real good!!

Ingredients: 

1. Quinoa- 3 measures

2. Split urad dal (white gram)- 1 measure

3. Fenugreek seeds- 1-2 tsp (good for tummy)

4. Chana Dal- 1-2 tbs (I assume for color...?)

5. Water to soak, and then water to grind

6. Oil

7. Salt per taste (to be added in batter) (Optional)

Method: 

The procedure is exactly the same as you would follow for regular dosa batter. See Dosa 1 and Dosa 2.

1. Soaking: Add ingredients 1-4 in a container, and rinse with cold water 2-3 times. Then add water so as to cover it all, and set aside for minimum 2 hours.

2. Grinding: After 2 hours, the above mixture is ready to be ground/blended into a nice batter. Blend/grind everything into a pancake sort of consistency. I noticed that grinding quinoa+dal is way faster than the traditional rice+dal. So that's good! ;) I add salt per taste while grinding. You can skip salt, if you are watching your salt intake......

3. Fermenting: After the batter is ready, I like to stir it all up well with a ladle. The idea is to well-aerate it, in order to aid fermentation, and the dosa will turn out better. So if you live in a nice hot sunny place, you will have lovely fermented batter, all ready to go in under 6 hours. But if you live in Seattle or Alaska (yay!), better to resort to the good old oven. I just keep the container with the batter in my oven, with the light on for warmth, overnight. Next morning my batter is good to go!

P.S.: I noticed that quinoa dosa batter actually fermented a bit faster as compared to the traditional dosa batter. Either that, or well, guess it is summer here after all! ;)

4. Make the dosas! Get your pan going on the stove, spread out the dosa batter with the help of a ladle. Add a few drops of oil to the circumference of the dosas, and in about 2-3 minutes, you'll have yummy quinoa dosa ready.

Quinoa Dosa cooking

Quinoa Dosas ready! 
Serve with chutney, or just a good pat of good old butter, or both! YUM!

Observation:

1. Quinoa dosas seem to brown up quite quickly, so gotta be careful not to burn 'em.

2. Couldn't get them to become crispy as I'd have liked- perhaps because of the lack of rice....?

3. To the novice tongue, this might taste slightly bitter..... but don't worry, you'll get used to it. ;)

Healthy Ideas:

1. Use oats to make dosas! Or combine oats and quinoa.

2. Make pancakes with quinoa flour instead of all purpose flour! Bet that'll be good.


Friday, July 4, 2014

French Toast- Indian twist

Who doesn't know how to make french toast, right? You take some bread, dunk it in eggs whisked with vanilla essence, fry till golden brown, and then drizzle maple syrup or honey, and eat away. That's the sweet version. I like the savory version too- where I add salt and pepper to the eggs, and the rest of the process is the same. Except, instead of syrup or honey, I use ketchup. And to kick it up a notch, usually on the weekend, I add a couple extra ingredients and I call it my Desi French Toast- i.e. french toast with an Indian twist.

Ingredients: 

1. Bread- stale white bread would be perfect, but you can use any kind, I'd say

2. Eggs

3. Finely chopped onion- I like to use 1/4 of an onion for 2 eggs

4. Finely chopped green chilies (per your heat tolerance!) 

5. Salt per taste

6. Freshly ground pepper 

7. Cumin seeds- 1/2 tsp

8. Fresh coriander leaves, or parsley 

9. Cooking oil- a few teaspoons

Method: 

1. I like to cut the bread (2-3 slices per person) into triangles.


2. Whisk up some eggs (2 eggs per person), add ingredients 3-8 into this, and give it all another whisk to get everything rolling.


3. Get your pan going, with a few teaspoons of cooking oil. Dunk each slice of bread into the egg mixture, and fry both sides until golden brown.


It is almost like bread and omelette in one shot! Pretty neat, I think, and it is super delicious all by itself. I like tomato ketchup on the side.


Thursday, April 24, 2014

Finger Millet Flatbread or Ragi Rotti

Finger Millet or Ragi has been a favorite with diabetics, because of the fact that it is rich in fiber, and upon consumption, blood sugar levels don't just instantly shoot up, but instead, it is all nice and slow. Ragi is also rich in iron, calcium, certain amino acids (that apparently are absent in most starchy grains), and of course protein. I also read somewhere that it helps relax you- so if you suffer from anxiety, or sleeplessness, or are just feeling the blues, try eating some Ragi. You will feel happy!

My paternal grandfather used to swear by Ragi mudde, and as far as I remember, often times dinner would be Ragi balls with a tamarind based soup. Tata would tell me to tear off a little ball, dunk it in the soup, place it in the mouth, and immediately swallow it. That was fun, really. I mean, the whole concept of not having to chew or bite food, but simply swallow, was so cool back then! And funnily enough, I quite liked that bland Ragi ball.

Another variation of Ragi that we were introduced to was Ragi rotti. This is basically Ragi flatbread, with added spices. It is super delicious! It is similar to akki rotti, the flatbread made with rice flour (Akki Rotti Recipe). In fact, I'd say that the recipe is the same, except that instead of rice flour, you use ragi flour.

Ingredients: 

1. Ragi Flour

Ragi Flour- sprouted ragi- even better! 

2. Onion- finely chopped

3. Green chillies- slit, or chopped

4. Cumin seeds- 1-2 tsp

5. Salt per taste

6. Water to make dough

7. A kadhai or wok, or a pan

8. Oil to cook

Method: 

1. Add onions, chillies, cumin, and salt to ragi flour and mix it up dry once, before adding water.

Ragi flour+onion+chillies+salt

2. Pour in water bit by bit, and begin kneading the dough, until you get a nice pliable dough. Similar to pizza dough.

Ragi rotti dough ready

3. Take a kadhai/wok or a pan, or both (like I do), pour a couple teaspoons of oil (you know your pan better- so if you think you need more oil, sure, go ahead. OR if you use a completely non-stick pan, well, skip the oil!). Then make a ball, as shown below:

Ragi ball 
4. Place this ball onto the oil in the pan, and start rolling it out with your fingers and palm of your hand:
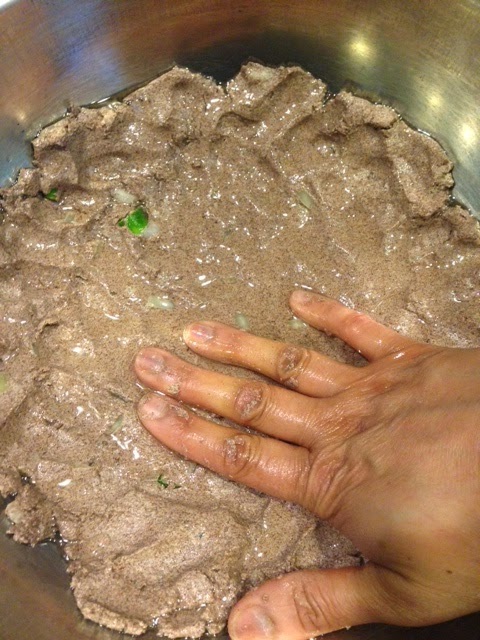
Ragi rotti in the making
5. Now cover the pan with a lid, and get the heat going. The first 5 minutes on medium high, and the next 5-7 minutes between low and medium flame, to avoid burning.

Ragi rotti cooking in the pan

In the kadhai/wok
6. Switch off the stove, and that's it, Ragi rotti is ready to be enjoyed! You can eat it with coconut chutney, or chutney powder, or just plain as it is with some ghee or butter. YUM! You could even eat this with some rustic chicken or mutton curry- are you salivating yet? ;)

Eating off of the kadhai/wok- irresistible! 

Don't forget that butter! ;) 

I personally LOVE both varieties- akki (rice flour) and ragi (finger millet) rotti. Both kinds make me happy! You know your rotti is perfect when it is crispy on the first bite, and has this beautiful soft, chewy thing going on as you continue to eat........ SLURRRRRRP!

Tuesday, March 11, 2014

Mashed Potato Sandwich

I gave my kids mashed potatoes for their school lunches yesterday. Promptly enough, my son brought it all back, claiming he "wasn't hungry." Well, that's quite alright son, for you will get it again for lunch tomorrow! Perhaps in a different form.

The recipe is a no-brainer, really:

1. You take that leftover mashed potato and a couple slices of bread.


2. Spread mashed potato all over a slice of bread. If you like more, then spread it on the other slice too. 


3. You could add some slices of boiled egg, some cheese- mm mmm! Season with pepper, and salt, if you'd like. 


4. Join the two slices together (OK, didn't know how else to say it!) and grill it in your sandwich maker. You could certainly use a pan for grilling, or eat it as a cold sandwich. 


That's it. You got yourself a delicious, and hearty breakfast. Some fruit on the side, and what a great way to start your day! 


Well, in this case, what a lovely lunch idea for kids! Now if this comes back too, then it will be served for dinner! Hey, if you are a mom, I know you hear me, right?! 😉

Saturday, January 5, 2013

You don't have to always make Fried Rice!

Happy 2013!!

I bet sometime in your life in the kitchen, when you have run out of ideas, you have gone ahead and converted leftover rice into your very special Egg Fried Rice. Aww, come one, I know you have! I used to think that egg fried rice is all you can make out of that leftover rice lying in the refrigerator, until recently, when we made our annual year-end trip to my brother and SIL's place. They introduced a new and very interesting eggs and rice dish to me.

Ever heard of Omuraisu? It is supposedly a Japanese omelette made with eggs of course, and rice, and topped with ketchup. Therefore the name Omu, meaning Omelette, and  Raisu, meaning Rice. Pretty cool concept, I think. Any kind of rice should work for this, though my brother recommends a rice-medley.

Ingredients: 

1. Cooked Rice- any kind- white, brown, green, red..... you get the idea! (2-3 tablespoons for 1 egg)

2. Eggs- beaten (typically 1-2 eggs per person)

3. Finely chopped onion, green chilies. I also like thinly sliced mushroom (Not too much, else the omelette will break....)

4. Oil to cook

5. Salt, pepper, any other seasoning you like

6. Ketchup, or any sauce that you like

Method:

1. Beat the egg(s).

2. Get your pan going on the stove, with some oil.

3. Throw in finely chopped onion, green chilies, and mushrooms and sauté for a couple minutes. I add salt-pepper at this stage.

4. Add a couple tablespoons of rice and sauté everything for another minute or so.

Fried Wild Rice 
5. Pour the beaten egg(s) onto this fried rice. And cook like you would an omelette. Be careful not to break the omelette- it tends to be heavy because of the rice..... if it breaks, no worries! It'll still be good!

Beaten egg(s) poured onto the fried rice

Flipped to complete

Omuraisu Ready! 
I used some leftover wild rice from last night, and the rice omelette, or Omuraisu, turned out real good! Instead of ketchup, I used, yes, my very favorite Ghost Pepper Salsa on the side. And since I have a huge crush on sharp cheddar (I can be crazy that way!), I sprinkled a tad bit of shredded sharp cheddar on the top. The wild rice added a nice nutty texture to the omelette, that I quite enjoyed. And not to forget, it was super-filling. I mean, eggs, veggies, and rice--- now that's a complete meal!

The next time you decide to make egg fried rice, try a little change, and make Omuraisu instead! It'll make you happy!


Friday, September 16, 2011

French Toast with Maple Syrup- Courtesy: My Daughter

My 7th grader has taken a class called, "Food, Clothing and You" and she has already learned how to make French Toast, Orange Julius (I tease her by adding Caesar to the Julius-- typical mom-joke!) and biscuits. I think that is pretty awesome! Wish my school had such a class to offer back then--- I mean, how fun is it to cook with your school friends and you even get to taste your creations and your teacher grades you on your cooking skills. That's a whole mini-Culinary school right there! Anyway, so she came back home and was looking in the pantry for a snack. And then she came to me and said, "Hey, you wanna try my French Toast?" I said, "Sure, why not?"

Ingredients: 

1. 1 egg

2. 1/2 cup milk (she used regular 2%  reduced fat milk)

3. 1/2 teaspoon of vanilla essence

4. A pinch of cinnamon powder. I was out of cinnamon powder, so I suggested nutmeg powder. She wasn't too sure- but she smelled it and decided, OK, mom does know..... (if-you-know-what-I-mean!).

5. 3 slices of bread

6. Some butter

Method:

1. She took 1/2 a cup of milk in a container and cracked an egg into it. Well, she came up to me and asked me to crack it for her since she doesn't know how to crack an egg yet! Ha ha!

2. Into this she added a pinch of nutmeg powder and 1/2 a teaspoon of vanilla essence and mixed it all up.

Milk+Egg+Nutmeg+Vanilla

"Whisked" together
3. Meanwhile she got the little pan going on the stove, added a dab of butter into the pan so as to melt it.

4. She dipped a slice of bread into her "french toast mixture" and then put it onto the pan with the butter.

Butter
Melting the butter
Coating the bread with the "French Toast mixture"
Onto the pan
5. After about 30-45 seconds of cooking on that one side, she flipped it over so as to cook the other side.

Flipped over to cook the other side
6. And after another 45 seconds of cooking the other side, the french toast was ready to be served. She drizzled some maple syrup all over the toast and gave it to me. See picture below:

French Toast drizzled with Maple Syrup- all ready to be eaten by Mom!
She then proceeded to cook the remaining 2 slices of bread- one for her and one for her brother.

This is the best French Toast I have ever eaten! Perfectly golden and with the right amount of sweetness and that nutmeg worked pretty well too. I know that French Toast is probably the easiest thing anybody can ever make- but when your daughter makes it for you with so much love and enthusiasm on a Friday afternoon, right after school, it definitely seems like the best thing you ever ate!

Friday, October 29, 2010

Jazzed up Crescent Rolls

You know those Pillsbury Crescent rolls you get at the grocery store? The ready-to-bake dough that is neatly tucked away in those pop-up cylinders, that, I must admit, scare the living daylights out of me (OK, not quite that scary, but startling, nevertheless!). Sometimes when I make soup for dinner, I just bake some crescents on the side. They work well for dunking purposes. Plain crescents are pretty yummy by themselves, but when jazzed up, they taste even better!

There are quite a few different ways I transform plain, ordinary crescents into out-of-this-world crescents and the most popular kinds in my household are the fruity crescents and the cheesy crescents. For the former, I use some jam or preserves (my personal favorite is the orange marmalade filling) while for the latter I like to use cheddar cheese (my personal favorite being the sharp variety).

The method is pretty straightforward, really and the main thing to remember is to follow the instructions on the container!
  1. Follow instructions and get the dough out on a baking sheet.  
  2. Spread some jam/jelly/preserves of your choice onto each individual crescent dough and then roll each into well, a crescent (again, instructions are on the container). 
  3. And then shove it into the oven per instructions and bake, err, don't want to repeat- but yeah, the instructions are right there on the container. (And that is the last time I say that!)
  4. The same for the cheesy kind- just place a little cube or thin slice of cheese of your choice (I think cheddar works best) and then roll and bake away.

Ready to be baked (the ones on the right have strawberry preserves in them, the left ones have cheese)

Perfectly baked and ready to be gobbled up!


Dunk those in your soup! Especially the cheesy crescent-- delicious!

Very simple, right? The good thing about this is that you can get all creative with that dough and take plain old crescents to a whole new level. And then, show off a bit! ;) 


Wednesday, May 5, 2010

Simple is good

Eating cereal every morning is such a BORE. I mean, sure, you can have a variety of cereal stacked up, but in the end, it is what it is and that is, cereal! Same old sweet (yes, there is that unsweetened stuff available too that tastes like nothing) stuff that you add milk to and either eat it cold or warm. Not my cuppa tea, or in this case, bowl of cereal!

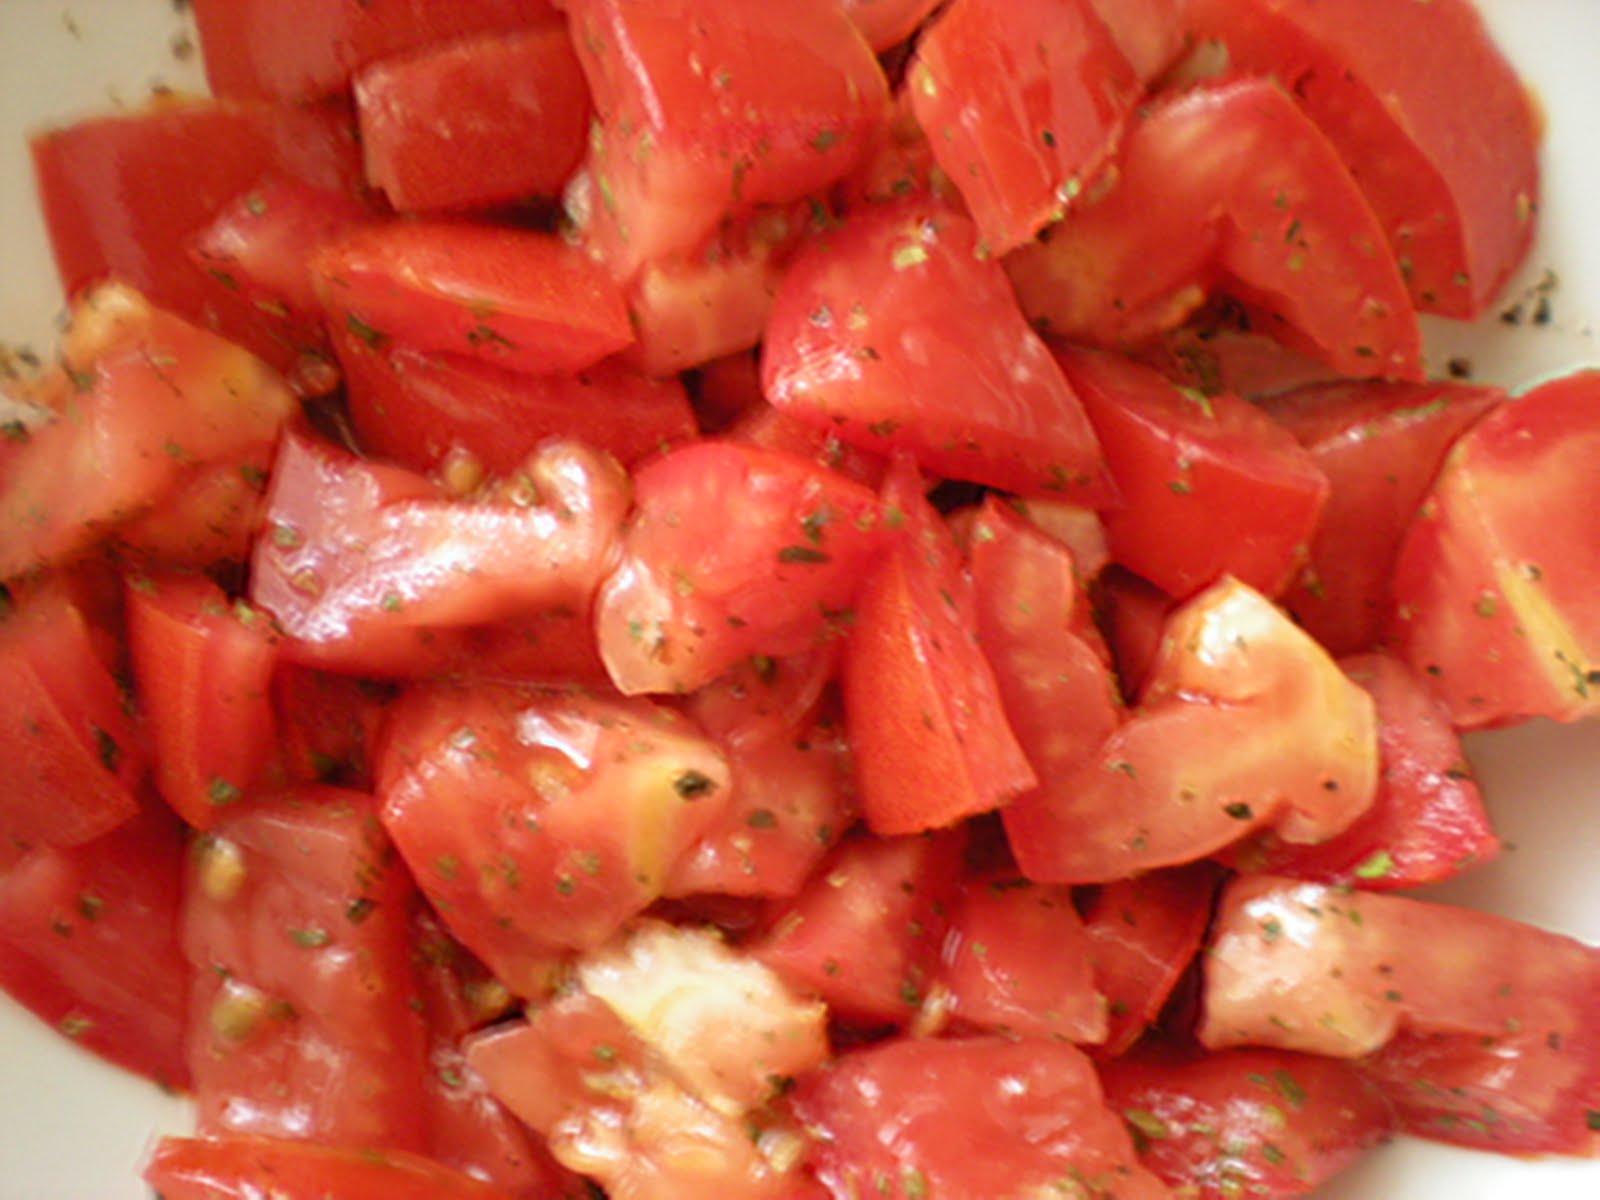
So this morning I chopped up a couple roma tomatoes, added salt, pepper, a teaspoon of rice vinegar and a teaspoon of lemon juice. Sprinkled some Italian seasoning (the dried kind you get at any grocery store) and then drizzled some extra virgin olive oil (or EVOO as my Guru calls it) and let it all hang out in a bowl to marry each other.

Tomatoes hanging out in the bowl marrying the other goodies

Meanwhile I took a couple slices of bread (white whole grain, to be precise--- this note is for the Californian who is impressed with all the healthy eating going on in this household...........;) ) and toasted them in a toaster. The real way to do this would be to pan fry the bread. But that would mean get the butter out, heat up a pan and then fry the bread in the butter until golden brown. It not only takes longer, but I mean, you don't need all that overdose of butter early in the day!

I also had a pot of water boiling on the stove. Once it came to a boil, gently put in a couple eggs. I do this with a pair of tongs now a days. Works out better. Turned the stove setting down to prevent the eggs from breaking up and then creating a whole lot of mess in the pot. Had them boil for exactly 10 minutes and then immersed the eggs in cold water. Now I don't know why the boiled eggs need to be immersed in cold water before you shell them. Just something that my dad taught me when I was a kid and I have just been following....... one of those things. Hmm, but now that I think about it, guess that just stops the egg from cooking any further and maybe makes peeling the egg a bit easier? As for peeling boiled eggs, I must confess--- I am not very adept. I often times peel not just the hard shell but also the white of the egg and then the end result is a weird looking "pixie" egg (remember the pixie orange?). I learned from a friend that a perfect boiled egg has its yolk perfectly yellow. Today, I am happy to say, that I boiled those eggs pretty darn perfect! (OK, the peeling was again a little off, but not that bad, really!)

Note to self: Must buy that Egg Genie one of these days.....

So finally I spooned in some of that beautiful tomato on top of toast. I like to do this when the toast is still warm because then it soaks in that lovely juice (tomato+vinegar+lemon+salt+pepper+seasoning) and it is a crispy yet soggy goodness. Delicious!

Now doesn't that look yummy? (Err, try to disregard the badly peeled egg on the side).


Aha! the perfect golden yellow yolk.

You don't have to eat boring cereal every day. Get some variety in your life, get some color in your life. You don't need fancy ingredients to create a delectable meal. Sometimes simple is good. Really good!