Showing posts with label Fish. Show all posts

Monday, October 17, 2016

Bengali Fish Fry

My good friend, Oindrila, who taught me how to make Shukto, also makes great fish fry. My son and I are big fans of her fish fry. Finally after all these years of depending on her, yours truly decided to learn the recipe and make it herself because one has to learn to be self sufficient. 

The process of making fish fry is quite straightforward. Though I must say that to a novice it might prove to be a bit tedious and could get messy, but in the end, it's all worth it!* Also, of course, it's all a matter of practice.....  

*Statement made based on personal experience

Ingredients: 

Tilapia filets, boneless skinless- 1 filet per person

Oil for frying

Bread crumbs

Eggs- 2, beaten

Chutney to marinate fish:  

Cilantro- 1 bunch for 4 filets

Thai green chili- 2-3 (per preferred level of heat)

Garlic- 2-3 cloves 

Lemon juice- 2 tsp

Salt to taste

Method: 

1. First make the cilantro-chili chutney. Combine cilantro, green chili, garlic, lemon juice, and salt and make a chutney in the blender/food processor. 

2. Halve each tilapia filet. Add chutney and gently combine, so as to coat all the fish pieces with the chutney. Now put away in the refrigerator for 15-30 minutes. 


Tilapia and Cilantro Chili Chutney

While that is marinating, get the following ready to go:

1. Breadcrumbs in a bowl

2. Eggs (beaten) in a bowl

3. Oil for shallow frying in a frying pan

Then arrange in this order:   


Fish, egg, breadcrumbs

Take each marinated fish piece, dip in egg, coat with breadcrumbs, and then fry. Easy! 

Tip: If it's for a party, keep everything ready ahead of time as shown below. The frying can be done just before the party begins...... 


Fish coated with egg and breadcrumbs, waiting to be fried 


Fry us! ;) 

Shallow fry until golden brown. 


Shallow fry

Serve with ketchup. I make extra cilantro-chili chutney that goes very well with this fish fry. 


Delicious Fish Fry


Friday, February 19, 2016

Easy Baked Sea Bass

Here's a great baked sea bass recipe, with a lovely dry spice rub. This one doesn't incorporate too many spices and is very easy to whip up on any busy weeknight. You could use any white fish such as tilapia, halibut or haddock. On our last Costco trip (more like an expedition, really!) we found sea bass in the frozen section and so picked it up. 

Ingredients: 

Sea Bass boneless skinless filets- 1 per person

The following quantities for the spices are per filet: 

Mustard Powder- 2 tsp 

Cilantro Seeds Powder (coarsely ground)- 2 tsp

Red Chile Powder or Paprika- 2 tsp (adjust according to taste)

Salt to taste

Cooking oil- a few drizzles

Method:

1. The Spice Rub: In a bowl mix up mustard powder (I like Colman's Mustard), cilantro seeds powder (make your own by roasting some cilantro seeds and then pounding it into a coarse powder), paprika &/red chile powder and salt to taste. Give the mixture a taste to make sure you like it! Adjust spices, if needed. 


Mustard Powder


The Spice Rub


2. Thaw fish filets according to instructions on packet. Pat dry with paper towel, dip each filet into the above spice rub and coat evenly. Go ahead, use your hand and give that fish filet some love! 


Coat fish filet with spice rub


3. Meanwhile preheat oven to 400 degrees Fahrenheit. Arrange all fish filets on a greased baking pan. Drizzle some cooking oil on each filet. 


Sea Bass filets coated with delicious spice rub ready to go into the oven


4. Place the above in the oven on the middle rack and bake for 10-12 minutes. After the bake time, set the oven to hi-broil and broil for 2-3 minutes (these are pretty thick filets, so won't overcook). 


Delicious Baked Spicy Sea Bass


5. Beautiful, delicious, spicy baked fish, sea bass in this case, is ready to be served. Place a filet on some creamy risotto, garnish with Italian parsley and a squeeze of fresh lemon, and enjoy! 


Mm Mm Delicious!! 


Tuesday, April 17, 2012

Hello again!

You know how you lose touch with a friend, for no particular reason, in that "just-happened" sort of way? And then when you finally do meet up, you are a bit quiet in the beginning, because you don't know what to say? (And somehow that inner poet in you also awakens!) That is exactly how I feel right now. It has been some time since I posted anything here. Life suddenly got a bit tumultuous. A lot of change, a lot happening......... and, so, amidst all that, I just did not have that urge to write anything. Oh, did I just hit that little curiosity button in you?!

Well, it is time to get back to doing things that make me happy, and so, hello again! 

About a month ago, we visited my brother and sister-in-law, and as ever, had a wonderful time. All we did was eat, laugh, eat (that's right, my next book, and movie!). A made some excellent Salmon Chettinad and Y made this wonderfully delicious veggie biryani. I watched them cook, and I must say that I was quite impressed with their team-work, and of course, by their culinary skills.

Salmon Chettinad:

My brother had marinated some beautiful salmon filets in olive oil and some "secret" spices the previous night.

Salmon filets, marinating in olive oil & "secret" spices
He prepared the masala/curry base by using a gazillion different spices, roasted them and then ground them up in the blender, along with some grated coconut. The end result was this delightfully spicy and fragrant chutney. Now I did watch while he cooked, but unfortunately, I do not recollect the exact list of spices he used. So, brother, if you happen to comment, I sure would appreciate it if you jot down those spices for me. Thank you very much!

He then pan-fried the fish filets, just enough to brown them up on both sides.

Pan-fried salmon filets
And then, he took a pan, poured in some cooking oil, threw in some chopped onions, ginger-garlic paste and chopped tomatoes. He sauteed it all, until the onions were translucent. And then into this, he poured in that spicy, fragrant chettinad curry/sauce and brought it to a boil. At this point, he had his sous-chef (my SIL!) pour in some tamarind juice into the curry. And finally he folded in the pan-fried salmon filets into the chettinad curry and let it all simmer for a few minutes. Mm, mm!

Chettinad curry/sauce into the onions+tomatoes+ginger-garlic

Sous-chef adding tamarind juice

Folding in the salmon filet(s)
Salmon chettinad, simmering away....... mm, mm!
Meanwhile, the sous-chef, my sister-in-law, was busy working on her veggie biryani. She first got all her vegetables ready. Look at the picture, and you will get the idea:

Veggies for the biryani
She also had some basmati rice going on the stove. The rice was to be just partly cooked. Once partly cooked, she drained away all the water.

She also chopped up a bunch of mint.

Mint leaves
And she soaked a few strands of saffron in some water.

Saffron
She took a nice huge pot, and poured in some oil and got the heat going. Then she added a few whole spices, such as bay leaves, cloves, cinnamon stick, cardamom, etc. The delightful aroma was already in the air.

Whole spices
She then added the veggies one by one into this pot, fried them, added salt and a special spice mix, and also added a cup of yogurt.

Veggies+spice mix+yogurt
And then she began the layering. She first added a layer of the cooked veggies, followed by a layer of the partly cooked rice, and then a thin layer of the mint leaves. She did this, very patiently, I must add, until all the rice and the veggies and the mint was used up; and err, the pot was quite full! She finished off by drizzling that saffron water.

Layer of veggies over rice
Layer of veggies spread out over the rice
One more layer of rice
Final layer of rice spread out evenly
Finishing touch- saffron
After all the layering was complete, she closed off the pot with the lid and allowed this to simmer away on the stove for a good 15-30 minutes. The yogurt in the mixture allowed the partly cooked rice to get completely cooked. In the end, when she opened that lid, that aroma and the look was insanely appealing and I just couldn't wait to eat dinner!!

Vegetable biryani waiting to be eaten!
Perfect Layers
The flavorful veggie biryani and the hot and spicy, as well as tangy Salmon Chettinad were just fabulously delicious.

Salmon Chettinad over a bed of Vegetable Biryani
Thanks, A and Y, for that amazing dinner. It truly was superb. The lovely little song we came up with, was/is also truly genius. "Tinta irbeku, tinta irbeku, tinalla andre nammage ishta illa!"

Cheers to that, and can't wait for our next eat, laugh, eat rendezvous!

Monday, January 9, 2012

Basil Pesto Tilapia

On one of my recent trips to Costco, they were giving out samples of this new item- basil pesto tilapia, and it sure smelled good. It was a Thursday, and so I refrained from tasting it, even though it was very tempting. Now Thursdays are supposedly "pure vegetarian" days in our household. I don't remember why we started doing this in the first place. I mean, for starters, we don't even eat meat everyday. In fact, we are pretty timid meat eaters and moreover, we are more vegetarian than meat-eaters. So it is really not a big deal at all..... but anyway, that's just something we do every Thursday. So coming back to that basil pesto tilapia- I almost picked up a packet from the frozen section, however, I decided not to. I mean, why buy frozen stuff when I can re-create it at home, all nice and fresh, right? It seemed pretty darn simple anyways.

I took:

1. 4 tilapia filets, marinated for 30 minutes with lemon juice, garlic powder, salt and black pepper

2. Pesto sauce from a bottle. I usually have Costco's basil pesto- a great thing to have in your refrigerator for anytime use; though making pesto is a breeze. All you need is some fresh basil, pine nuts and olive oil. A couple pulses in the food processor and there, you got yourself some great, fresh pesto! If you don't have pine nuts, no problem- a great substitute would be almonds.

Costco's Awesome Pesto!
Um, yeah, that's pretty much my ingredient list for this preparation!

Method:
 
1. I took my pan, put in a teaspoon of oil. You could just spray some Pam, if you'd like. Then got the heat going.

2. I placed each filet onto the pan with the hot oil. While the first side was cooking, I spooned in a little bit of pesto onto each filet and spread it out.

3. After about a couple to 3 minutes, I flipped each filet and cooked the side with the pesto. And then I spooned in a tad bit more of that pesto onto the already cooked side. A couple more minutes and it was done and looked gorgeous! And the taste couldn't go wrong with that delicious pesto in the lemony background- fabulous!

Basil Pesto Tilapia
I served this beautiful basil pesto tilapia with brown basmati, jazzed up with pesto as well, and some carrot and cucumber salad. I also made a lovely dill and chive bud sauce to go with the fish and the rice. Mm, mm, mm- a very delectable meal indeed!

Simple carrot and cucumber salad

Fresh, not frozen stuff!

Tuesday, July 5, 2011

Appi's Jambalaya

Jambalaya Vs Khichdi: Jambalaya to me is basically "Khichdi."  Khichdi in India is a one-pot comfort food made with rice and lentils, simply seasoned with salt, turmeric, cumin seeds and pepper. It is typically yellow in color because of the turmeric. Vegetables may be added to this for some color, my personal favorites being peas and carrots. While living in England, I learned about "Kedgeree" from one episode of Jamie Oliver's show. He made that kedgeree with haddock and hard boiled eggs. I realized that Kedgeree was basically Khichdi! I soon learned that pretty much every culture has its own version of khichdi--- that one-pot-wonder comfort food. Therefore the inference that Jambalaya is Khichdi too!

So the other day I decided to make jambalaya with tilapia and prawns. I did not have that special jambalaya spice mix (Zatarain's or otherwise) and so decided to just make my own spice mix and go with that. It is quite simple, actually. I mixed up some onion powder, garlic powder, red cayene pepper powder, italian seasoning (I know, I know, that sounds a bit off--- but believe me, it works!) and took a couple cubes of veggie bouillon.

Ingredients:

1. 2 cups of rice (I used basmati that day), washed and ready to go.
2. 2 cubes of veggie bouillon (this is really your choice- you could use fish or chicken or beef......)
3. Jambalaya or Gumbo spice mix OR make your own spice mix (see earlier para)
4. Tilapia (or any fish of your choice) cut into bite sized pieces, prawns (tail-on or off). You could even add sausage and chicken if you'd like.
5. A medium sized onion, chopped up
6. 1 Red Bell Pepper, chopped up
7. 1 tablespoon tomato paste
8. Salt, pepper
9. 4-5 teaspoons of oil
10. Don't forget water to cook the rice in! (Veggie bouillon+water= broth)

Method:

1. Pour in 4-5 teaspoons of oil into a pot and get the heat going. Throw in the chopped onion, saute a bit, followed by the red bell pepper. (Now one can use celery too- but we are not big fans of celery and so I don't typically use celery in my cooking).

2. Add the washed rice into this and stir it all up. Then add water (or broth) (2 cups of water for 1 cup of rice). For this dish, you gotta add extra water as the desired consistency in the end is a risotto-like consistency. So what I do is that towards the end of the entire preparation, depending on the need, I add extra liquid to get that nice not-too-wet-not-too-dry consistency.


3. Add the jambalaya spice-mix, veggie bouillon, pepper and a tablespoon of tomato paste and give it all a good stir, bring to a boil, reduce heat and cover the pot and leave it to cook for 20 minutes.

4. While that is going, prep the fish and the prawns by sprinkling some salt and pepper on them, so as to not have them too bland.

5. At the end of 20 minutes, check to make sure that the rice is done. At this point, gently fold in the tilapia and the prawns. If the consistency is on the drier side, pour in some extra water or broth. Cover the pot again and leave it for another 10 minutes. That will allow the fish and the prawns to cook.

6. That's it! Jambalaya is ready to be served!

Jambalaya ready to be served
Finishing Touch:

Before serving, I sprinkle some of that awesome spice-mix over the jambalaya for a great flavor blast.

Appi's Jambalaya- deeeelicious!
My family loves this jambalaya. Well, my daughter is not too crazy about prawns, and so she just skips them, or if she does happen to end up with a couple prawns that might have sneaked in, she just gives them to her brother, who is crazy about prawns!

Next time you want some comfort food, think along the lines of a one-pot-wonder dish. Think Jambalaya!


Sunday, April 10, 2011

Going Gourmet with Albino Asparagus

I love asparagus. Back while growing up, my dad used to take us to this Chinese restaurant in Bangalore (I forget what it was called) where I would always order chicken-asparagus soup that was THE best chicken-asparagus soup I have ever eaten. Now apparently the restaurant does not exist anymore. Anyway, so coming back to asparagus- I usually buy the normal green kind and cook it the standard way- you  know, either steamed, grilled or quickly sauteed and then sprinkled with some salt, pepper, crushed garlic, lemon juice. Oh and a drizzle of good olive oil. Sometimes add a dab of butter. Simple and delicious!

I happened to see albino asparagus yesterday in the store and decided to buy some for the first time. Was thinking of a nice gourmet meal for dinner. After thinking hard, I decided to stick to that standard recipe of quickly sauteeing the asparagus. And so, washed the asparagus.

White/Albino Asparagus
I got my pan going on the stove, threw in the asparagus, drizzled some good old olive oil, followed by some kosher salt, freshly ground black pepper as well as some dried herb powder. Within 3-4  minutes, it was done. It looked pretty good at that point. I then tasted it, starting with the tip. Hmm, nice- definitely milder than green asparagus. Then it began to taste bitter and stringy (peel). I figured that perhaps the bitterness is what makes it "gourmet!" Later, upon looking it up online, I learned that I should have peeled the asparagus. Oh well! Now I know!

Baked Salmon & Albino Asparagus
Finally we did have a gourmet meal that comprised of this beautiful mildly bitter (and not peeled!) white asparagus with baked salmon and brown+wild rice.

Gourmet Meal
I intend to buy white/albino asparagus again and actually cook it the right way. Well, I wasn't off by that much, really- the only thing I didn't do was to peel 'em. Next time I'll perhaps try to recreate that chicken-asparagus soup that I remember from childhood........I might be successful!

Sunday, February 20, 2011

3-Step Fish with Lemon-Caper Sauce

I owe this recipe to Melissa D'Arabian. For those of you who may not know, she was the winner of Food Network's "The Next Food Network Star" a couple years ago. Her show is called "10 Dollar Dinners" and the show kind of grew on me......she does have some very neat recipes to offer.

She called this recipe "Fish Piccata." I call it my 3-Step Fish. Please note that I have added my own little twist to this recipe. I don't encourage plagiarism either!

The First Set of Needs:

1. Tilapia fillets or any similar bland fish that absorbs flavors well
2. All Purpose Flour jazzed up with salt, pepper, turmeric powder, cayenne pepper, italian seasoning (your choice of spices, really)
3. A pan
4. Cooking Oil

The Second Set of Needs- The Sauce:

1. Capers
2. Lemon juice
3. All Purpose Flour (optional)
4. Some white wine or broth, else just water
5. Salt, pepper

The 3 Step Fish:

1. Pour some cooking oil into your pan and get it going on the stove. The pan should be screaming-hot.
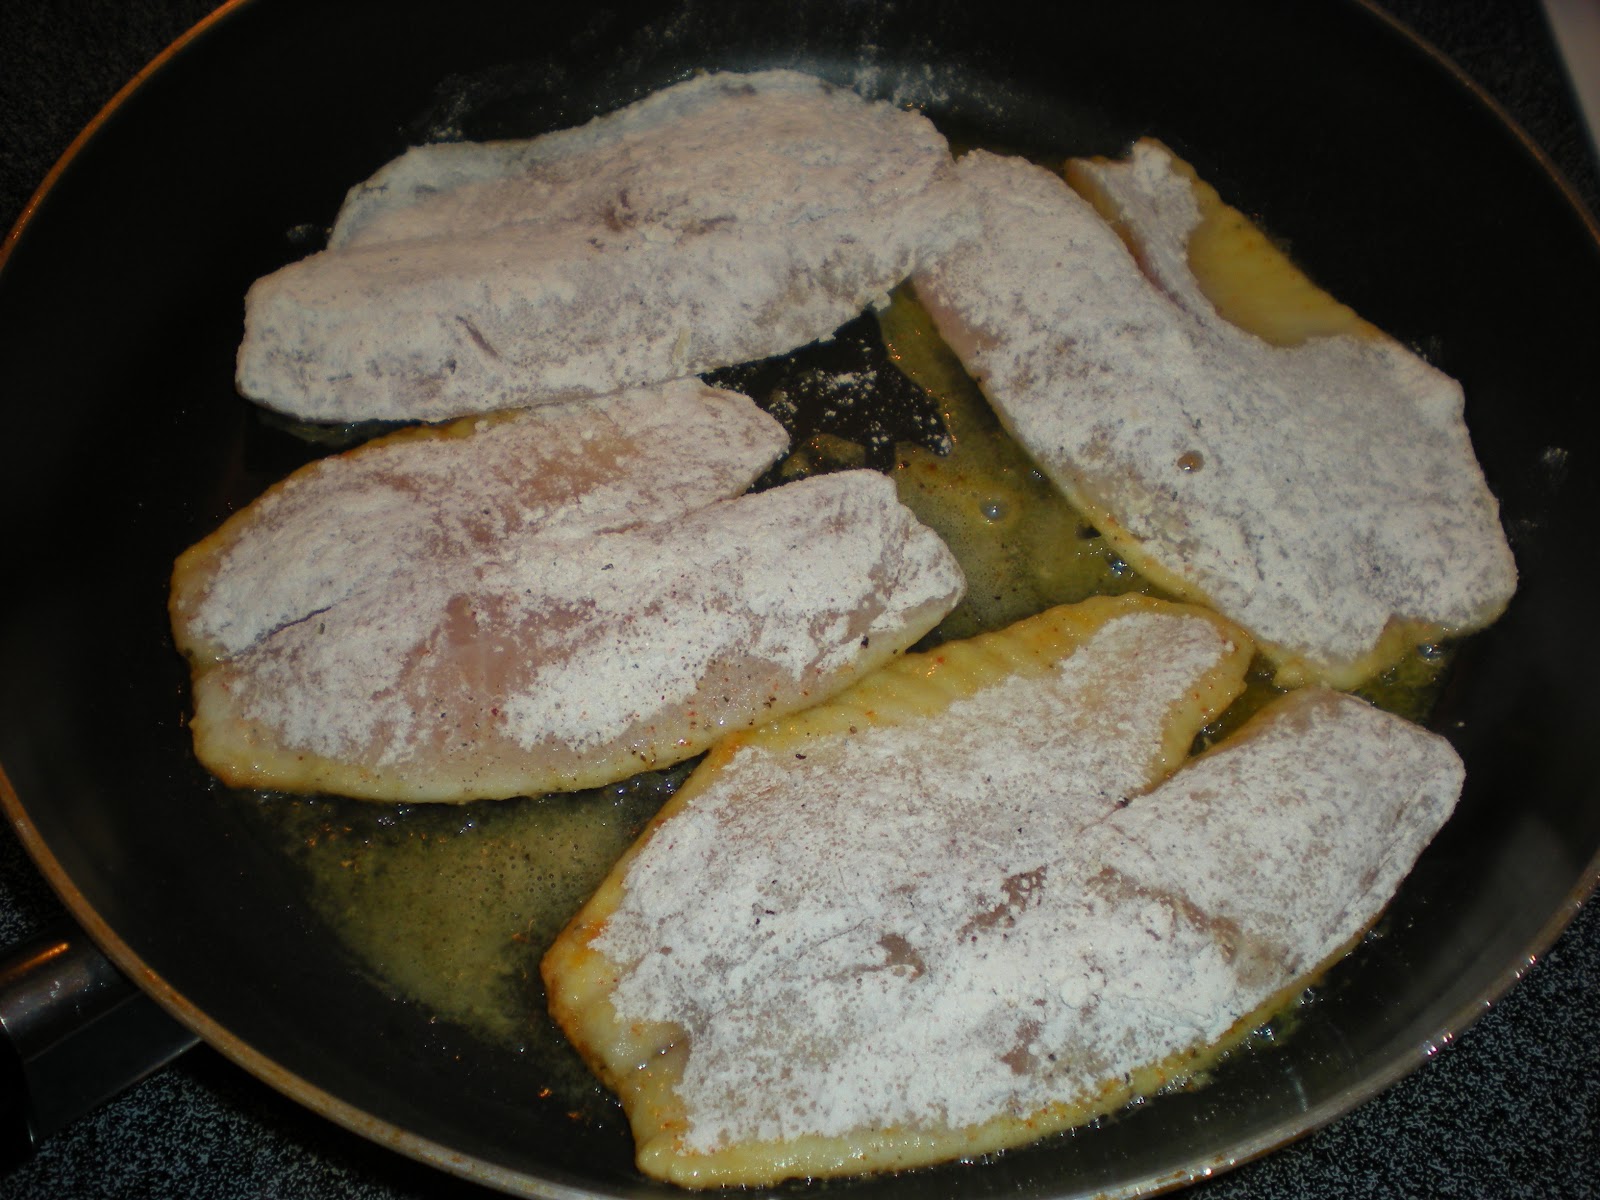
2. Salt and pepper the fish, dip in jazzed-up all purpose flour to coat the entire fillet, dust off extra flour.
3. Drop the fish into the heated oil in the pan. A couple minutes on one side and then flip it to brown the other side. DONE!

Coating the fish with all purpose flour
 Browning one side........
 Browning the other side

 Gorgeous fried fish waiting for that tangy sauce

The Lemon-Caper Sauce:

1. After frying all the fillets, keep the same pan going. Yes, there's going to be some stuff sticking to the pan- that's what we are looking for- all that yummy caramelized goodness. Pour in some white wine or broth or plain water and start stirring and scraping off all those tidbits (yep, deglazing is the term!).
2. Add some capers into this and right towards the end, add some lemon juice. Taste to check the salt etc.
3. Melissa leaves her sauce pretty thin, but I prefer a somewhat thicker sauce and so I add a couple teaspoons of all purpose flour (corn starch should work too, I suppose). One quick boil and ready to be served!

Mmm, the tangy lemon-caper sauce!

Spoon some of that awesome tangy lemon-caper sauce onto the fried fish and serve alongside some brown rice or spaghetti or anything really or if you are on that no-carb diet, eat the fish alone!

Fried Tilapia with lemon-caper sauce and some tortellini on the side

The fish is real easy to cook- I mean, 3 steps literally!! And you can't go wrong with fried fish! That lemon-caper sauce just explodes in your mouth with tangy deliciousness.

Thanks, Melissa D'Arabian!

Monday, September 6, 2010

Quinoa Delight

My brother has been raving about quinoa (pronounced KeenWaa) for many months now. Supposedly packed with a lot of good stuff. I remember my friend telling me about it as well. So finally I decided it was time to give it a try. I had some wild rock fish lying in the fridge. I thought hmm, how about some quinoa with some of that fish and maybe some baked broccoli? Sounded pretty good.

 The Quinoa:
  1. Took 2 cups of quinoa and washed it about 3-4 times. The way you wash it is basically the same way you would wash rice........ you know, wash and rinse out the water a few times before adding the final water for cooking. The only thing to keep in mind with quinoa is that the seeds (yeah!) are so tiny that they just fall out along with the water. Therefore the best way is to use a strainer- that way you don't end up with all that quinoa in the sink. The other thing to keep in mind is that you gotta wash it well a few times to remove that outer bitter saponin coating.
  2. Added 4 cups of water to the washed quinoa in the rice cooker. Figured a 2:1 ratio should work fine (water:quinoa). Also added a pinch of salt and a cube of veggie bouillon for flavor.
  3. Switched on the rice cooker to do its thing. 
The Broccoli: 
  1. Cut up the broccoli into florets. And then gave the florets a quick wash. 
  2. Took a baking pan and spread out the broccoli florets. Smashed up a clove of garlic and added it to the broccoli and then sprinkled some salt and some ground pepper. Finally drizzled some oil and mixed it all up.
The Wild Rock Fish:
  1. Made a beautiful marinade with some buttermilk (yogurt would be better, I think), salt, black pepper, fresh coarsely ground mustard seeds and some vinegar for acidity (lemon juice should be just fine). 
  2. Placed the fish fillets into a baking dish and poured in the marinade. Oh, I salted the fish before pouring in the marinade. 
  3. Then put it in the refrigerator to let it all marinate. I gave it only about 10 mins. I think 30 mins would work way better. 
I pre-heated the oven to 425 degrees and then baked both the broccoli and the fish together for about 20 mins. That is the best part of this recipe: 1 temperature, 2 items, same cooking time! How cool is that!


The fish and the broccoli baking together

After about 15 mins, I took out the broccoli, grated some cheddar cheese into it, tossed it once and then put it back into the oven. Meanwhile the fish was almost done--- nice and bubbling and ohhh, the smell was simply fabulous.


Just as the baking was done, the rice cooker went off. I tasted the quinoa and it was perfect! The only question was whether or not the other 3 would like it.

Delicious Quinoa with broccoli and wild rock fish


To my pleasant surprise, they loved it!! The quinoa was perfectly cooked and the texture was lovely. The broccoli with that melted cheddar was nice and crispy and the fish was full of that mustard goodness and cooked to perfection. What a delightful meal!

If you haven't had Quinoa yet, go right ahead and get some today. Trust me, you will love it!


    Monday, August 2, 2010

    Basic Fish & Potato Curry

    Whenever I don't know what to cook and that happens quite frequently, if you have observed!--- I just whip up the most basic Indian curry and throw in either some veggies or peas & paneer (Indian cottage cheese) or chicken. I don't usually cook fish in this basic sauce, but today thought, heck why not? Should taste pretty good, right?

    The 4 ingredient Curry Base: Onion+Tomato+Garlic+Ginger

    1. I take a medium size onion, 1 juicy beefsteak tomato, a couple to 3 cloves of garlic and some ginger. THAT'S ALL! Run it in the food processor until well processed. 
    2. Then I take a pan/pot, put in a few teaspoons of oil (the more the oil, the better the taste--- but of course, we all know that we try to eat healthy now a days!). 
    3. Then temper some mustard seeds, cumin seeds, fennel seeds, cardamom, cinnamon (you can skip some of these and use only cumin or only mustard seeds if you want- your choice) and then pour in the curry base. Start stirring it. You gotta be careful because this stuff tends to come to a boil real fast and then tends to splatter all over. The idea is to get all that water out of the base (water from the onion and the tomato) until the end result that is a lovely dark red colored thick paste. This can take upto 20 mins or so.
    4. Just as the evaporation is happening, add the desired amount of salt and red chilli powder followed by some of that famous garam masala powder. 
    5. The basic North Indian style curry base is ready to be transformed into any saucy curry! 
    The Fish:

    Today I decided to actually fry the fish a little bit so as to brown up the outer part. Else of late I have just been poaching the fish (remember- the healthy cooking!). So I cut up the fish into bite sized pieces and then marinated in some lemon juice+salt+red chilli powder. A half hour is good enough. Then I took a pan and put in a few teaspoons of oil and then gently added the fish pieces and browned them up. This took only about 4 mins. The main idea was to get the fish to brown up and not fall apart easily when thrown into the curry.

    Fish marinating

    Partially cooked fish- look at that OIL!

    The Final Touch:
     
    1. I let the fried fish rest on a couple paper towels to blot off the extra oil. 
    2. Meanwhile I added a cup of water into the curry base and brought it to a boil. 
    3. Oh, I cooked a couple potatoes as well in the curry. Then I turned off the stove.
    4. Finally I added the fish pieces one by one into the beautiful curry. Put the lid on the pot and that's it! DONE! The partially cooked fish cooked up prefect in that hot curry.
    5. Before serving, garnished with some fresh green cilantro. 


    The delicious fish & potato curry!

    I love the versatility of this 4 ingredient curry base. I mean, you can use it to of course make curries (veggie or meat). You can even use this same base for rice pilafs too. Oh, this stuff is so yummy- you can sometimes just use it as a spread or a chutney!

    I served this fish & potato curry with some plain streamed rice.I was right--- it did turn out pretty darn good!