Wednesday, December 27, 2017

Food Post #207: And it's a Wrap

This year is almost over!! Just to wrap things up, here are my food highlights from this year:


1. January: Aam ki Sabzi or Raw Mango Relish


2. March: Salmon over Couscous, and Sautéed Veggies etc  Sunset Dinner Cruise


3. August: 

3.1. Outstanding Food (as ever!) in India!! India Trip 


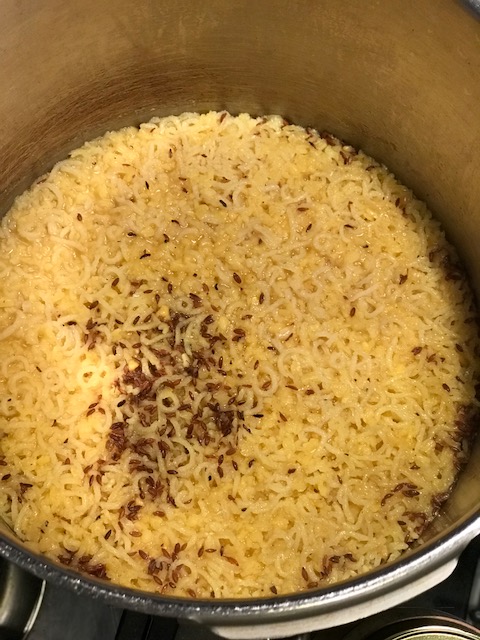
3.2. Bitter Gourd "gojju"- delicious hot, sweet, and tangy preparation made with bitter gourd and spices. Bitter Gourd Gojju


4. November: 

4.1. Muhammara- delicious Mediterranean style dip made with roasted red bell peppers, walnuts, and pomegranate. Recipe for Muhammara


4.2. NOT Shrimp Vindaloo- shrimp in a delicious sauce made with poppy seeds, ginger, coconut, and other spices. Recipe


5. December: My very awesome "vegetarian" Lamb Curry. I think this is definitely My Dish of the Year. Lamb Curry without onions and garlic


So there, that's my food highlights for the year 2017. Let's see what I cook, and eat in the New Year! :)

Wait, I do want to end this post with a brilliant quote. This was uttered by my darling friend from school, Nanda. As with many such casual utterances, these words just came out. And man, was I amused!! Quick backdrop: we were both trying to encourage one another, and trying to lift up our spirits. You know, we too have had our share of heart breaks and heart aches..... and in trying to uplift one another, these brilliant words came out from her mouth: "We are ahead of time and human intelligence. That's why nobody understands us!" We both burst out laughing. Now that's some serious stuff.


Wednesday, December 13, 2017

Food Post #206: Vegetarian Lamb Curry

Here's a lovely recipe for not-your-typical-lamb curry. Bengalis call it "vegetarian lamb," and I believe Kashmiri Pandits also make this dish. It is "vegetarian" because they don't use onions and garlic. Funny! How do you make lamb curry without onions and garlic?? Well you see, you can.

Yield: 4 adults 

Cooking time: 1 hour 30 minutes (in a pot) 

Ingredients: 

1. Lamb (cut for stew)- 2.5 lbs

2. Fennel Seeds- 4 tbs

3. Cumin- 4 tbs

4. Cinnamon powder- 1/2 tsp

5. Cardamom- 4 pods

6. Cloves- 4-6 

7. Bay Leaves- 2

8. Asafetida (hing)- 1/2 tsp

9. Ginger- 1.5 inch

10. Green Chilies- 8-10  

11. Buttermilk- 1 bowl (or yogurt- whipped)

12. Cooking oil- 8 tsp

13. Ghee (clarified butter)- 2-3 tsp

14. Water- 1 cup (adjustable) 

15. Saffron- a good pinch or two

*Soak saffron in buttermilk (or whipped yogurt) at the beginning of the cooking process

Method: 

1. Powder ingredients 2 to 8 in a small coffee grinder, and set aside. 


2. Make a coarse paste of ginger and green chilies, and set aside.  


3. With some cooking oil plus ghee in a thick bottomed pot, get the heat going, place lamb pieces one by one, allowing one side to brown up. Then turn over to brown up the other side. This shouldn't take too long- say about 5-7 minutes on high flame. 

4. Now add the dry spice mix we made in step 1 to this, and fry for a couple minutes, followed by the ginger green chili paste. Stir everything together. At this point, enticing aromas will begin to emanate from the lamb and spices. 


5. Now add a cup of water, or enough to barely cover the lamb pieces. Add salt to taste. Bring to boil, cover, reduce flame, and simmer for 30 minutes. 


6. At the end of 30 minutes, uncover. At this point, I like to break the lamb into smaller bite sized pieces with the help of the ladle itself. The lamb will still be a bit tough. Cover again, and simmer for another 30 minutes. Now the lamb will be nice and tender, just the way I like. Add some more water, as the liquid would have reduced at the end of 1 hour.  

7. Now slowly add the buttermilk with saffron, while stirring the curry as you pour the buttermilk. Bring to boil, reduce flame, cover, simmer for about 8-10  minutes.  


Buttermilk with Saffron 


Delicious Lamb Curry


8. For a final touch, add some freshly ground pepper, and a couple chilies slit lengthwise. Serve with steamed rice. A side of quickly sautéed greens such as swiss chard and spinach goes very well with this lovely lamb curry and rice. 


Lamb curry over a bed of rice, with some swiss chard on the side

See? You can in fact make curry, that too lamb curry (!!) without using onions and garlic, and red chili powder, and tomatoes. It's turns out as delicious as ever. 

Wednesday, December 6, 2017

Food Post #205: Who Made These Rules Anyway

There's rules everywhere. All. The. Time. I have learned to make peace with most (unspoken) rules.... can't do much, that's how it is. But of late, I am having trouble understanding social rules. I have to be politically correct all the time, else someone might get offended. I have to watch what kind of jokes I cut around people, else someone might get offended. Even if something is bothering me, I have to fake it, and just shut up, because my saying anything, might result in someone getting offended. Even if someone offends me (I too have an ego, you see!), I have to just suck it up, else I might offend the offender. The only person I can really be me is with myself.

They have cooking rules too. And there's pasta rules as well. Yes, "pasta rules." Cook it al dente. Cook it in salt water. Do not use oil in that salt water when you cook that pasta. If it's pasta with fish, do not use cheese. Every pasta is to be cooked differently according to its shape. One time a friend commented- you put peas in your pasta?? He seemed to be appalled. I mean, what's wrong with putting peas in pasta? Heck, what's wrong with putting cheese on fish? I'll put peas, fish, and cheese in my pasta, for all I care! Cooking the pasta al dente seems like a reasonable tip; I say tip, not rule. But other than that, it's up to the cook, in this case- me, to use whatever ingredients I want in my pasta. I'll follow pasta rules if and only if a *true Italian cook* tells me that these are indeed the rules to cooking perfect pasta. Then again, maybe I won't! The only person that rules in my kitchen, is me!  


My No Rule Pasta with Mushrooms, Artichokes, Pimento Stuffed Olives, Corn, Capers, Crushed Hot Chili Garlic Sauce, and Torn Basil, topped off with Grated Parmesan 


Pasta a la Appi


Thursday, November 30, 2017

Food Post #204: Mediterranean style Muhammara

I am excited to present to you a brand new dish that I made yesterday- Muhammara- a delicious, red colored, peppery, lightly sweet, tart, and nutty Mediterranean style dip. I ate this on a plane ride from Seattle to Dubai a couple years ago, and I quite liked it. It's a great addition to that Mezze platter that you can serve as an appetizer at your next party.

The traditional key ingredients in Muhammara are roasted red bell pepper, aleppo pepper, walnuts, and pomegranate. Now as it often happens in my home kitchen pantry, I don't always have all the ingredients at one time for one dish, and so then I make do with whatever there is available. In this case, I didn't have any walnuts, nor aleppo pepper, so I decided to use almonds instead, and some reaper chilli flakes. My friend had given me some sumac, a tart spice (very similar to the Indian anaardana) a few months ago, and I was delighted because I could finally use some of it in this dish! :)

The only longish step in terms of time is roasting the bell pepper. Once that is done, it takes under 10 minutes to whip up this tasty as well as super healthy dip.


Muhammara 


Ingredients:  

Red Bell Pepper- 2

Almonds- 2 tbs

Garlic- 2 cloves

Pomegranate- 2-4 tbs

Chilli flakes- 1-2 tsp

*If using reaper chilli flakes which are VERY HOT, a pinch will do

Salt to taste

Sumac- a pinch

Method: 

1. Wash bell pepper, wipe dry, brush oil all over the bell pepper, place in an oven safe pan/dish.


2. Broil under high setting for 10-12 minutes each side. The idea is to char the skin of the bell pepper.


3. Set aside to cool.

4. After it has cooled off, remove skin, and the stem. The seeds will come off with the stem, which is exactly what you want.


5. Cut this roasted, peeled red bell pepper into strips, and transfer into your food processor. Add some chili flakes, and salt to taste.


6. Toast some almonds, and add a couple cloves of garlic to the toasted almonds to soften them up a bit.


7. Add the above to the bell pepper in the food processor. Also add some pomegranate seeds to the same. Blend it all into a nice dip.


8. Transfer into serving dish. Garnish with pomegranate seeds, sumac, and a drizzle of good olive oil. Serve with some warm pita, crackers, or vegetables.


Tuesday, November 28, 2017

Food Post #203: When Life gives you Lemons.....

...... set them aside on the countertop for a bit, go back to your refrigerator, open the door, take the container with leftover black beans from the previous night out, shut the refrigerator door, place the container on the countertop beside the lemons, and then just stare at the lemons, and the container with the leftover black beans. Continue staring for a few minutes. Take your time, no rush, it's all good! After a few moments the loud chattering in your brain will slow down, and soon you might experience the brain shutting down, which will result in sheer bliss. And then all of a sudden, it arrives- the eureka moment! You wake up from the blissful stillness, nice and fresh. With that same bliss still lingering inside you, you head to the kitchen drawer where you have stashed away some luscious dark chocolate. You take it out of the drawer, look at it very lovingly, rather lustfully, and then snap a piece off the bar. You know exactly what to do. You know exactly what to make. You put a couple tablespoons of black beans into your nifty blender. There's no need to add any seasoning or flavor to that, because you had already jazzed it up last night.  You go right ahead and process it into a nice thick saucy consistency. You transfer this black bean puree into a tiny pot, get the heat going, and slowly add that dark chocolate into it. As you stir the two together, the chocolate will melt into the black bean puree, and soon you will have created a beautiful dark chocolate colored luscious, delicious, sexy dip. Perfect with some warm tortilla chips, or warm bread sticks, or with sesame toast. Yum! As for those lemons, you have a few options:

Option 1: You pick them all up one by one, and put them back in the fridge. They'll still be there, though, mind you!

Option 2: I guess you could make lemonade, and drink it up.

Option 3: Even better, make margarita. It'll go well with that black bean chocolate dip and warm chips!


Black Bean Chocolate Dip 


Monday, November 27, 2017

Food Post #202: How to Move On

Here's the bitter truth about life: It never goes according to your plan(s). It involves failure, rejection, disappointment, disillusionment, etc. They say when you have the right intention, everything falls in place. Heck, no! Sometimes, even if you have/had the healthiest of intention(s), everything goes wrong. Our attempts at repairing also end up being futile, and sheer waste of time, and energy. So what should be done when things don't work out, and are irreparable? Well, first take a deep breath in, then pick yourself up, dust off, take that pile of "failure," and dump it down the garbage disposal. Don't forget to breathe out!  

I'm Just Not That Into You Smoothie


Hmm, looks pretty toxic to me! 


Ingredients:

Frozen spinach- 1 cup

Carrot- 1 medium

Potato- 1 medium

Apple- 1 medium

Agave syrup- 1 tbs

Water- 1 cup

Method: 

1. Blend all the above ingredients in a vitamix or similar blending machine

2. Pour into glass

3. Take a sip

Rest is really up to you. Good Luck!  

As for me, I took one sip. I took a second sip. I took a third sip. And then my heart spoke to me, and said- you know what, you have tried enough. Enough is enough! Woman, just go ahead, and get rid of it. Me: Maybe adding another tablespoon of that agave syrup will do the trick....? No. Maybe I could convert it to a soup of some kind....? NO! So I picked up that container with the remaining terrible smoothie, poured it down the sink, switched on the insinkerator, and called it a day. 


Dump it, and Move On!! 


Saturday, November 25, 2017

Food Post #201: Khichdi

Khichdi is the perfect dish to make and consume when one faces certain situations, some of which I list as below:

1. You don't know what to cook

2. You know what to cook, but are feeling lazy

3.  You are sick and tired of eating lavish foods, and your tummy needs some TLC

4. Extrapolating #3: Your tummy has had it, and you are sick and tired of popping those fruity, calcium rich Tums into your system. Your tummy needs some TLC

5. You are suffering from a fever, or a cold, or a cough, or a cold and a cough, or a fever, a cold, and a cough

6. You desire for some comfort food, and are quite tired of eating soup

7. You need to cook something ASAP

8. You miss the time when your kids had just started eating solid foods, and all you needed to cook for them was khichdi, and they would eat it up very happily

9. You remember your childhood when Mom used to cook khichdi for you, and the rest of the family on certain occasions. I am pretty sure she too encountered the aforementioned situations that drove her to cooking this wonderful dish. And I do say "wonderful" without any ounce of sarcasm. Really! No, really!!


The Very Basic Khichdi made with Rice and Mung Dal 

Yield: 2 adults

Ingredients: 

Rice- 1/2 cup

Mung dal- 1/2 cup

Asafetida (hing)- 2 pinches

Cumin seeds- 2 tsp

Turmeric powder- 1/2 tsp

Pepper- fresh ground- 2-4 tsp

Oil or Ghee- 1 tablespoon 

Salt to taste

Water to cook- 2-4 cups 

Method: 

1. Wash rice and dal and keep aside. Meanwhile in a pressure cooker, pour in some oil or ghee, or a combination of oil and ghee, get the heat going, add a couple pinches of asafetida, followed by cumin seeds, turmeric, and pepper powder. Then throw in the washed rice and dal. Stir for a minute or so. 

2. Add water. I like my khichdi a bit "watery," nice and mushy. If you prefer it dry- then add only double the quantity of water. Add salt to taste. Cover lid. Pressure cook for 5 minutes. Done! 

Khichdi almost ready to be eaten!


3. At this point the khichdi is ready to be eaten. I like it a bit mushy, so I stir it and make it so. Then add a bit of ghee (yum!), and eat away. Some Indian pickle on the side is a good way to eat it. Or perhaps some sliced onion. Or just some plain yogurt. Any way you like it! 

Mushy khichdi for me please! 


Khichdi with some ghee and Indian pickle on the side- Yum! 


Friday, November 24, 2017

Food Post #200- Just Do It

Slightly altered blogpost title from "Daily Food Post (#8)" to Food Post #200. This is my 200th post here! Finally! I started off very enthusiastically way back, and then slowly became irregular, then kinda stopped completely, and then did some intermittent posting- it took a lot of effort on my part, really. And then just last week I decided that I just gotta do this. I remember saying to people when I'd mention this food blog- "Oh, I don't post regularly. I post when inspiration hits me." Okay- that's a whole load of, err, rubbish. I realized that if I continue waiting for that "inspiration" to "hit" me, it'll never happen. And therefore, I told myself- woman, just do it!

Corn Upma 

It is only recently that I got re-introduced to corn upma. I like the simplicity of the dish. It's simple, quick, and delicious, as well as healthy. Wait, then again, that's how most of my cooking is. 

Ingredients: 

Frozen Corn kernel- 2 cups

*This dish will taste way better with fresh corn kernel rather than frozen. If using fresh, it may require using a little bit of water to aid in cooking the corn. It will also take a bit longer to cook

Onion- 1 small, chopped

Green chilis- 2-4 (or 6!), slit and chopped

Coconut- grated, 1/4 cup

Mustard seeds- 1/2 tsp

Asafetida (hing)- a pinch

Oil- 3-4 tsp

Salt to taste

Cilantro to garnish

Lemon juice- a dash


Delicious Corn Upma


Method: 

1. Heat pan with some oil. Add a pinch of asafetida (hing), splutter mustard seeds, add chopped onion, green chilis, and fry for about 5 minutes, or until cooked. 

2. Throw in the corn, add salt to taste, stir fry for another 5 minutes. 

3. Add grated coconut, and cilantro. Mix. Squeeze some lemon juice, and it's ready! 


Yummy! 

It takes under 10 minutes to whip up. It's almost like corn salsa. I like to eat it as it is. It could possibly be eaten with tortilla chips, or in tacos. The fried onions, and the heat from the green chilis, and the coconut make this dish delicious. And it's corny!  


Wednesday, November 22, 2017

Daily Food Post #7: Not Shrimp Vindaloo

I wanted a change of color. That's what drove me into making this beautiful dish. I came up with this recipe myself, no googling involved, whatsoever! Now am not sure I can claim sole proprietor rights to this recipe because, well, I have found that recipes are pretty universal, and somebody in some other part of the world would have made something similar. But just to humor myself, I'll say that this is indeed my innovation. About me wanting a change of color- well, Indian curries that I make, often end up being red and/brown because of the use of ingredients such as tomatoes, tamarind, and/or garam masala. I decided not to use any of these.

Shrimp simmered in a poppy seed, ginger, coconut, and mustard sauce, with a hint of flowery cardamom, spicy cinnamon, and a little bit of pleasurable heat from thai chilies:

YUMMY! 


Ingredients: 

Shrimp 1 lb (can use raw or pre-cooked)  

Poppy Seeds 2 tbs

Cardamom 4-6 pods

Cloves 4-6

*Toast the poppy seeds, cardamom, and cloves for a couple minutes to enhance flavors

Coconut- grated, 2-3 tbs

Ginger 1.5 inch, chopped

Garlic 2 cloves (garlic powder okay)

Green chilis (thai) 4-6 or up to your preferred heat level

Cinnamon powder a pinch

Mustard seeds 1/2 tsp

Cooking oil 4-5 tsp

Water 1/2-1 cup (adjust according to your liking)

Salt to taste

Freshly ground pepper 1/2 tsp


Poppy seeds, cardamom, cloves


The sauce base

Method: 

1. Coarsely grind toasted poppy seeds, cardamom, cloves, coconut, ginger, garlic, and green chilis in a food processor. Can use a little bit of water to aid in the grinding process.


Coarsely ground poppy seed- coconut- ginger- garlic- chili- cardamom-clove 


2. In a pot, with some oil, splutter mustard seeds, and transfer the above ground masala into it, quickly fry for about 3-5 minutes. Add 1/2-1 cup of water. Bring to boil.


3. Then fold in the shrimp into this. Add a pinch of cinnamon powder, salt to taste, and some freshly ground pepper. If using pre-cooked shrimp, lower flame, and simmer for 5 minutes, to marry all the flavors. If using fresh shrimp, well, that'll take ~5 minutes to cook, and then simmer to marry all the flavors. :)

Shrimp in beautiful sauce 

And it's ready! It's a lovely gingery-coconutty-flowery-mildly hot and spicy curry, perfect for these winter nights. Serve with hot basmati infused with saffron- YUM!

You don't always have to cook shrimp vindaloo, you know! ;)


Tuesday, November 21, 2017

Daily Food Post #6: Aloo Palak Sabzi

Here's a jhatpat (super quick) recipe for a potato and spinach preparation, spiced very simply with asafetida, and spluttered mustard seeds. Eat with roti or parantha, or as a side dish with rice and lentils.

Aloo Palak Sabzi


Ingredients: 

Spinach- 1 lb, coarsely chopped

Potatoes- 2 medium, boiled and chopped into bite sized pieces

Garlic- 2 cloves, smashed

Tomato- 1 medium, chopped

Mustard seeds- 1/2 tsp

Asafetida- a pinch

Cooking oil- 3-4 tsp

Crushed red pepper 1/2 tsp

Salt to taste

Method: 

1. In a pan with some oil, get the heat going. Add a pinch of asafetida, and splutter mustard seeds

2. Add smashed garlic, crushed red pepper, followed by spinach. Sauté a bit, add salt to taste, stir, reduce flame, cover pan, and allow to cook for about 5-7 minutes

3. Now add the chopped boiled potato, and tomato, give it a stir, cover, and cook for an additional 5-7 minutes

Done! Easy as that!

Serve with hot rotis or paranthas and plain yogurt on the side. Or eat as a side with hot rice and dal. It's simple, delicious, and healthy.


Monday, November 20, 2017

Daily Food Post #5: Nachos

It was only recently that I found out the history behind one of the most popular food items in America- Nachos. Quite intriguing, really, how something so simple, and tasty, actually has history attached to it. For starters, I had my own doubts about whether or not this dish was even truly Mexican. You know, like General Tso's Chicken, and Cauliflower Manchurian- that aren't actually Chinese. Or heck, the food served at most Indian restaurants here showcasing paneer tikka masala, tandoori chicken, chicken tikka masala, and naan (highly highly overrated) on their menus, as if these dishes encompass the entirety of *all* Indian cuisine. So not correct!

Going back to Nachos- so apparently back in 1943, in Piedras Negras, Mexico, Ignacio "Nacho" Anaya, the headwaiter at the Victory Club, threw together this dish with some tortilla chips, cheese, and jalapeño poppers for a bunch of hungry army wives. He called it, Nachos Especiales. The hungry ladies were very thankful to Mr. Nacho, and started eating. The warm, crispy tortilla chips topped with ooey-gooey melted cheese, and spicy jalapeños totally made their day. They felt satiated at the end of the meal. When they asked him for the recipe, he was nice enough to give it to them. And then, you know how it goes- people talk, news travels, recipes travel too, and the nachos recipe somehow got into the hands of this one Frank Liberto in Texas. Mr. Liberto altered the recipe by coming up with cheese sauce, which in fact is supposedly not even cheese! Go figure! However, unlike good old Ignacio "Nacho" Anaya, who readily gave away the recipe to his innovation, this latter dude did not believe in divulging the recipe to the cheese sauce created by him. So that's a trade secret. He built a company, made money, and now his son runs the company. Meanwhile, when the original Mr. Nacho died in 1975, they built a bronze plaque in his memory, and declared October 21st as International Day of the Nacho. But then they call Mr. Liberto as "The Father of Nachos." I suppose they ought to call Mr. Nacho as the Grandfather of Nachos? Those hungry women who first tasted nachos, and spread the original recipe around- are they the Grandmothers of Nachos? Also, did someone build bronze plaques in their memory?    

Interesting read: History of Nachos. There's plenty more articles up there on the internet..... the only thing I haven't found is an image of that bronze plaque they made in memory of Ignacio Nacho. Guess that calls for a trip to Piedras Negras one of these days. I am truly curious to see if it actually exists. 


And now for my version: Spicy Chicken Nachos


Appi's Spicy Chicken Nachos


Ingredients: 

Note: Quantities will vary depending on the number of people you are cooking for, and/or how much you want (them) to eat! Gotta go the eyeball route...
*Your favorite tortilla chips

*Cooked chicken- taco style- i.e. with taco or fajita seasoning. I use onions and bell pepper when I cook chicken for tacos/fajitas

*Pepper jack cheese

*Sharp cheddar cheese

*Fresh jalapeños chopped your style (fine or discs or slit.... )

Method: 

1. In a lightly greased baking dish, layer all the ingredients, starting with the chips. On the chips goes the chicken. On the chicken goes some jalapeño. On that goes some grated cheese. You could layer that again with more chips, chicken, jalapeño, and cheese 

2. Bake the above in a 350 degree F oven for 10 minutes, or until the cheese melts 

3. Broil off for a couple minutes to brown the cheese 

4. Optional: Garnish with more jalapeño or some fresh pico de gallo or perhaps some guacamole or just plain chopped avocado. A dollop of sour cream will also go pretty well with these spicy nachos. 

5. Dig in, just like those hungry women did all those years ago when Ignacio "Nacho" Anaya served them that first ever plate of Nachos Especiales. Be sure to try this recipe, and spread the word. 

Maybe many years from now, somebody will build a bronze plaque in my memory too... and then some more years later, someone will write about me and call me the "Mother of Spicy Chicken Nachos!" Hey, I am allowed to fantasize a little bit!! Incidentally, the year this "Nacho" dude died, is the year I was born! Now that definitely adds to the intrigue! 


Sunday, November 19, 2017

Daily Food Post #4: Masala Omelette

The Sunday morning masala omelette for breakfast has become a ritual of sorts around here. I am usually a pretty no-fuss kinda person when it comes to food, but in case of an omelette, I have certain specifications:

Specification #1: I like mine with everything please. Everything includes at least four of these- onion/green onion, tomato, green chilli, mushroom, ham, cilantro, spinach, broccoli (you read that right), corn, red chilli powder, and grated cheese, preferably sharp cheddar or pepper jack. Salt and pepper are the default ingredients of course.

Specification #2: I like mine to be browned up a bit, no very french yellow fluffy omelette for me, thank you very much. I am not French.

Specification #3: I like mine to be cooked in oil, not butter.

Specification #4: I don't really care whether or not you incorporate milk in the eggs while beating them. I absolutely don't see how milk contributes anything to a masala omelette.

Specification #4: When you add that cheese, please crisp it up.

Specification #5: Give it to me nice and hot.

The above specifications have been finally understood by my husband. And he is now able to make a decent omelette for me pretty much every Sunday. He makes it lovingly, and gives it to me exactly the way I want, while I sit on the couch, watching the birds outside the window.

This morning's omelette had green onion, green chilli, tomato, spinach, and pepper jack cheese. It was delicious!


Yummy Masala Omelette


Saturday, November 18, 2017

Daily Food Post #3: Roots

I watched a short film on National Geographic- Scent of Geranium. It's about an Iranian girl who moves from Iran to America, and she talks about homesickness, and her struggle while being an immigrant in a brand new land. She remembers her mother's words: It takes time for damaged roots to settle into new soil..... and then over time, the plant establishes itself and grows and thrives and flowers. Fair enough, I thought. At the end of it, I felt mildly amused at myself. I realized that I still possess damaged roots! It will be twenty years in December this year since I was "uprooted" from the land where I was born. I think that I have managed to establish, grow and thrive, and flower in this "new" land..... and yet, somehow, the roots are a bit damaged. I have a home here, and yet, I miss being there. I have loved ones here, and I miss my loved ones there. All in all, it's quite a torn kinda situation.

I forwarded the link to the short film to my dear friend, Lara. She responded, and I quote: 

"Yes. Although, as a plant person, it's good to have damaged roots a bit. That's the point where growth happens most, and it anchors you strongly. When we transplant from containers, we scarify and loosen the roots at the bottom, so that they spread and settle in the soil. If we don't do that, the root(s) keep circling around itself (themselves) in the original container shape. Especially in trees- they can choke." 

I read and re-read, and realized the profundity of these words. Thanks, Lara!! I feel fortunate to have a friend like you!

So there, that's my food post for today- it's food for thought. :)

Here's that 4 minute short film: Scent of Geranium

Bee and Flower

Friday, November 17, 2017

Daily Food Post #2: Chicken and Waffles

The other day I suddenly got this unexplainable craving for some chicken and waffles. I opened the freezer and found an old frozen waffle package. There were exactly two waffles in there, hidden somewhere behind the thick ice that had formed over who-knows-how-many-months. But hey, after chipping off that ice, I found the waffles to be in perfect condition. Definitely 'toastworthy' and edible, whispered the foodie from within me. Now what about the fried chicken? No problem! I am one hecka smart person. And so I picked up the car keys, wore those dorky running shoes that I use for walking, sat in the minivan, ignited the minivan (okay, I just wanted to use the term ignite like that) and headed straight to the nearest McDonald's. Picked up a four piece crispy chicken tenders, and rushed back home. I was excited!! 

Appi's Chicken and Waffles 

Here's how you satisfy that sudden out-of-the-blue craving for chicken and waffles: 

Ingredients: 

Frozen Waffles- 2 

Crispy chicken tenders from your nearest McDonald's- 4 piece 

Syrup of choice OR when they ask you what sauce you want at McD's, ask for honey! ;) 

Method: 

1. Toast the waffles 

2. Place a crispy chicken tender or two on each waffle

3. Drizzle some syrup, such as agave or maple or good old honey, all over the chicken and waffles

4. To fancy it up a bit, sprinkle some smoky chipotle pepper powder 

5. Eat, and enjoy! 

YUM! 


Thursday, November 16, 2017

Daily Food Post #1: Warm Yellow Corn

Considering the rather infrequent posts around here, the reason behind which is that I don't cook extravagantly every single day. I am not a famous chef in any snooty restaurant, or heck, in ANY restaurant, snooty or otherwise. I am just another regular home cook. Now that the disclaimer has been taken care of, I have decided to go the Instagram way. And so here is today's food post:

Warm Yellow Corn, a perfect quick meal for a cold rainy afternoon in Seattle  


Ingredients: 

Frozen yellow corn kernel 1 cup

Salt to taste

Freshly ground pepper 1/2 tsp

A pat of butter

Lemon juice- a squeeze

Method:

1. In a microwave safe bowl, pour in a cup of frozen yellow corn kernel straight out of the package.

2. Run it on high for a couple minutes, until it is nice and warmed up.

3. Add salt to taste, some freshly ground pepper, and a pat of butter. Mix it, and run it on high for another 30 seconds to a minute.

4. Mix, add a squeeze of lemon juice, and eat away!


Sunday, August 27, 2017

Green Smoothie

This is rather out-of-norm for me to be posting here- a smoothie recipe of all things!! I was quite surprised at how tasty it was, not to forget, feelings of "ooh-I-got-some-healthy-stuff-inside-of-me" gave me quite a high. 

Yield: Enough for 1 adult 

Best kitchen gadget for this: Vitamix. Any other blender should work, I suppose. 

Ingredients:  

Frozen Spinach (do not thaw)- 1 cup

Banana- 1 medium

Yogurt, plain- 1/4 cup

Water- 1 cup

Agave Nectar- 1 tbs

Method: 

Put all ingredients into the Vitamix. Blend on high for about a minute. Pour into glass and drink. Easy, super healthy, super delicious, and 100% guilt free! Yes, really!

Yummy Green Smoothie

Healthy Stuff! 


Monday, August 14, 2017

Bitter Gourd Gojju Feedback

I am pleased to inform you that the gojju recipe that I posted a couple days ago has been tried and tested with positive results. Yash, from Wisconsin followed the recipe and said that it was delicious! She even sent me a picture! It looked exactly like the picture I posted. She changed it up a bit in a couple places: instead of using bitter gourd (she is not a fan of this unfortunate bitter beauty like I am!), she used eggplant and bell pepper. Nice! And she reduced the quantity of the red chilies by half. Okay, yeah, I completely understand that not everybody likes their food screaming hot and spicy. ;)

Thanks, Yash! Glad you and your family liked the gojju!

Yash's Eggplant Bell Pepper Gojju

Just to show you how similar the above picture is to the picture I took:

Bitter gourd Gojju

Saturday, August 12, 2017

Kakarakaya Gojju- Hot, Sweet, Tangy Bitter Gourd

If you are thinking- what on earth is kakarakaya gojju, here, allow me to explain:

Kakarakaya is the Telugu name for bitter gourd, aka bitter melon, whilst Gojju is a Kannada word that means, and this is my interpretation- a mishmash of vegetables such as onions, tomatoes, okra, aubergine/eggplant, capsicum/bell pepper, etc, and of course, bitter melon. Fruits such as pineapples, apples, grapefruit, raisins, etc can also used to make gojju.  The final flavor profile is hot, sweet, and tangy. So I suppose one could call it ketchup or jam of sorts, or achaar or a chunky pickle or a chunky salsa. The optimum way of enjoying gojju is by mixing it up with some cooked rice, and adding a spoonful of ghee to it. YUM!

Bitter gourd is called karela in Hindi, and haagalkaai in Kannada. According to yours truly, only the elite foodies like this bitter beauty. For reasons unknown to me, most people cringe at the mere mention of bitter gourd. 

Now that the meanings are out of the way, here's a recipe for kakarakaya gojju that I learned from my sweetie's grandma. It's easy, and tastes delicious.


Ingredients: 
Yield: Enough for 2 karela-lovers

1. Sesame seeds- 4 tbs
2. Cumin seeds- 1 tbs
3. Urad dal- 1 tbs
4. Red chilis- minimum 7 (If you don't  have red chilis, can use red chili powder- 4-5 tsp)
5. Black pepper powder- 1-2 tsp
6. Mustard seeds- 1-2 tsp

7. Bitter gourd from the Indian store- 4
8. Oil- 7-10 tsp (skip skimping!)
9. Turmeric powder- 1 tsp
10. Asafetida (hing)- 1/2 tsp
11. Salt to taste

Quantities of the following two ingredients depend more on your preference for sweet and tang, so adjust accordingly:

12. Jaggery powder- 4 tbs
13. Tamarind pulp- 4 tbs

14. Water- 1/4-1/2 cup, to adjust consistency of gojju according to your preference

Method: 

The gojju masala:

1. Dry roast ingredients 1 through 6 until the mixture turns fragrant, and the sesame seeds begin to "dance" in the pan (and may start jumping out of the pan too!), and the urad dal turns brown.

*If using red chilis, add them towards the end, else they will burn. If using red chili powder- it can be added directly to the bitter gourd.

2. Transfer to a food processor or a coffee grinder and pulse into a fine powder. Set aside.

The bitter gourd:

Note: I have become a hardcore bitter gourd fan, and so now I merely wash it, chop it, cook it, and eat it. I don't do the whole pre-prepping by soaking in turmeric and salt, and then squeezing the bitterness out. I mean, instead I might as well suck on a honey stick!

1. In a pan, add 7-10 tsp of oil, heat, add a pinch of asafetida (hing), splutter 1/2 tsp of mustard seeds, and then throw in chopped bitter gourd, as well as a pinch of turmeric, followed by salt to taste. Stir fry for 5 minutes on high flame, and then sprinkle some water, lower flame between medium and low, cover, and cook for another 10 minutes, until the bitter gourd is tender, and yet retains some crunch.

2. Uncover. Add gojju masala to the above and stir. Add some water to thin it out a bit. Now add tamarind pulp and jaggery. Stir. The sesame seeds act as thickening agent, so go ahead and add quarter to a half cup of water. Taste. Add salt and chili powder if required. Taste. Cover again and simmer for 5-7 minutes. Switch off.

Enjoy with hot rotis or rice.

Check out these other bitter gourd recipes that I posted a while ago:

Jalapeno and Bitter Melon

Stuffed Bitter Gourd

Karela Stir Fry