Sunday, November 28, 2010

Gongura Pachadi

The plan was to go visit my brother and his wife this weekend. And so we set off. Loaded the minivan with sleeping bags for the kids, a couple pillows, some clothes and the stuff from the Indian store. The place they live in does not have one single Indian grocery store! And so they usually buy all their stock when they visit us. Now since we were going to visit them, they gave me a tiny list, that included kari patta (curry leaves) and I do know that my sister-in-law is quite fond of gongura leaves as well and so I just bought a couple bunches of gongura as well. Now thankfully I was sensible enough to call my bro when we left the house to tell him that we were on our way. Apparently there was a winter storm warning and he suggested that it would be better for us not to go. Oh well and so we came back home and unloaded everything and I put the perishables back in the refrigerator. So much for our weekend trip!

The botanical name for Gongura is Hibiscus cannabinus and well, I am not sure what the common English term is. I think Red Sorrel leaves.........not sure. Anyway, the leaves are sour like heck and the most popular dish made out of Gongura is Gongura Pachadi, a chutney of sorts, in the southern state of Andhra Pradesh in India.

I was thinking that perhaps I could give the gongura to one of our friends who might actually cook it, rather than letting it rot in the fridge. But I surprised myself by actually going ahead and cooking it myself! My cousin, my sister-in-law and my mom--- all of them gave me one basic recipe that sounded very easy and so I went ahead and made Gongura Pachadi for the very first time in my life!!

 Gongura Leaves

Ingredients:
  • Gongura leaves
  • Green Chillies
  • Red Crushed pepper (my substitute for red chillies- I was out of red chillies......)
  • salt
  • oil 
Method: 
  • I separated the green leaves from their red stems and washed the leaves. I then dabbed the leaves with paper towel to sort of dry them (I must admit that I was a little impatient and so a lot more dabbing would have actually worked better.......).
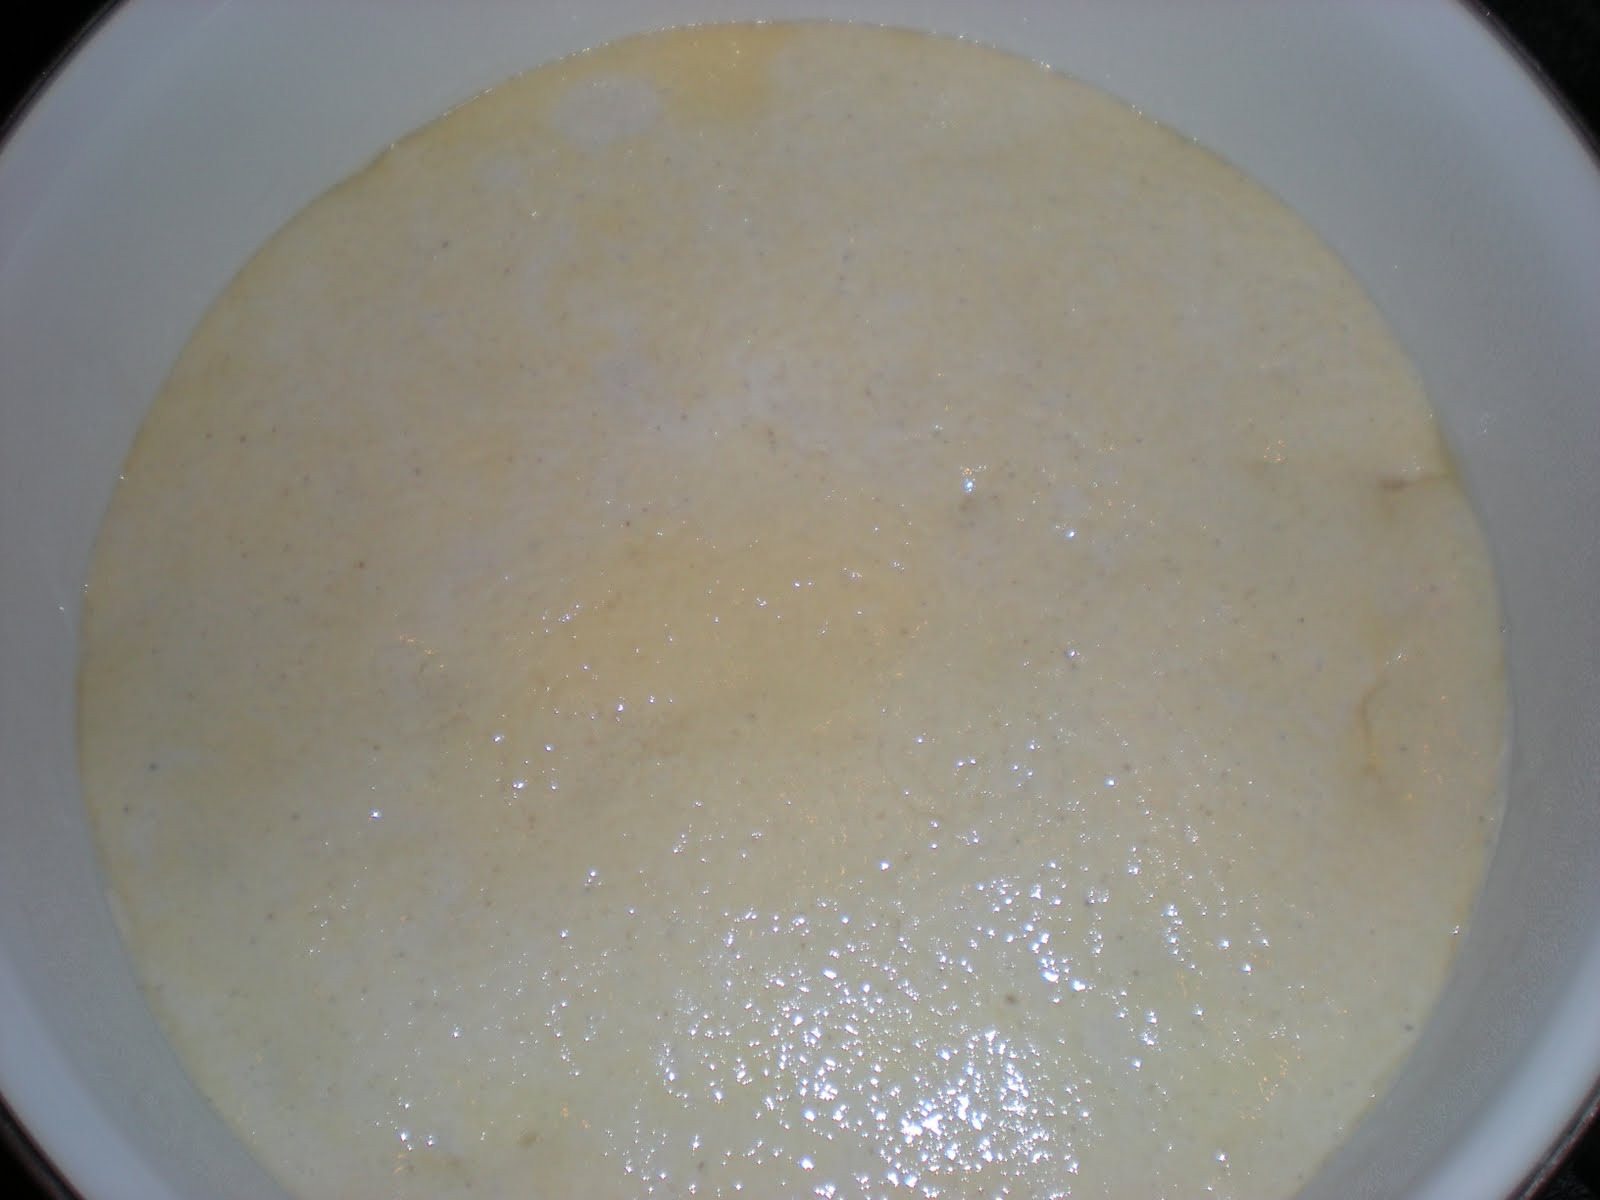
  • I took a nice big pan and poured several teaspoons of oil into it; note: several teaspoons. And got the heat going.
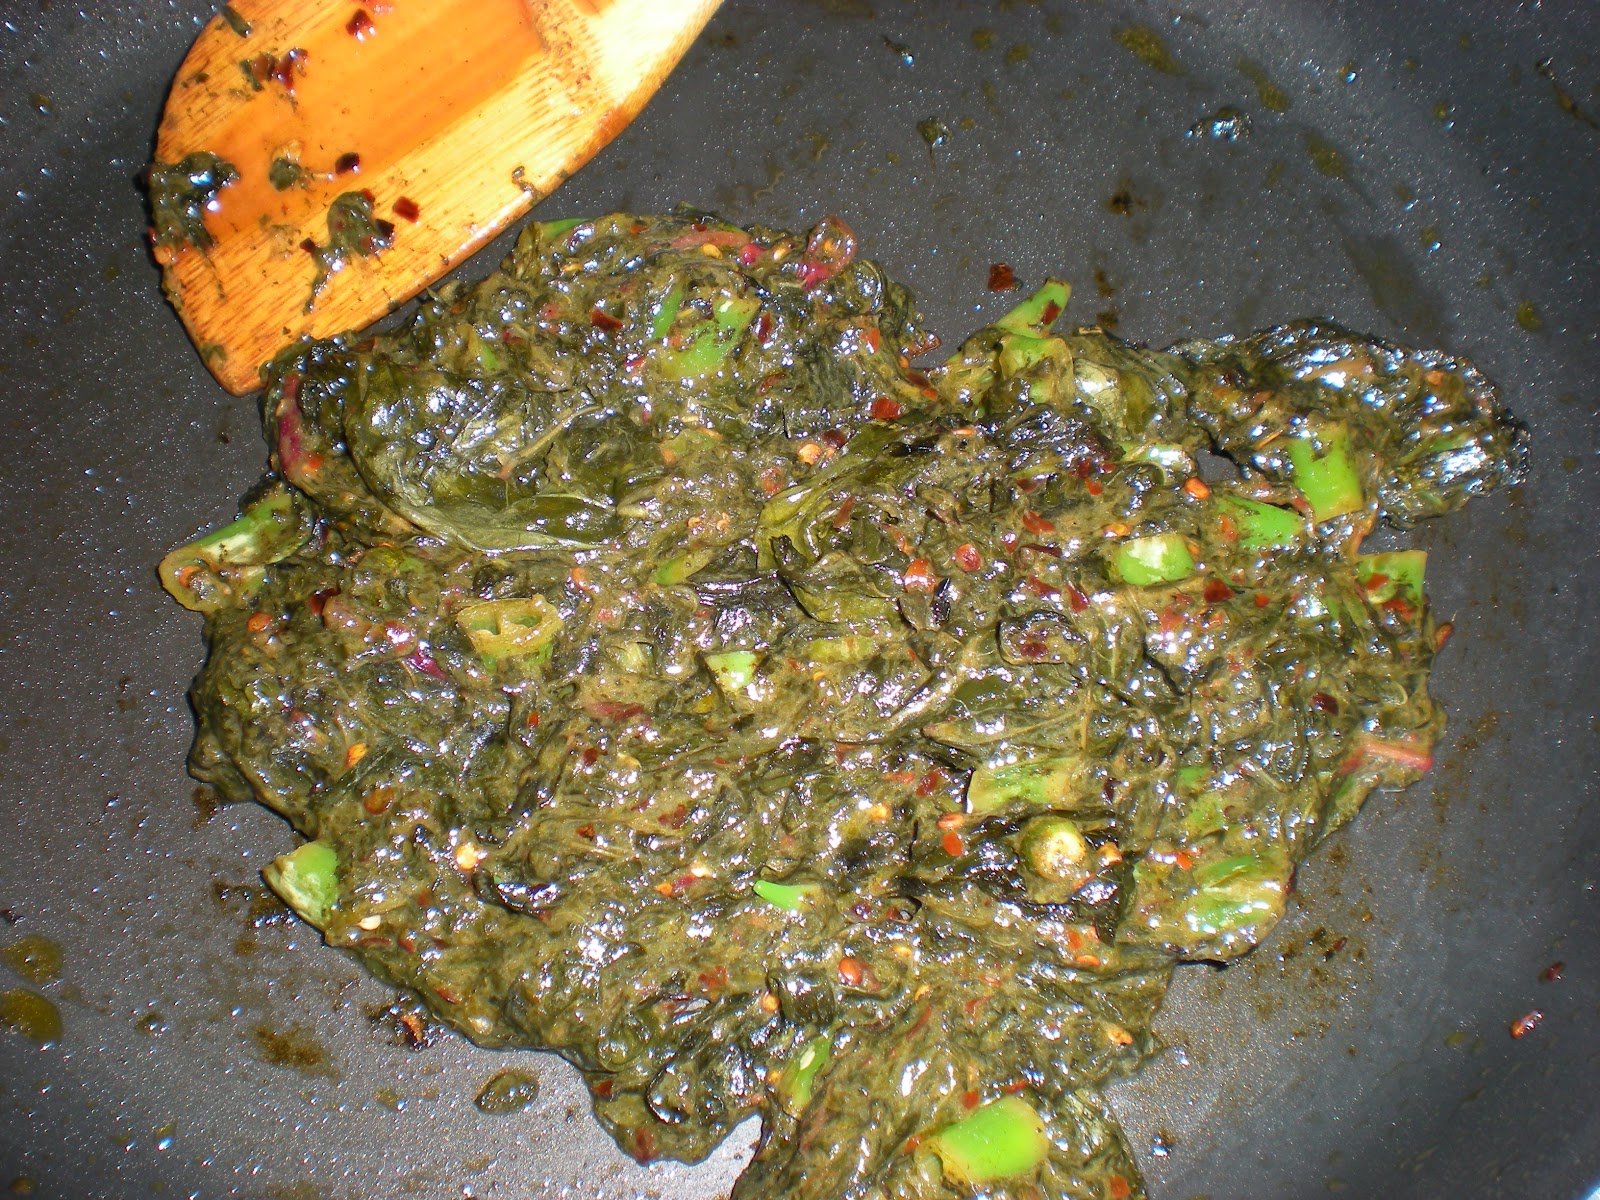
  • I then threw in the washed and dried (err, sort-of-dried in this case) gongura leaves into the hot oil along with the green chillies and the red crushed pepper. I added salt to taste.
  • Fried everything together. Within a minute or so of frying, the green leaves started to turn really dark. My sis-in-law had told me that it would happen. Good, so I was on the right track!
  • Now my mom had told me to fry it all until the leaves turn crispy dry. However, the impatient me (no, no, not lazy!!) decided to stop frying mid-way. Anyway, this was my first time and basically an experiment, right?
  • I turned off the stove and let the fried leaves sit to cool off. I then transferred it into my food processor and pulsed it a couple times into a chutney consistency. There and that's it! The pachadi was ready and hopefully my experiment was a success!
 Gongura leaves washed and dabbed dry with paper towel

All fried up and ready

Gongura Pachadi ready to be eaten!

The Real Way to Eat this Stuff: 

My cousin P had suggested that the real way to eat this stuff is by mixing it with fresh hot steaming rice, a little bit of ghee (clarified butter) and some finely chopped raw onion. That is exactly how my husband and I ate it. It was pretty darn good! There was that sour thing going on as well as the kick from the green and red chillies. As for the onion-- the crunch totally added a joy-factor to the eating!

So my experiment was successful and guess from now on I shall be buying these sour leaves more often. Oh yeah! And I did not let the gongura rot in the fridge.

Now I gotta figure out what I'm going to do with the four packets of curry leaves that are lying in the fridge!!

Tuesday, November 23, 2010

Egg-free and Butter-free Oatmeal-Raisin cookies

You remember how I bought all that hummus from Costco thinking that my kids would love it and actually eat it? And then of course, they never did and I kept using it as a sauce thickener in various dishes.........now one would have thought that I have learned my lesson.

No thanks to that one episode of Good Eats- the one about oats and how oats are excellent for the body, especially the heart etc, I yet again committed a blunder. I bought this box of oatmeal from Costco and placed it in the butler's pantry with a big smile on my face and imagining my kids thoroughly enjoying every bit of that healthy oatmeal every single morning for the next few weeks. I probably knew deep inside that this was a big mistake. Well, they say always listen to your inner voice...........wish I did that more often.

It snowed the whole of yesterday and on account of the 1.5 inches of snow, all schools were shut down today. You see, in this part of the world, we are not used to all this snow and we really can't handle it and hence we all just decide to stay put in our respective homes. Well, it is nice being cooped up in the house for a change and having the fireplace on and feeling nice and cozy, while outside is freezing. And so, around late afternoon I suddenly decided to please my kids by baking some cookies, some oatmeal raisin cookies, to be precise! Yes, the plan was to utilize that oatmeal lying in the pantry.

I think I have mentioned this before- I suck at baking cookies and cakes and the like. Cakes as I understand require a lot of precision. But I kind of figured that cookies should be easier. I mean I have "baked" those ready-to-bake kinds before and I have an idea about the consistency and the general ingredients.

Just as I started to gather up the ingredients, I realized that I was out of eggs and butter. The two most important ingredients! Uhh, what do I do? Well, thanks to the internet, I found this one butter-free and egg-free recipe and I decided to put my own twist to the recipe.

I took:
  • 4 sachets of chocolate chip oatmeal and 2 packets of original oatmeal
  • All purpose Flour (a few tablespoons)
  • maple syrup
  • brown sugar
  • canola oil 
  • vanilla essence
  • raisins
  • cinnamon powder (took a stick of cinnamon and powdered it in my nifty little coffee grinder)
  • baking powder
  • baking soda
  • pinch of salt
  • milk (a last moment addition to rectify the consistency)

Method:
  • I took a mixing bowl and put in all the dry ingredients.
  • I then added a teaspoon of vanilla essence followed by oil and maple syrup.
  • I mixed up everything real well. 
  • I decided to make a few first just to see how it turns out and so I made little balls and patted out little cookies between my palms and placed them on a greased baking sheet.
  • I baked this first batch at 375 degrees for 15 minutes.
  • After the timer went off, I took out that batch and placed the cookies on my little cooling rack. At that point they looked pretty good! I had to try one and indeed it was superb! Crunchy and delicious!
 The first batch (one already in my tummy)

Last moment addition to the cookie dough: I figured it was OK to go ahead and bake the second batch. The first batch was great, but a tad bit too crunchy for an oatmeal raisin cookie. And so I decided to add a little bit of milk to the cookie dough.

I baked the second batch again at 375 degrees, this time for only 10 minutes. Oh that second batch was excellent!! Chewy as well as fluffy!! Yummy!

 The second batch- chewy and delicious!

And fluffy inside!

My husband was bowled over (yes, he was at home today because of the snow......remember?) and could not believe that I made those cookies without eggs and butter! My kids were thrilled! And as ever, I was pretty pleased with myself!

A few more rounds of cookie-baking and I will succeed in finishing all that oatmeal. Yes, yes, I have promised myself not to buy huge boxes of oatmeal and hummus from Costco!!

Thursday, November 18, 2010

The latest sensation- Naanizza!

A few weekends ago we went to Pallino Pastaria and my daughter and I ordered two individual pizzas- one was a chicken-pesto and the other supposedly a "four seasons" pizza. We were all excited (and we were super-hungry) until the waiter brought our orders. I mean, literally, our faces fell upon seeing those little itsy-bitsy things that were placed on our table. To elaborate- the pizza base was basically a naan (we all know what a naan is, right?), floppy, that too! The chicken-pesto naan, oops, I mean, pizza was basically topped with 4 really tiny pieces of chicken, half a teaspoon of pesto and 1 slice of tomato, while the "four seasons" kind was topped with exactly 1 slice of prosciutto, 1 miniature slice of salami, 1 artichoke piece (definitely from a can) and 1 slice of tomato (aah, "four" seasons indeed!). Dunno where the mushroom(s) went! The menu mentioned mushrooms too......... oh well, so it was a total rip-off and we decided never to go there again.

Last week I bought a bag of naan from Costco. You get 8 lovely naans from one bag which is great. What do you think I did with those naans? One guess!
  • I pre-heated the oven to 400 degrees
  • Placed a couple naans on a lightly greased baking sheet
  • Topped each naan with the desired toppings
  • Threw it in the oven and baked for about 5 minutes and then switched it to the broiler mode and broiled for about 7-8  minutes (basically until the cheese got bubbly and the naan base got brown)
  • And I created some out-of-this world pizzas--- well, definitely a thousand times better than that restaurant pizza!
Toppings:
  •  The son had pepperoni, tomatoes and cheddar cheese; the daughter had canadian bacon, mushrooms, tomatoes and chipotle jack cheese; the husband and I had Supreme pizza (basically with everything!). 
  • For the kids I used some plain old tomato ketchup and spruced it up with italian seasoning- hey, it was yummy! While for us two, I used a gourmet spicy sauce. 

Broiling is on.......the cheese is melting.....

Ready to eat-- crisp and delicious!

I got so excited with the success of my pizza, that I even made a dessert pizza. So I topped half a naan with some fresh blueberries and some brown sugar and a few chunks of chocolate and just baked and broiled like I did for the other pizzas. It was fantastic!!

Note to Self: Next time, I should omit the brown sugar and just use chocolate and fresh fruit and maybe some kind of jelly/jam.

Blueberry and chocolate pizza--- mmm!

Apparently now this kind of pizza actually has a name--- a Naanizza! Wow!

So will I order pizza from one of those pizza places now that I can create my own gourmet pizza, or should I say, Naanizza, at home? Heck, yeah!! But, but, but---- I am certainly not going to that restaurant to get ripped off again!

Friday, October 29, 2010

Jazzed up Crescent Rolls

You know those Pillsbury Crescent rolls you get at the grocery store? The ready-to-bake dough that is neatly tucked away in those pop-up cylinders, that, I must admit, scare the living daylights out of me (OK, not quite that scary, but startling, nevertheless!). Sometimes when I make soup for dinner, I just bake some crescents on the side. They work well for dunking purposes. Plain crescents are pretty yummy by themselves, but when jazzed up, they taste even better!

There are quite a few different ways I transform plain, ordinary crescents into out-of-this-world crescents and the most popular kinds in my household are the fruity crescents and the cheesy crescents. For the former, I use some jam or preserves (my personal favorite is the orange marmalade filling) while for the latter I like to use cheddar cheese (my personal favorite being the sharp variety).

The method is pretty straightforward, really and the main thing to remember is to follow the instructions on the container!
  1. Follow instructions and get the dough out on a baking sheet.  
  2. Spread some jam/jelly/preserves of your choice onto each individual crescent dough and then roll each into well, a crescent (again, instructions are on the container). 
  3. And then shove it into the oven per instructions and bake, err, don't want to repeat- but yeah, the instructions are right there on the container. (And that is the last time I say that!)
  4. The same for the cheesy kind- just place a little cube or thin slice of cheese of your choice (I think cheddar works best) and then roll and bake away.

Ready to be baked (the ones on the right have strawberry preserves in them, the left ones have cheese)

Perfectly baked and ready to be gobbled up!


Dunk those in your soup! Especially the cheesy crescent-- delicious!

Very simple, right? The good thing about this is that you can get all creative with that dough and take plain old crescents to a whole new level. And then, show off a bit! ;) 


Wednesday, October 20, 2010

The Other Egg Curry

I often make egg curry where you boil some eggs, make the usual curry sauce with onions, ginger, garlic and tomatoes and throw in the eggs into the sauce. Pretty simple and of course, delicious.

Now I remember, back when I was a kid, my mom used to make the regular egg curry (with the boiled eggs) and also another kind wherein she would first make an omelette and then cut it into bite sized pieces and put this into the curry sauce. To be honest, I used to hate that version of egg curry! But apparently my dad quite enjoyed it. Not sure about my brother, though.

Last evening I ended up making the very same egg curry, omelette style!

I took:

1. Eggs- whisked them up the old way with a fork and made one big, fluffy (and it was super fluffy!) omelette. I then cut the omelette into bite sized pieces.

 Gorgeously Fluffy Omelette!

Cut up into bite sized pieces

2. Onion finely chopped, grated ginger+garlic, tomato paste.


3. A couple potatoes.


4. Cumin, fennel and mustard seeds, salt, red chilli powder, garam masala powder, oil, water.


The Curry Sauce:


1. Just heated up some oil in a pot, spluttered cumin, mustard and fennel seeds and threw in the onion, ginger and garlic and sauteed it a bit. Then added some tomato paste, followed by some salt, red chilli powder and garam masala. Added some water and brought it to a boil.


2. Then added the potato (rough chopped) into this and covered the pot so as to cook it.


And Finally: 

After about 15 minutes, when the potato was cooked, added the omelette pieces into the curry. Covered the pot and let everything hang out.

Omelette curry! Almost looked like fish curry!

Served with:

Some quick simple peas and "jeera" (cumin) fried rice. The fluffy omelette pieces had soaked up the beautiful curry sauce. One bite and it was a blast of juicy goodness in your mouth........mmm, fantastic!

Omelette Curry over some peas-jeera fried rice

It is funny how my taste buds have changed over the years. I mean, I used to hate this omelette curry as a kid and look at me now--- I quite like it! My husband and son like it too. As for my daughter..........well, she reminds me of me all those years ago!! 

Monday, October 18, 2010

Not your ordinary Chicken & Mushroom!

The other day, I picked up this nice package of Hummus from Costco. Nice because it has several snack sized cups.......pretty convenient, I think. Well, the primary purpose was of course to have the kids take it as part of their school snacks and lunches (that is what most of us go to Costco for, right?). But then the plan sort of backfired on me and well, I was left with these 16 2 oz unopened cups of hummus lying in the fridge. Well, sadly for the kids, their plan of not eating the hummus backfired on them! HAHA! (Note the evil laugh!)

I made some really delicious chicken and mushroom dish and what do you think I incorporated to get that beautiful consistency as well as the flavor? One guess!

I took: 

Boneless skinless chicken breast, mushrooms (the regular white button kind), some cherry tomatoes, a couple cloves of garlic, some salt, black pepper, red crushed pepper, tad bit of water and the "secret" ingredient- hummus!

The cooking:

OK, I'm telling ya, the cooking involves pretty much nothing. Literally the easiest thing to whip up, ever!
  1. I cut up the chicken into bite sized pieces, minced up the garlic and threw the two together into some heated oil in a pot. Stirred it all to brown up the chicken and basically cook it. Salted it and also added some black pepper as well as some red crushed pepper flakes.
  2. Then I threw in the mushrooms that I had cut into halves and sauteed them together with the cooked chicken. I then added some beautiful red cherry tomatoes for color. The mushrooms and tomatoes had released some water, but to increase the quantity, I added some more water.
  3. And finally I stirred in some of that awesome hummus into the chicken and mushroom. It not only added an extra flavor profile to the whole dish, but also gave it an excellent consistency. I let it simmer for a few more minutes and then tasted it and was bowled over! It was so delicious!!!! I knew for sure that the kids and the husband would love it too. 
Not your ordinary chicken and mushroom! 

Was I right?

Of course! The family loved it like crazy! I served it with brown rice. And it was superbly yummy!

Was the secret revealed?

OK, I admit- normally, I would have just shut up. But well, I wanted to tell the kids that hummus is in fact pretty yummy and therefore the "secret" had to be revealed.

The Kids' Reaction?

Oh we knew it, Mom!

Me: 

YEAH RIGHT!

So is the hummus over?

Err, no. Not to worry, though. I am sure it will get incorporated into yet another brilliantly delicious preparation, thanks to yours sincerely!


Monday, October 11, 2010

Upma

Normal Breakfast at my house: Cereal, Bread, perhaps eggs. 

Normal Breakfast back at mom's house: Dosa, Idli, Poha, Sabudana khichdi, Akki Rotti, just to name a few and the ever famous Uppittu (kannada) or Uppindi (telugu), better known as Upma.

Sometimes, especially on a weekend, I decide to make something special for breakfast. Now special to me of course means something that I would eat if I were back at my mom's place in India. I love upma because well, for starters, it is delicious! And it is extremely quick* and simple to make. And as you know, I am always up for simple, quick and delicious!

There are several kinds of upma one can make. You know, the very basic one where you put err, nothing- basically like a savory porridge. Then you have the kind where you incorporate onions and potatoes (and tomatoes, that I love). And then there is the whole mixed veggie kind. And then again, there is the kind that incorporates only green peas and it is simply delicious.

You need:

Green peas (I just use the frozen kind), Coarse Rava/Sooji- available at any IGS (you could substitute this with cracked wheat, works awesome!), salt, green chilli(es), hot water, oil, mustard seeds.

Method:  
  1. I take a pan and put in a few teaspoons of oil. Heat and then splutter some mustard seeds followed by some green peas and green chillies (depending on how much heat you like). Quickly stir. 
  2. I then pour in the coarse Rava/Sooji (usually for 2 of us, I take 1 to 1.5 cups) into this pan with the peas and then add salt to taste. Stir it all up for about 2-3 minutes. I don't mind if it kind of browns up a bit, in fact, I like it.
  3. Then I take the pan off the heat and pour in hot water and immediately stir it all up. There is going to be some major boiling-bubbling action going on, but don't worry, it is all part of the fun! ;) And then I place the pan back on the heat and cover it up and let it simmer. 
  4. Usually in about 7 to 10 minutes, all the water would have disappeared and the upma is ready to be served! 
  5. If I am in the mood, I garnish with some chopped up cashew nuts, grated coconut and cilantro. YUM!
Green Peas Upma- YUM!

If you know couscous and like it, I am sure you will like upma too. Do give it a shot!


Saturday, October 9, 2010

Akki Rotti

If you do not know the language, Kannada, then you might be wondering about the title, "Akki Rotti." Well, Akki stands for Rice and Rotti stands for Roti/bread. So simply put, it is bread made of rice flour. I simply LOVE this preparation and as usual, I think that my mom and Avva (mom's mom) make THE best akki rottis in the world!

The standard version incorporates finely chopped onion, green chillies and cilantro. And of course, the innovative version or well, MY version, incorporates spinach and even grated carrots!

You need:

The standard version: Rice Flour (available in any IGS), finely chopped onion, some chopped or slit green chillies, cilantro, cumin seeds, salt to taste. I sometimes use grated coconut too......adds to the taste.

The spinach or grated carrots version:  As above plus chopped spinach or grated carrots. Easy!

Oh and a few teaspoons of oil (yep, you don't need a lot of oil for this!)

First, the Dough:

You know how you make pizza dough? Or dough for rotis/chapatis? This one is pretty similar.

1. So take rice flour in a mixing bowl, add the chopped onion, green chillies and cilantro, cumin seeds and salt (and coconut, if you are using it). If you are using spinach, then go ahead and put that in too. Ditto for grated carrots.
2. Take some water in a cup and start pouring it into the above flour mixture bit by bit. Start mixing it all together with your fingers. Keep adding water until you can make a nice pizza-dough like dough. It should all hold together when you make a ball out of it.

Next, the making of Akki Rotti: 

1. Take a pan (my mom & grandmom use aluminium kadhais/woks for this. But I just make-do with regular pans..........) and put a teaspoon of oil into it.

2. Then take some of that dough you made and form a rough ball out of it and then put this into the pan and start patting with your fingers, so as to spread it out. It is almost like the reverse of making a pizza base out of pizza dough. The difference being, you make the pizza base with your fingers underneath the dough and spread it out, while here you use a pan as a support and spread it out with a patting action going on. Here, this picture should help a bit:
See how I spread out the dough with my fingers? 

3. Then switch on the stove and cover the pan with a lid and cook the rotti. You don't have to cook both the sides because the bottom part gets cooked with the heat from the stove and the top part gets steam cooked because of the combination of the heat and the lid on top.

4. I like my akki rotti nice and brown and crunchy and so I cook it for about 7-10 minutes on medium heat......if you prefer it white and soft, then just cook for 5-7 minutes and it should be good to go!

5. Can be eaten with chutney or Indian pickle or even with any kind of curry. Pretty rustic and yummy!!

Akki Rotti with tomato chutney

Making akki rotti can be pretty tedious the first time around. But as with anything, practice makes perfect! If you want a really healthy, rustic version of this already rustic preparation, use Ragi (finger millet) flour.

Note: You gotta make sure that when you start patting out the dough to make the rotti, the pan has to be cool and not hot--- because if it is hot, then patting it out is going to be one messy job.

When I make akki rotti for the entire family, I just use 4 pans at a time. That way I get 4 rottis in one shot!

Wednesday, September 29, 2010

Leftover rice? No sweat!

Scene 1: I have a splitting headache, it is the middle of the week, my son continuously plays his recorder and I have to keep up with the "good job!" so as to encourage him, even though the sound is in fact piercing through my ear drums and hitting my already aching head thus making it ache even more..........and amidst all this, the brain is thinking: What the heck should I cook?? And then I make a smart move and pop in a couple ibuprofen capsules followed by some ginger tea. The headache soon goes away but the brain is still thinking: What the heck should I cook?

Scene 2: I open the refrigerator with the hope of finding some leftovers that can be eaten tonight. But all I find is a bowl of leftover lentils and a rice cooker pretty full of well, plain rice. I immediately disregard the lentils as boring and that leaves me with all that plain white rice.

Scene 3: The brain comes up with a solution soon enough: Leftover rice+veggies+shrimp+soy sauce= AWESOME shrimp & veggie fried rice!! 


That is definitely a simple yet brilliant solution. And so here is how I usually make fried rice. There can be several variations to this- you know, if you are pure vegetarian, just stick to veggies. If you are a "vegetarian- but-I-eat-sea food," then throw in the shrimp. If you are vegetarian but also eat eggs, then throw in some scrambled eggs...........you get the idea.......oh and brown rice works great too.

Needed:

Cooked plain rice, Assortment of vegetables (I typically use garlic, ginger, green onions, carrots, bell pepper, peas, bok choy, sometimes cabbage, broccoli......anything I feel like, really), soy sauce, veggie bouillon for extra flavor (optional), shrimp, black pepper and extra salt if needed (typically you don't because the soy sauce makes up for all the required salt) and don't forget some oil for cooking!

Method:
  1. I put in a little bit of oil into a pot/pan and then throw in the veggies and quickly stir fry it all. I then add a cube of veggie bouillon followed by shrimp and then soy sauce. I stir again. (If using cooked shrimp, no sweat. If using raw shrimp, make sure you cook it- you know, it should turn pink and sort of curl up). 
  2. I then add the cooked rice into this pot with all that veggie & shrimp goodness. Followed by another dash of soy sauce and then mix everything up. I finally add some freshly ground pepper.
  3. Sometimes I scramble a couple eggs and then add it to the fried rice before serving. I always keep some ketchup & some chilli sauce on the side if anybody wants.

 Yummy fried rice! Did you notice that I did not use a single tomato here?!

Scene 4: We are all sitting at the table thoroughly enjoying the yummy shrimp & veggie fried rice. My son has put his recorder away. My headache has long gone. Our tummies are happy. The day has ended on a good note!

Thursday, September 23, 2010

Palak Paneer

I always have spinach on my Costco list. I love that box of organic baby spinach, all washed and ready to use. And what is the one thing I usually end up making with those lovely green leaves? Palak Paneer, of course! Also known as Saag Paneer in most Indian restaurants and pretty popular too. (Palak= spinach, Saag= leafy greens). As for paneer- simply put, it is an Indian cottage cheese that you can make easily at home. All you need is some milk (2% reduced fat or err, whole milk) and something acidic such as lime juice or vinegar. As for me, well, I just pick up my paneer from Costco. Yep, Costco carries paneer now!

I usually like to mix up a couple different kinds of leafy greens together for this preparation. For instance maybe some swiss chard plus spinach or kale plus spinach or collard greens plus spinach etc or well, a nice mix of all of these. Of course, plain spinach is just fine.

Needed:

A good amount of spinach (remember when cooked, spinach reduces in quantity.........), a couple cloves of garlic, a few green chillies (depends on how much heat you want), a medium onion finely chopped, 1 tomato (optional), cumin seeds, oil and of course salt.

The Spinach:

There's that old way of frying the spinach in a good deal of oil that completely destroys all the nutrients from the spinach. Then there is the completely oil-less version where you just cook the spinach in some extra water and go from there. And then there is my version that uses a little bit of oil and a little bit of water without destroying all the good stuff and retaining the taste.

I take a pot/pan, put in a little bit of oil and then throw in the ready-to-use spinach. Throw in a couple cloves of garlic as well as some lovely thai green chillies. Sometimes I add a chopped tomato to this as well. I stir everything up and add a wee bit of salt. By then anyway the spinach starts to wilt--- you know how quickly it cooks up. That's it. I add a quarter cup or so of water. It is all cooked within 5 minutes! I then let it stand to cool off before I puree it.

 Spinach all ready to be pureed

The Paneer:

While the spinach is cooling off, I prep up my paneer. I cut up the paneer into bite sized cubes (you could do cuboids...........). Earlier I used to just use "raw" paneer as it is. But of late I prefer to brown it up. Now again, there is that old way of literally frying up the paneer pieces in oil and then there is the total opposite option of baking. My method is much simpler and I don't even have to switch on the oven (I don't use any oil either and it is yummy!). I just get my non-stick pan going and then drop in the paneer pieces one by one. Within under 4 minutes, all the paneer cubes are browned up (you gotta flip them once--- common sense!).

Browning up the paneer cubes in my non-stick pan (paneer by itself is pretty fatty........)

And finally:

1. I then puree the cooled spinach with my neat little hand processor (more convenient than the food processor for this dish). And then add the browned paneer cubes into this puree. I usually have to add some extra water to fix the consistency- should be not too thin, nor too thick.

2. In the same pan that I used to brown up the paneer, I add a teaspoon or two of oil, splutter some cumin seeds and sautee the chopped onion. I finally fold this into the almost ready palak paneer. I add some salt to taste. I mix up everything and give it one more round of heating for about a couple minutes---- there is no more cooking needed at this point........and ta da! Palak Paneer is ready to be eaten with rice or chapattis or couscous or quinoa--- your choice! ;)

Mmm, yummy palak paneer!

Look at the gorgeous green color and the lovely browned up paneer-- DELICIOUS!

I used to think that palak paneer is so fancy and must take a lot of effort to make. But in reality it is THE simplest thing to whip up. So yeah, you can eat "fancy" even on a crazy weeknight!

Wednesday, September 15, 2010

My Rockin' Chicken with Couscous

I have never been to Morocco and neither have I been to a Moroccan restaurant. I don't have any Moroccan friends..........so yeah, basically I have never eaten Moroccan food. I have however watched a few shows on Travel channel and other foodie channels and have a general idea about Moroccan food. So yesterday I thought hey, why not attempt some Moroccan food? And that is how last evening's menu was set- couscous with my version of Moroccan chicken- My Rockin' Chicken!! Get it?!

The Spice Rub:

Cumin seeds, cinnamon, cloves, turmeric powder, red crushed pepper.

I took the cumin, cinnamon and cloves in a m-wave safe bowl and m-waved it for about 40 seconds to gently roast. Then I added the red crushed pepper and turmeric and powdered it all in my nifty little coffee grinder.

 The Spice Rub

The Chicken:

I bought a little tray of 4 chicken thighs, bone in, skin on. Took off the skin and then rubbed that lovely spice rub all over. Gotta make sure you massage the chicken with that spice rub to get all the goodness into the meat. I also added a splash of lemon juice and sprinkled some salt. Gave it one more quick massage and covered and put it away in the refrigerator. As the rule goes, 30 minutes is a good amount of time for marination--- but more the better. I did this in the afternoon so it was way more than 30 minutes........

Chicken with the spice rub sitting in the fridge

And then My Rockin' Chicken:

Soon it was evening and time to cook dinner. My everyday cooking pot was going to be that special clay pot with the conical lid that is used in Moroccan cooking. Hey gotta make-do with what you have!

I took some oil in the pot and heated it and then put in the 4 thighs packed with the spice rub one by one into the hot oil. Allowed that bottom side to get browned up and then flipped the pieces over to brown up the other side. Looked very yummy!
Well browned and browning up the other side too

While the other side was browning up, I roughly chopped up some garlic, onion, carrots and potatoes. I wish I had some kind of squash- that would have been a good addition too.

Special Stuff: And then I threw in a handful of dried apricots and some blanched almonds. Ooooh yeah!

Added a tablespoon of tomato paste (whole tomatoes would work just fine), some extra water and salt. Put the lid on the pot and allowed everything to simmer for 25 minutes. My Rockin' Chicken was on its way to getting ready!

The Couscous:

While the chicken and veggies were simmering away, I prepared the couscous. This took literally less that 5 minutes! Boiled some water. Added some salt and a dash of olive oil and then poured this hot water into the couscous. Covered it up. That's it! All that I needed to do was to fluff it up and serve.

Finally:

Served my version of Moroccan chicken on a bed of couscous and garnished with cilantro. The chicken was perfectly cooked, tender and delicious with that cumin-cinnamon goodness. The apricots added a lovely sweetness to the whole concoction. Not overwhelmingly sweet, mind you! And the huge chunks of veggies were delicious. The almonds added a nice almost-crunchy texture. It was simply outstanding.

My Rockin' Chicken on a bed of Couscous


I know what I am going to cook for my next party! And I bet it'll be much appreciated!

Friday, September 10, 2010

Tomato Chutney

This is another chutney made frequently by yours truly. Involves a little more "cooking" than the onion chutney as well as a few extra ingredients. Still very simple and delicious, of course!

Required: 

Tomato, cumin seeds, mustard seeds, peanuts or sesame seeds- your choice, green or red chillies- again, your choice, salt and oh, some oil.


Method:
  1. Roughly chop up a nice juicy tomato.
  2. Heat some oil in a pan and splutter mustard seeds and cumin seeds and throw in the chopped tomato and the chillies.
  3. Add salt to taste, stir and cook the tomato--- takes about 3 to 5 minutes. Set it aside to cool.
  4. Take a handful of peanuts in a m-wave safe bowl and run the m-wave until the nuts are roasted. If you use sesame seeds, do the same. One thing to note is that sesame seeds tend to "jump" as they heat up, so don't be surprised if you find some sesame jumping action going on inside the m-wave!
  5. Then I put the roasted peanuts/sesame seeds into the food processor and run it a couple times until the peanuts/sesame seeds are powdered. Then I add the cooled tomato into this and blend it all into a nice chutney.
  6. To finish off with that extra touch, splutter some mustard seeds and maybe some kari patta and pour onto/into the chutney. 
Finally, eat and enjoy!

Deilicious Tomato Chutney, sans that extra touch of spluttered mustard seeds.........

Thursday, September 9, 2010

The Ultimate Masala Dosa- Part 2

So I went to my oven this morning and took out the pot with the dosa batter I made last night. I removed the lid and peeked inside. I was thrilled to see that the batter had nicely risen. Fermentation successful!

Observe the bubbles........ perfectly fermented dosa batter

Beautiful consistency- not too thick, not too thin

I then put away the fermented batter into the refrigerator since I was going to make dosas for dinner and I did not want the batter to over-ferment and get all sour and stinky (yeah, that could happen! While some people do like that extra fermented taste---I don't). However, I got the other items ready. I had a busy evening ahead and therefore wanted to be done with all the preparation in advance.


The Accompaniments:

The most important accompaniment to a masala dosa is well, the masala itself. Like I mentioned in Part 1 of The Ultimate Masala Dosa, the masala is basically a smashed potato filling. So here is how I make the masala:
  1. I cook a few potatoes in the pressure cooker. Any kind should work, though I prefer the Yukon Gold kind just because I like the natural sunny color and the texture. My pressure cooker takes 4 minutes to cook those taters. 
  2. I meanwhile finely chop up some onion and slit a few green chillies. I also like to use kari patta or curry leaves just because I simply love the aroma. Besides you gotta use kari patta if you are making South Indian food! 
  3. I take a little bit of oil in a pan, temper some mustard seeds and then throw in the chopped onion, chillies and kari patta. I add salt and turmeric powder to this and sautee it all. I make sure to add some extra salt so that I don't have to bother adding salt again after incorporating the cooked taters into this. 
  4. While the onions are sweating, I peel the skin off the potatoes and roughly chop them up before throwing them into the cooked onions. At this step, I switch off the stove. 
  5. I roughly smash up the potatoes and then mix everything up. The masala is now ready! 
Mmm, the gorgeous yellow masala for my dosas!

The next thing you need is a chutney. Now there are a variety of chutneys that can be eaten with a dosa or a masala dosa. My mom makes this superb coconut chutney with green chillies and cilantro. Of late I have been making this tomato chutney as well as a chutney with onions and red chillies. I made these two again today. (Recipes are included in my Chutney/Pesto/Sauce section).

There, the accompaniments were ready and all I had to do was actually go ahead and make dosas later in the evening.

Finally, making of the Dosa:  
  1. I get my not-so-non-stick pan heated. 
  2. I then pour some batter onto that hot pan with the help of a ladle and immediately start spreading it with the ladle itself in circular motion so as to create a round, thin dosa. I add a wee bit of oil around the circumference of the dosa and in the center too. This sort of fries the dosa thereby cooking it. Soon enough the bottom part of the dosa begins to turn brown, thus indicating that the dosa is pretty much done.
  3. And then I spoon in some of that potato masala into one half of the dosa and then fold the dosa- like a taco.
  4. And the masala dosa is ready!
 First scoop of batter.........

Spread out with the help of the ladle

Spoon in the masala into one half of the dosa

Folded over like a taco

A couple crisp dosas with two kinds of chutney ready to be gobbled down! 

A few pointers:
  • Usually the very first dosa turns out not-so-great. But no worries. As the pan gets hotter, the dosas turn out way better. 
  • Some people prefer their dosas thick, white and soft--- in that case there is no need to spread it out much with the ladle--- in fact then it is exactly like a pancake, with that extra step of flipping involved. 
  • I know I said that hotter the pan, better the dosa. Well, a slight catch there---- if the batter starts sticking to the pan as you try to spread it out, that means that the pan is a little too hot. When that happens, I just sprinkle some cold water onto the pan to cool it down a bit and then resume again. 
  • I love my dosa with sambar (a South Indian lentil and vegetable medley), the recipe for which I shall write another day. (Since I was a bit busy today, I skipped making sambar.......)
  • If you are a health freak, you can use a non-stick pan and not use any oil at all. But well, I must tell you that everything tastes better with some grease.......

So is this THE Ultimate Dosa afterall? Nope, because it still does not match my mom's dosas nor CTR's dosas. In fact it probably never will. However, in this part of the world, this is indeed THE Ultimate Masala Dosa that my family has access to. And that sure makes me one proud mama! :)


Onion chutney- the 5 minute deal

Now a days when I make dosas I make this excellent chutney with onion, red chillies and coconut. It literally takes 5 minutes to make and tastes outstanding.

I use:

1 medium onion, a few red chillies (if I am out of red chillies, I just use red crushed pepper), grated coconut, tamarind paste and salt. (The grated coconut and tamarind paste is available at any IGS).

On their way to becoming a chutney

My Method:
  1. I roughly chop up the onion and throw it in the food processor followed by a tablespoon or so of grated coconut, 5-6 red chillies (or a tablespoon of red crushed pepper), a teaspoon of tamarind paste and salt to taste. (I sometimes add some jaggery too for a hint of sweetness in the background. Jaggery is available again at any IGS. If not jaggery, sugar is fine too).
  2. I run the food processor to finely blend everything together into a chutney.
Err, yeah! That's it! The chutney is ready. If I am in the mood, I temper some mustard seeds separately and mix it up with the chutney for added taste.

The 5 minute Onion Chutney

This chutney can be eaten with dosas or chappatis. Works in sandwiches too. Perfect balance of flavors- the bite from the onion, the heat from the red chillies and the tang from the tamarind. And best of all, takes only 5 minutes to make! Heck, if you think about it, there is absolutely NO COOKING involved!! How cool is that!

Note: Don't forget to brush your teeth and floss too, if possible, after eating this chutney..........

Wednesday, September 8, 2010

The Ultimate Masala Dosa- Part 1

My mom makes THE best Masala Dosas in the whole entire world. Next in line would be CTR. CTR is a tiny little restaurant in Malleswaram, Bangalore. Now sadly for me, both my mom and CTR are about 9000 miles away and so I get to eat those scrumptious dosas only once every couple years. Yeah, tell me about it--- ridiculously sad. But I can't just sit here all sad and glum, yearning for their dosas every day, now can I?

I used to get those ready-to-make dosa packets from the Indian Store. You just take the mix (full of unnecessary sodium bicarbonate) and add some water and then make the dosas. Pretty blech, if you ask me. I stopped buying those. Then a couple years ago, the Indian Store started carrying the actual batter. So there was no need to mix up a powder with water- it was pre-made and well, definitely way more convenient. But I soon discovered that the batter was well, not great, in fact not good at all. Then my cousin V advised that I should just make it at home. My first reaction was, "Uggh! Soak all that stuff and then grind it all and then allow it to ferment?? Too much work!!" But then, after much reluctance, I decided to give it a shot. And I have not looked back ever since!

What is Dosa?

In my dictionary, I like to define Dosa as a South Indian rice and lentil "pancrepe" (somewhere between a pancake and a crepe) and a Masala Dosa is basically the same pancrepe with some beautiful jazzed up smashed potato filling.

In this post I shall tell you how I go about with the very first and basic step- making of the dosa batter. If I want to make dosas on a Thursday, I make the batter on Wednesday. So really, there are two parts to this whole dosa-making process. Therefore I call this Part 1.

Ingredients for Dosa Batter:
  1. Rice (any kind of rice should be fine, except maybe sticky rice. My mom says no to Basmati, but I have used it and have had no issues......)
  2. Urad Dal or White Lentil- available at any Indian Grocery Store (IGS) (picture follows)
  3. Salt
  4. Fenugreek Seeds
  5. Toor Dal or Pigeon Pea- again, available in any IGS
  6. Rice Flakes
  7. Water
P.S.: Ingredients 4,5 & 6 are totally optional. I just use them coz my mom said so. Apparently the fenugreek is good for the tummy and the other two just impart better texture and color to the end product, the Dosa. 


Urad Dal or White Lentil

Fenugreek Seeds (called Methi Daana in Hindi)

Toor Dal or Pigeon Peas


Rice Flakes (Poha)


I know, I know, the ingredients' list seems pretty long and complicated, but hang in there with me--- I promise that this is EASY! Besides, like I mentioned above, you don't even have to use 3 of the ingredients from that list if you don't want to........ so there, you can go  "Phew" now!

Soaking:
  1. Per mom's instructions, I take 3 measures of rice in a container. I wash the rice a couple times or so to remove any unwanted foreign particles. Then I soak the washed rice in water.
  2. I add a teaspoonful each of fenugreek seeds, toor dal and rice flakes to the above and cover the container and proceed to the next step.
  3. I take 1 measure of Urad Dal in another container and wash it like I wash the rice, you know, a couple times or so. Then soak the dal in water, cover the container and then leave it. 
That's it. I leave the rice and dal soaking away, at least for 2 hours. The soaking helps soften the grain, thereby making it easy to grind into a nice smooth batter.

Top container has the rice (+fenugreek+toor dal+poha) soaking and bottom one has the urad dal soaking

Grinding- Making of Dosa Batter:
  1. After 2 or 3 hours, I discard the water from the containers. I then take the rice in my blender, add cold water to it and blend it into a nice smooth batter. This usually takes about 2-3 minutes, max 4. In the beginning I suggest you start adding water in batches, little by little, so as to avoid making the batter too thin. Remember, this is somewhere between a pancake and a crepe and so the consistency has to be neither too thick nor too thin.
  2. I then pour this rice batter into a big enough container. The container has got to be a tad bit larger than the actual quantity of batter because the batter is going to be left to ferment. Upon fermentation, the level of the batter will rise and if the container is not big enough, the batter will actually flow out of the container and it will be one big mess and I say this with experience, yessiree! It usually takes a couple rounds to finish grinding all the rice.
  3. And then I proceed to do the same with the dal. The only glitch here is that the dal tends to get ground very fast and then starts sticking to the blade of the blender. OK, not trying to scare you, but you just gotta be prepared. As soon as you hear the blade make a weird sound, you must stop and add some more cold water. This takes no more than 2 minutes. Just keep adding cold water until the weird sound stops. 
  4. I then pour this dal batter (which, BTW, is so lovely to touch--- it is super smooth and silky and you  might be tempted to dab some on your face.......) into the rice batter, add some salt to this and then give it a couple stirs. 
  5. Finally I cover it up and set it aside on the counter if it is a nice hot summer day or put in the oven like I usually end up doing in this part of the world where it is usually overcast and chilly. I keep the oven light on for warmth that helps with the fermentation. I leave it in the oven with that light on for the whole night. 
Dosa Batter sitting in Appi's Multipurpose Oven (yeah, I do store some other kitchen stuff in my oven....... hey, I don't live in a palace, you see!)

There, Part 1 of the dosa-making process is over. I did that today and right now my dosa batter is quietly fermenting away in the oven. Tomorrow morning I shall take it out of the oven and make sure it has indeed fermented well enough for me to proceed to Part 2.

Until then, I say to my dosa batter- Happy Fermenting!!

Monday, September 6, 2010

Quinoa Delight

My brother has been raving about quinoa (pronounced KeenWaa) for many months now. Supposedly packed with a lot of good stuff. I remember my friend telling me about it as well. So finally I decided it was time to give it a try. I had some wild rock fish lying in the fridge. I thought hmm, how about some quinoa with some of that fish and maybe some baked broccoli? Sounded pretty good.

 The Quinoa:
  1. Took 2 cups of quinoa and washed it about 3-4 times. The way you wash it is basically the same way you would wash rice........ you know, wash and rinse out the water a few times before adding the final water for cooking. The only thing to keep in mind with quinoa is that the seeds (yeah!) are so tiny that they just fall out along with the water. Therefore the best way is to use a strainer- that way you don't end up with all that quinoa in the sink. The other thing to keep in mind is that you gotta wash it well a few times to remove that outer bitter saponin coating.
  2. Added 4 cups of water to the washed quinoa in the rice cooker. Figured a 2:1 ratio should work fine (water:quinoa). Also added a pinch of salt and a cube of veggie bouillon for flavor.
  3. Switched on the rice cooker to do its thing. 
The Broccoli: 
  1. Cut up the broccoli into florets. And then gave the florets a quick wash. 
  2. Took a baking pan and spread out the broccoli florets. Smashed up a clove of garlic and added it to the broccoli and then sprinkled some salt and some ground pepper. Finally drizzled some oil and mixed it all up.
The Wild Rock Fish:
  1. Made a beautiful marinade with some buttermilk (yogurt would be better, I think), salt, black pepper, fresh coarsely ground mustard seeds and some vinegar for acidity (lemon juice should be just fine). 
  2. Placed the fish fillets into a baking dish and poured in the marinade. Oh, I salted the fish before pouring in the marinade. 
  3. Then put it in the refrigerator to let it all marinate. I gave it only about 10 mins. I think 30 mins would work way better. 
I pre-heated the oven to 425 degrees and then baked both the broccoli and the fish together for about 20 mins. That is the best part of this recipe: 1 temperature, 2 items, same cooking time! How cool is that!


The fish and the broccoli baking together

After about 15 mins, I took out the broccoli, grated some cheddar cheese into it, tossed it once and then put it back into the oven. Meanwhile the fish was almost done--- nice and bubbling and ohhh, the smell was simply fabulous.


Just as the baking was done, the rice cooker went off. I tasted the quinoa and it was perfect! The only question was whether or not the other 3 would like it.

Delicious Quinoa with broccoli and wild rock fish


To my pleasant surprise, they loved it!! The quinoa was perfectly cooked and the texture was lovely. The broccoli with that melted cheddar was nice and crispy and the fish was full of that mustard goodness and cooked to perfection. What a delightful meal!

If you haven't had Quinoa yet, go right ahead and get some today. Trust me, you will love it!


    Friday, September 3, 2010

    Strawberries on Toast

    This is another one of my jiffy (rare) desserts and lemme tell ya, it is high on the taste factor as well as the health factor! All I use are strawberries and some old bread. Yeah! Not kidding! That's it! (If you want to serve it at a party, some butter and sugar would be great........).

    So this is what I do if I decide to make it for a party. The good thing is that this can be a dessert or a starter, that I think is pretty cool:

     I take: 

    Strawberries, Vanilla Essence, sugar, mint leaves, unsalted butter.

    Steps:
    1. Wash the strawberries and then cut each into half. Put them into a bowl (or any desired container). 
    2. Sprinkle sugar to bring out the fruity juices and well, I have found that there are always a few berries that are sour.......followed by a couple drops of vanilla essence. I usually do this a few hours before the party. That way the berries get all nice and sweet and juicy. 
    3. Meanwhile I roughly chop up some mint leaves and throw it into some butter. I then m-wave the butter. The result is this lovely minty butter spread. If you want, you can add some sugar to this too........
    4. I slice up some good old (or freshly bought- doesn't matter!) bread. Thickness depends on how you like it. I also like to quickly toast them in the broiler or just a regular toaster for some crunch. Again, not a must.
    Serving: 
    1. I take each slice and spread some of that minty butter on top.
    2. I then place one beautiful red juicy strawberry atop that butter. 
    3. And then serve!
     Beautiful strawberries on toast

    Any fruit would probably work just as well. I just like the whole look of those gorgeous heart shaped red strawberries. You can't go wrong with this "dessert!" Wish I had a better name for it, though. Any suggestions?