Showing posts with label Quinoa. Show all posts

Friday, March 13, 2015

Quinoa Pilaf

I am surprised that I haven't posted this before. Quinoa pilaf, with vegetables and all the works, is a complete meal, and oh-so-healthy and delicious! Best of all, it is so easy to prepare, and is ready in just under 30 minutes!

Quick nutrition facts about quinoa: 

*Guten free
*Low Glycemic Index (diabetics- take note!) 
*Provides all 8 amino acids, thereby becoming a complete protein 
*Zero Cholesterol
*Zero Sodium
*Rich in Dietary Fiber
*Rich in Iron, Phosphorus, and Riboflavin (Vitamin B)


Qunioa

Closer look 


Ingredients: 

1. Quinoa- 2 cups

2. Leek- 1 cup 

3. Garlic- 4-5 crushed

4. Ginger- 1 inch grated

5. Carrot- 1 big, chopped per liking

6. Tomato- 1 medium, chopped

7. Kale- 1/2 bunch 

8. Cumin- 1/2 tsp

9. Turmeric- a pinch

10. Cooking oil- 3-4 tsp

11. Salt and pepper per taste

12. Water to cook- 4 cups

Optional: 

*4-5 Thai green chilies for some kick

*Garam Masala powder- 1/2 tsp  

Note: Any and every vegetable will work well in this recipe. 

Method:

If you get pre-washed, ready to use quinoa, you are good to go. Else, give it a good rinse in cold water before cooking, to get rid of its natural bitterness. 

1. Put 3-4 tsp of oil into a pot or pan, get the heat going. Splutter 1/2 tsp of cumin seeds. 

2. Add leek, garlic, and ginger into this, followed by a pinch of turmeric powder, and quickly stir fry for 3-5 minutes. Then add chopped carrot, tomato, and any other vegetable that you might be using. Save the greens such as swiss chard, kale, collard greens, spinach, etc to be added towards the end. 

3. After 3-5 minutes of stir frying, add quinoa to this, and mix everything together. Also add salt and pepper per taste, as well as the chilies and garam masala powder, if using. And then add 4 cups of water. Quinoa:Water= 1:2 Give it all a good stir. Also give it a quick taste, and adjust salt pepper etc if need be. Cover and bring it all to a boil. 

4. Once it starts boiling (about 3 minutes on high), lower flame, and simmer away covered for 15-20 minutes. At about 10 minutes, add the greens, and cover again and continue cooking. At the end of 20 minutes, all the water will have evaporated and the quinoa will have cooked to perfection. 

5. Garnish with cashew nuts and fresh cilantro. Enjoy! 


Deliciously Healthy Quinoa Pilaf


Tuesday, July 29, 2014

Quinoa Dosa

Yessss, I did it, finally! I managed to successfully make quinoa dosas! They turned out real good!!

Ingredients: 

1. Quinoa- 3 measures

2. Split urad dal (white gram)- 1 measure

3. Fenugreek seeds- 1-2 tsp (good for tummy)

4. Chana Dal- 1-2 tbs (I assume for color...?)

5. Water to soak, and then water to grind

6. Oil

7. Salt per taste (to be added in batter) (Optional)

Method: 

The procedure is exactly the same as you would follow for regular dosa batter. See Dosa 1 and Dosa 2.

1. Soaking: Add ingredients 1-4 in a container, and rinse with cold water 2-3 times. Then add water so as to cover it all, and set aside for minimum 2 hours.

2. Grinding: After 2 hours, the above mixture is ready to be ground/blended into a nice batter. Blend/grind everything into a pancake sort of consistency. I noticed that grinding quinoa+dal is way faster than the traditional rice+dal. So that's good! ;) I add salt per taste while grinding. You can skip salt, if you are watching your salt intake......

3. Fermenting: After the batter is ready, I like to stir it all up well with a ladle. The idea is to well-aerate it, in order to aid fermentation, and the dosa will turn out better. So if you live in a nice hot sunny place, you will have lovely fermented batter, all ready to go in under 6 hours. But if you live in Seattle or Alaska (yay!), better to resort to the good old oven. I just keep the container with the batter in my oven, with the light on for warmth, overnight. Next morning my batter is good to go!

P.S.: I noticed that quinoa dosa batter actually fermented a bit faster as compared to the traditional dosa batter. Either that, or well, guess it is summer here after all! ;)

4. Make the dosas! Get your pan going on the stove, spread out the dosa batter with the help of a ladle. Add a few drops of oil to the circumference of the dosas, and in about 2-3 minutes, you'll have yummy quinoa dosa ready.

Quinoa Dosa cooking

Quinoa Dosas ready! 
Serve with chutney, or just a good pat of good old butter, or both! YUM!

Observation:

1. Quinoa dosas seem to brown up quite quickly, so gotta be careful not to burn 'em.

2. Couldn't get them to become crispy as I'd have liked- perhaps because of the lack of rice....?

3. To the novice tongue, this might taste slightly bitter..... but don't worry, you'll get used to it. ;)

Healthy Ideas:

1. Use oats to make dosas! Or combine oats and quinoa.

2. Make pancakes with quinoa flour instead of all purpose flour! Bet that'll be good.


Thursday, June 14, 2012

Quinoa "Pie"- not just for the diabetic!

I mentioned in my last post that my parents are now into low Glycemic Index (GI) foods. That basically means that my mom's pantry is now devoid of any rice, or wheat, for that matter. Instead, her grocery list consists of foxtail millet (called "navane" in Kannada), wire-cut oats etc. These are the "ancient" grains with carbohydrates that take a longer time to break down, thereby releasing sugar into the blood at a slower rate as compared to "modern" grains such as rice, especially white rice, that spike up blood sugar levels at a rapid rate, and the latter is not a good thing, especially for diabetics. And that, my friends, is a pretty long sentence! So anyway, low GI foods are supposedly healthy foods. And with all this talk about healthy living and healthy eating, grains such as millet, oats, buckwheat and quinoa are being re-discovered by people. Well, if not people, definitely by my parents!

The other day I had made quinoa to go along with some baked salmon and grilled veggies, and some of the quinoa was leftover. The next day we had something else and the quinoa just stayed in the fridge. Finally, a couple days later, on a Saturday morning, I decided to use my mom's innovative recipe and converted the quinoa into a beautiful quinoa "pie." It turned out to be pretty darn delicious!

The Making, Ingredients and all:

1. Leftover cooked quinoa. Err, doesn't necessarily have to be leftover-- you could always make some fresh quinoa (cooks just like white rice)! I used roughly about 1.5 cups, maybe. (If you are aware, I follow the eye-ball technique when it comes to cooking......)

Cooked quinoa
2. I had some leftover grated carrot salad from the previous night. Decided to just throw that in as well. Hey, you can make it as healthy as you want! The salad already had salt and some coarse peanut powder.

Grated Carrot salad (with coarsely ground peanuts)
3. Chickpea flour (specifically black chickpea flour, called "kala chana besan" in hindi)- another diabetic friendly ingredient- about 3-4 tablespoons. This acts as the binding agent.

The binding agent- chickpea flour
4. I chopped up a small onion and a couple thai green chillies. And mixed up all of this. I added a few teaspoons of water, just to get a bit of a sticky consistency, to make it easier to spread it out in a baking pan.

Qunoa "pie" mixture
5. I then sprayed a baking pan with some Pam (regular oil will work too, and if you don't care, butter would be great!). I transferred the quinoa "pie" mixture into the pan and spread it out with my palm/fingers. You gotta be quick while doing so, else the mixture can start sticking to your palm and fingers and just get all messy.

Ready to bake!
6. Before sticking it into the oven, that I pre-heated at 400 deg F, I remembered that my mom, when she made the same thing with millet, added some pats of butter on the top and then let it all bake. Yep, butter makes everything, even low GI foods, better! So after placing a few pats of butter on top, I put it away in the oven and let it bake for about 15 to 20 minutes. At the end of it, the butter was all melted and the "pie" was all nice and browned up and best of all was the aroma! So inviting!

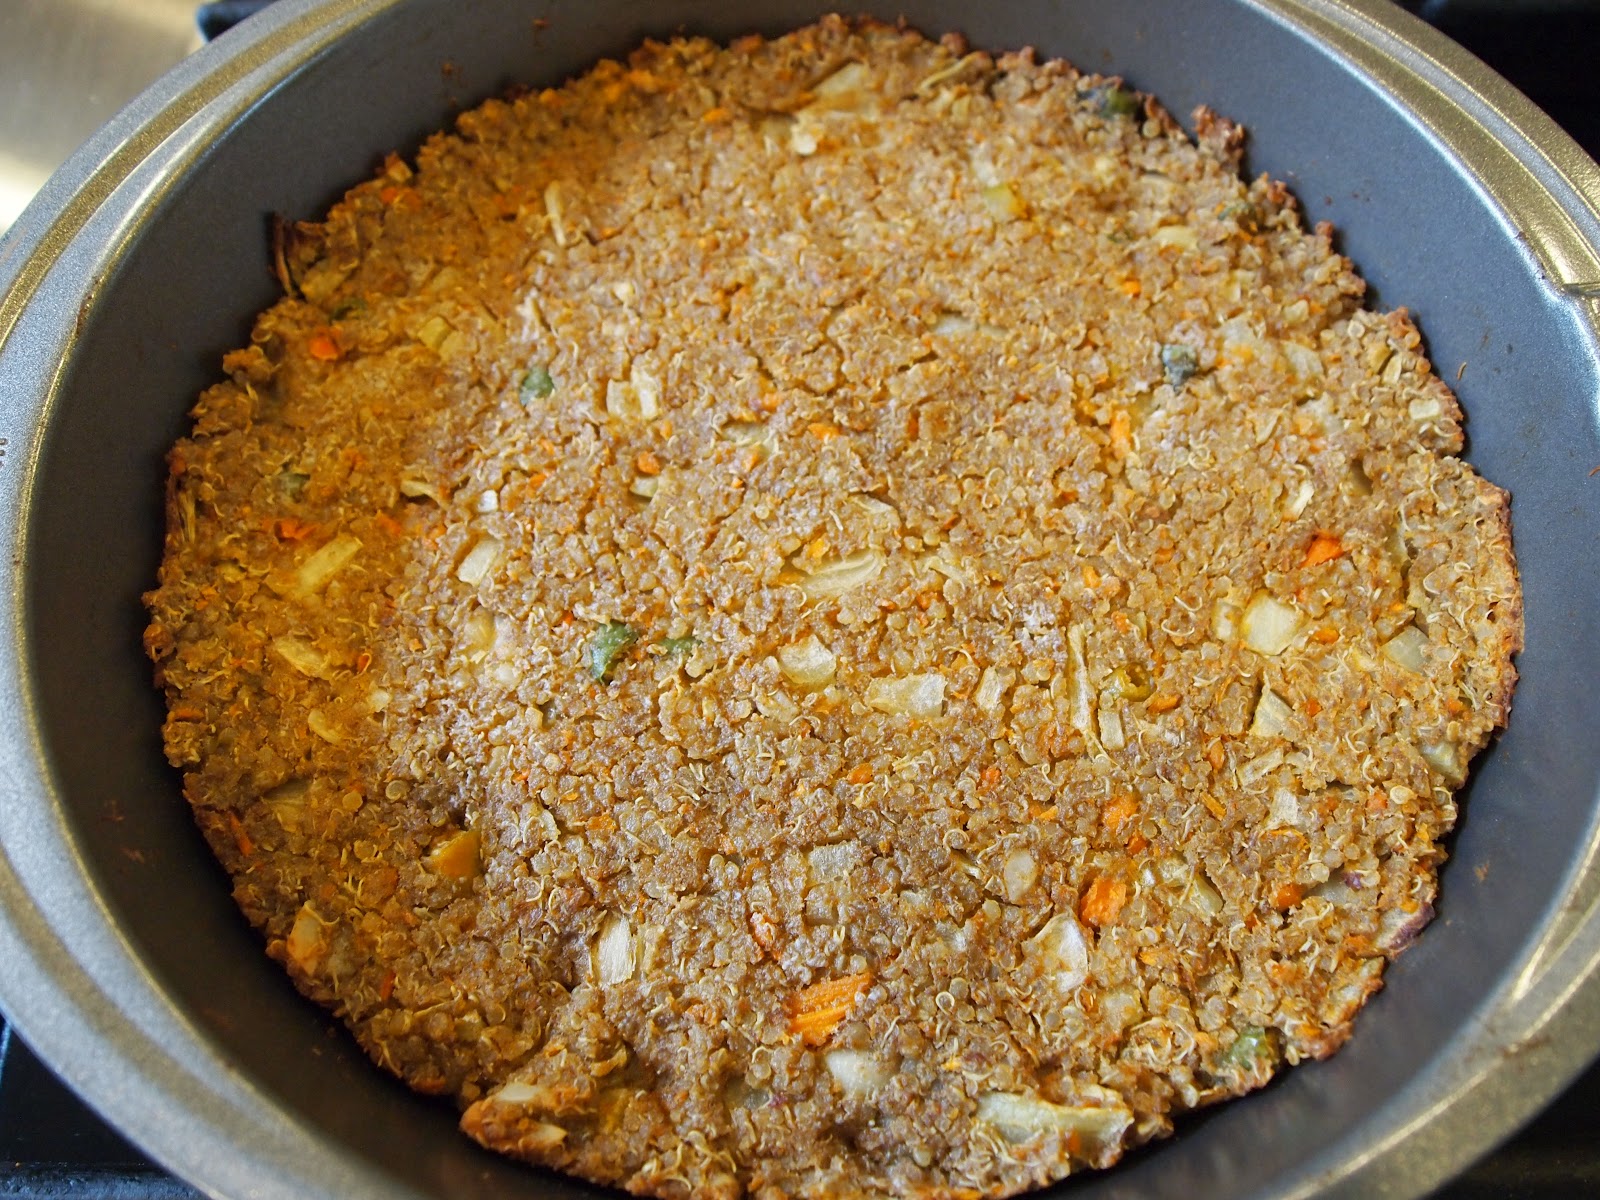
Quinoa "pie" all baked and ready!
Delightful Quinoa "pie"
7. I cut up the "pie" into slices, like pizza slices really, and served it with my sun dried tomato pachadi. Mm, mm, delicious! It tasted nutty and chewy and the ends were nice and crisp. In fact, like my daughter pointed out, it tasted like a veggie burger, one of those whole grain bocca patties-- simply outstanding, and super filling too!

Quinoa "pie" with sun dried tomato pachadi

Afterthought:

I realized that this awesome quinoa "pie" will make a great pizza base! I mean, if you are diabetic and you can't find diabetic-friendly pizza anywhere, or if you just want to do something super healthy for yourself, you just make this in the form of a pizza base (pat and spread it out nice and thin), bake it,  and then top it with veggies of your choice (or meat- but believe me, that will be extremely, as in EXTREMELY, heavy!!). And there, you'll have made yourself a real good, out-of-this-world-healthy, pizza!

Likewise, you can incorporate cooked millet or buckwheat or any grain, really, and create some unconventional deliciousness. Go ahead, try it today!


Monday, September 6, 2010

Quinoa Delight

My brother has been raving about quinoa (pronounced KeenWaa) for many months now. Supposedly packed with a lot of good stuff. I remember my friend telling me about it as well. So finally I decided it was time to give it a try. I had some wild rock fish lying in the fridge. I thought hmm, how about some quinoa with some of that fish and maybe some baked broccoli? Sounded pretty good.

 The Quinoa:
  1. Took 2 cups of quinoa and washed it about 3-4 times. The way you wash it is basically the same way you would wash rice........ you know, wash and rinse out the water a few times before adding the final water for cooking. The only thing to keep in mind with quinoa is that the seeds (yeah!) are so tiny that they just fall out along with the water. Therefore the best way is to use a strainer- that way you don't end up with all that quinoa in the sink. The other thing to keep in mind is that you gotta wash it well a few times to remove that outer bitter saponin coating.
  2. Added 4 cups of water to the washed quinoa in the rice cooker. Figured a 2:1 ratio should work fine (water:quinoa). Also added a pinch of salt and a cube of veggie bouillon for flavor.
  3. Switched on the rice cooker to do its thing. 
The Broccoli: 
  1. Cut up the broccoli into florets. And then gave the florets a quick wash. 
  2. Took a baking pan and spread out the broccoli florets. Smashed up a clove of garlic and added it to the broccoli and then sprinkled some salt and some ground pepper. Finally drizzled some oil and mixed it all up.
The Wild Rock Fish:
  1. Made a beautiful marinade with some buttermilk (yogurt would be better, I think), salt, black pepper, fresh coarsely ground mustard seeds and some vinegar for acidity (lemon juice should be just fine). 
  2. Placed the fish fillets into a baking dish and poured in the marinade. Oh, I salted the fish before pouring in the marinade. 
  3. Then put it in the refrigerator to let it all marinate. I gave it only about 10 mins. I think 30 mins would work way better. 
I pre-heated the oven to 425 degrees and then baked both the broccoli and the fish together for about 20 mins. That is the best part of this recipe: 1 temperature, 2 items, same cooking time! How cool is that!


The fish and the broccoli baking together

After about 15 mins, I took out the broccoli, grated some cheddar cheese into it, tossed it once and then put it back into the oven. Meanwhile the fish was almost done--- nice and bubbling and ohhh, the smell was simply fabulous.


Just as the baking was done, the rice cooker went off. I tasted the quinoa and it was perfect! The only question was whether or not the other 3 would like it.

Delicious Quinoa with broccoli and wild rock fish


To my pleasant surprise, they loved it!! The quinoa was perfectly cooked and the texture was lovely. The broccoli with that melted cheddar was nice and crispy and the fish was full of that mustard goodness and cooked to perfection. What a delightful meal!

If you haven't had Quinoa yet, go right ahead and get some today. Trust me, you will love it!