Sunday, January 9, 2011

1-Pot Pesto Pasta

I love to cook dishes that require least amount of effort, time and utensils. The fewer the number of utensils I have to use, the better. I therefore love to cook these 1-pot wonders that well, as the name suggests, utilize just 1 pot and of course, a ladle to stir up everything.

Now usually I cook pasta by first boiling water, cooking the pasta until al dente and then in a separate pot, throwing in some veggies/meat, seasoning etc and then draining the cooked pasta and then finally incorporating that into the sauteed veggies/meat. It does take some time and effort to do all that. Not to forget, I have extra utensils in my sink. So sometimes, when I am on a time-crunch, I just cook everything together in 1 pot and it turns out pretty darn good. This is how I make my 1-pot pesto pasta:

  • I take a pot, add some oil, followed by some Italian seasoning and then throw in some mushrooms. 
  • Quickly sautee and then add a packet of pasta. 
  • I then add water just enough to cover the pasta. Yes, they do say that pasta must be cooked in "sea-water," meaning a lot of salty water..........but remember, this is my 1-pot pasta wonder. 
  • I then add some salt and pepper and then once it comes to a boil, I cover the pot and reduce the heat. 
  • I stir it intermittently to prevent the pasta from sticking to the bottom of the pot. 
  • Towards the end, I add some broccoli and frozen peas followed by a couple tablespoons of pesto. 
  • Give it all one last stir and ta-da! my 1-pot pesto pasta is ready! 
 My 1-Pot Pesto Pasta

I made this for dinner on Saturday. Before serving, I added some chopped cucumber on top. It added a lovely cool, fresh crunch to the warm and delicious pasta.

The best part was that I had only 1 pot to wash!

My 45-second Cake!

Last evening, right after dinner, I felt like some cake. Yep, that happens sometimes! Now if you remember, I am bad at baking cakes and the sort........so I told the husband to bake a cake. The kids got all excited too--- they love their dad's cakes. He is our Pastry Chef, you see. Well, since it was pretty late, he promised us some cake today. Then we called it a day and my kitchen was shut. I was watching some TV, when I suddenly got this brilliant idea. I dashed to the kitchen and started my experiment. Within 5 minutes, I had created a beautiful red velvet cake!! No way, you say? Here, keep reading and you'll know........

I took:

In a  microwave-safe bowl- 3 spoons of all purpose flour, a pinch of baking soda, a pinch of baking powder, a few drops of vanilla essence, some sugar, a few drops of red food color (for the red velvet part, of course), a couple spoons of olive oil, a tad bit of milk and water.

What I did: 

1. I took a m-wave safe bowl and put in all the dry ingredients first.

2. Followed by the wet ingredients.

3. Stirred all this up into a nice batter (cake batter-  you know, not too thin, not too thick.......). Tasted it to make sure it was sweet enough.

4. Then placed this bowl with the batter in the microwave.

5. Said a little prayer.

6. Punched in the cooking time for 30 seconds first and started the m-wave. Watched the batter rise up and by then the 30 seconds were up. I cooked it for an additional 15 seconds. At this point, it was smelling like real cake!

7. Took it out of the m-wave and by the mere look of it, I knew that it was a success. I nevertheless poked it to see if it was cooked all the way through and indeed it was!

WOW! I had created some real good red velvet cake (could have used more of the red food color to make it a nicer red). It took me 45 seconds to "bake" it in the microwave! I cut it into 4 parts and all of us loved it!

 Imagine my joy when I saw this!
 One slice for each of us
 Perfectly "baked!"
 Bowl licked clean!

From now on, whenever one of us feels like cake, voila! I can whip up my awesome 45-second Cake and satisfy that sweet tooth!

Thursday, January 6, 2011

Mexican Rice- my style

You know how sometimes you come back home right around lunch time and you are hungry like heck. You open the refrigerator, only to find drab leftovers. So then you consider take-out, but then again you re-think that option because you get into this whole "saving" mode and you don't want to spend 10 bucks on yourself. Of course, the very same weekend you go right ahead and spend 200 bucks on your Costco purchases........but hey, those are essentials! Anyway, so coming back to the lunch scenario. This happens with me on and off and so I came up with an excellent quick-fix for my lunch problem. I call it Myxican rice and it is super quick and super easy and I usually have all the ingredients, including leftover plain rice, for this wonderful lunch-fix.

I use:

A couple mushrooms, some frozen corn, hot salsa, plain rice, salt, pepper, some cheese (cheddar or pepper jack or whatever I have).

What I do:

1. I put in sliced mushrooms and some frozen corn into a microwave-safe bowl. Sprinkle some salt & pepper on this and throw it in the m-wave for about a minute or two.

2. I then take the desired amount of rice and plonk in on top of the mushroom-corn mixture. M-wave this for another minute or two.

3. Spoon in a good amount of hot salsa over the rice and then mix it all up.

4. I finally take a thin slice of cheese and just tear it up into little bits and mix it into the above rice mix.

5. Heat up this final mixture in the m-wave for another minute to melt that cheese.

6. I add some extra hot sauce before eating. Delicious and oh-so-satisfying!


Corn, mushrooms, salt, pepper


Insanity Sauce, Salsa

Check out that warning! Love Insanity! ;) 


Yum-yum!! And so quick! 


I love this creation of mine. Takes me 5 minutes to whip up. And it totally satisfies my mid-day hunger!

Wednesday, January 5, 2011

Masala Bhurji

It was the fourth day of the new year, freezing outside and it was time to cook dinner. I had a few veggies lying in the fridge, but was in that laze-around-kinda-mood. Aha! Masala Bhurji! You know, scrambled eggs, all jazzed up with onions, garlic, ginger, tomatoes and spices---YUM!

Required:

Eggs, finely chopped onion (you could just slice it too), smashed up garlic+ginger, green chillies, tomatoes, fresh coriander/cilantro, a couple different spices that you like--- I usually like to add mustard seeds, turmeric, red chilli powder, cumin powder and sometimes even garam masala-- totally upto you, little bit of oil to cook and of course, salt to taste.

My Method: 

1. I take a couple teaspoons of oil in a pan and get the heat going. I splutter some mustard seeds and then throw in some chopped onion, garlic, ginger, green chillies, fresh coriander/cilantro as well as tomatoes*. Quickly sautee it all, adding turmeric powder, red chilli powder and salt.

2. I then break eggs directly into the above mixture in the pan and start stirring it all up (just like scrambled eggs).

3. Within a couple to max 5 minutes, Masala Bhurji is ready! I sprinkle a tad bit of garam masala right at the end or maybe some cilantro+cumin powder for that final oomph.

*I was out of tomatoes and so I substituted that with tomato ketchup. OK, some of you might smirk at the idea of adding ketchup......but hey, it totally works, I tell ya!


Masala Bhurji all ready to go

With chapati/tortilla/bread


Hot chapatis with hot Masala Bhurji on a cold Tuesday night worked out great!

P.S.: If I was in that laze-around-kinda-mood, how on earth did I suddenly get the energy to make chapatis? Well, those were pre-made chapatis.......

Sunday, November 28, 2010

Gongura Pachadi

The plan was to go visit my brother and his wife this weekend. And so we set off. Loaded the minivan with sleeping bags for the kids, a couple pillows, some clothes and the stuff from the Indian store. The place they live in does not have one single Indian grocery store! And so they usually buy all their stock when they visit us. Now since we were going to visit them, they gave me a tiny list, that included kari patta (curry leaves) and I do know that my sister-in-law is quite fond of gongura leaves as well and so I just bought a couple bunches of gongura as well. Now thankfully I was sensible enough to call my bro when we left the house to tell him that we were on our way. Apparently there was a winter storm warning and he suggested that it would be better for us not to go. Oh well and so we came back home and unloaded everything and I put the perishables back in the refrigerator. So much for our weekend trip!

The botanical name for Gongura is Hibiscus cannabinus and well, I am not sure what the common English term is. I think Red Sorrel leaves.........not sure. Anyway, the leaves are sour like heck and the most popular dish made out of Gongura is Gongura Pachadi, a chutney of sorts, in the southern state of Andhra Pradesh in India.

I was thinking that perhaps I could give the gongura to one of our friends who might actually cook it, rather than letting it rot in the fridge. But I surprised myself by actually going ahead and cooking it myself! My cousin, my sister-in-law and my mom--- all of them gave me one basic recipe that sounded very easy and so I went ahead and made Gongura Pachadi for the very first time in my life!!

 Gongura Leaves

Ingredients:
  • Gongura leaves
  • Green Chillies
  • Red Crushed pepper (my substitute for red chillies- I was out of red chillies......)
  • salt
  • oil 
Method: 
  • I separated the green leaves from their red stems and washed the leaves. I then dabbed the leaves with paper towel to sort of dry them (I must admit that I was a little impatient and so a lot more dabbing would have actually worked better.......).
  • I took a nice big pan and poured several teaspoons of oil into it; note: several teaspoons. And got the heat going.
  • I then threw in the washed and dried (err, sort-of-dried in this case) gongura leaves into the hot oil along with the green chillies and the red crushed pepper. I added salt to taste.
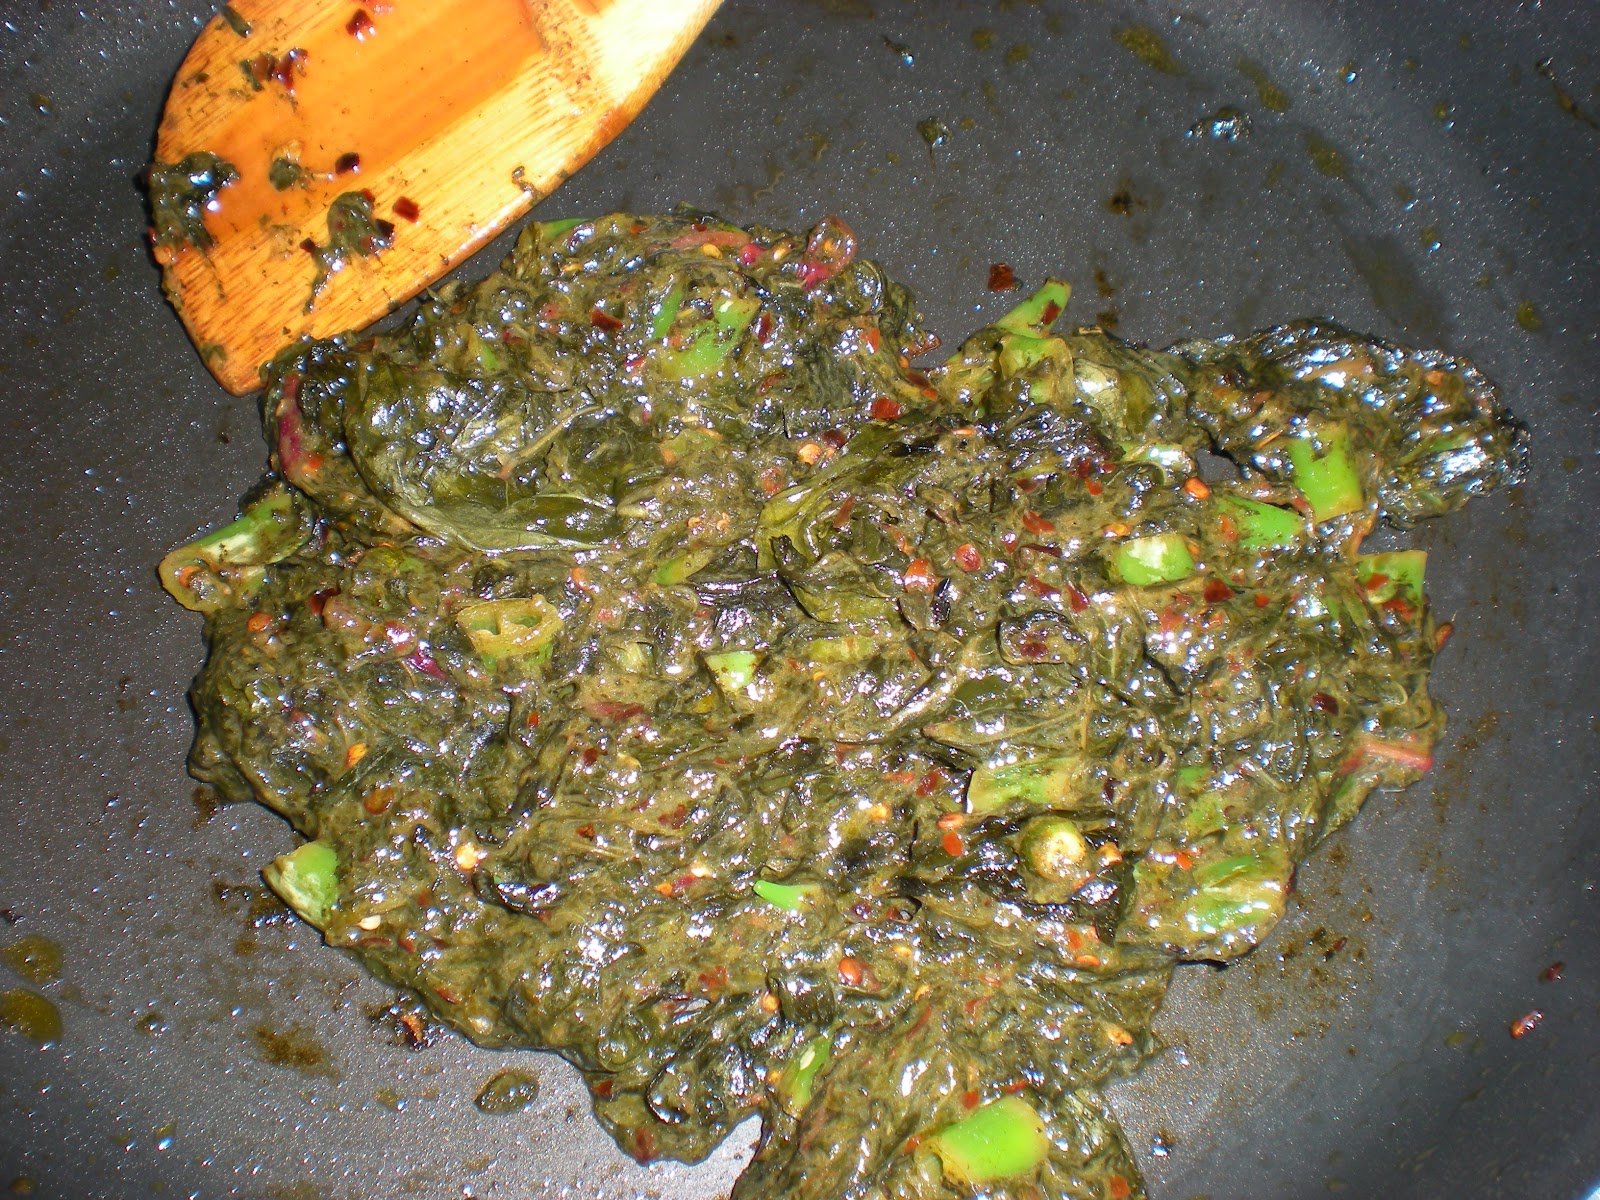
  • Fried everything together. Within a minute or so of frying, the green leaves started to turn really dark. My sis-in-law had told me that it would happen. Good, so I was on the right track!
  • Now my mom had told me to fry it all until the leaves turn crispy dry. However, the impatient me (no, no, not lazy!!) decided to stop frying mid-way. Anyway, this was my first time and basically an experiment, right?
  • I turned off the stove and let the fried leaves sit to cool off. I then transferred it into my food processor and pulsed it a couple times into a chutney consistency. There and that's it! The pachadi was ready and hopefully my experiment was a success!
 Gongura leaves washed and dabbed dry with paper towel

All fried up and ready

Gongura Pachadi ready to be eaten!

The Real Way to Eat this Stuff: 

My cousin P had suggested that the real way to eat this stuff is by mixing it with fresh hot steaming rice, a little bit of ghee (clarified butter) and some finely chopped raw onion. That is exactly how my husband and I ate it. It was pretty darn good! There was that sour thing going on as well as the kick from the green and red chillies. As for the onion-- the crunch totally added a joy-factor to the eating!

So my experiment was successful and guess from now on I shall be buying these sour leaves more often. Oh yeah! And I did not let the gongura rot in the fridge.

Now I gotta figure out what I'm going to do with the four packets of curry leaves that are lying in the fridge!!

Tuesday, November 23, 2010

Egg-free and Butter-free Oatmeal-Raisin cookies

You remember how I bought all that hummus from Costco thinking that my kids would love it and actually eat it? And then of course, they never did and I kept using it as a sauce thickener in various dishes.........now one would have thought that I have learned my lesson.

No thanks to that one episode of Good Eats- the one about oats and how oats are excellent for the body, especially the heart etc, I yet again committed a blunder. I bought this box of oatmeal from Costco and placed it in the butler's pantry with a big smile on my face and imagining my kids thoroughly enjoying every bit of that healthy oatmeal every single morning for the next few weeks. I probably knew deep inside that this was a big mistake. Well, they say always listen to your inner voice...........wish I did that more often.

It snowed the whole of yesterday and on account of the 1.5 inches of snow, all schools were shut down today. You see, in this part of the world, we are not used to all this snow and we really can't handle it and hence we all just decide to stay put in our respective homes. Well, it is nice being cooped up in the house for a change and having the fireplace on and feeling nice and cozy, while outside is freezing. And so, around late afternoon I suddenly decided to please my kids by baking some cookies, some oatmeal raisin cookies, to be precise! Yes, the plan was to utilize that oatmeal lying in the pantry.

I think I have mentioned this before- I suck at baking cookies and cakes and the like. Cakes as I understand require a lot of precision. But I kind of figured that cookies should be easier. I mean I have "baked" those ready-to-bake kinds before and I have an idea about the consistency and the general ingredients.

Just as I started to gather up the ingredients, I realized that I was out of eggs and butter. The two most important ingredients! Uhh, what do I do? Well, thanks to the internet, I found this one butter-free and egg-free recipe and I decided to put my own twist to the recipe.

I took:
  • 4 sachets of chocolate chip oatmeal and 2 packets of original oatmeal
  • All purpose Flour (a few tablespoons)
  • maple syrup
  • brown sugar
  • canola oil 
  • vanilla essence
  • raisins
  • cinnamon powder (took a stick of cinnamon and powdered it in my nifty little coffee grinder)
  • baking powder
  • baking soda
  • pinch of salt
  • milk (a last moment addition to rectify the consistency)

Method:
  • I took a mixing bowl and put in all the dry ingredients.
  • I then added a teaspoon of vanilla essence followed by oil and maple syrup.
  • I mixed up everything real well. 
  • I decided to make a few first just to see how it turns out and so I made little balls and patted out little cookies between my palms and placed them on a greased baking sheet.
  • I baked this first batch at 375 degrees for 15 minutes.
  • After the timer went off, I took out that batch and placed the cookies on my little cooling rack. At that point they looked pretty good! I had to try one and indeed it was superb! Crunchy and delicious!
 The first batch (one already in my tummy)

Last moment addition to the cookie dough: I figured it was OK to go ahead and bake the second batch. The first batch was great, but a tad bit too crunchy for an oatmeal raisin cookie. And so I decided to add a little bit of milk to the cookie dough.

I baked the second batch again at 375 degrees, this time for only 10 minutes. Oh that second batch was excellent!! Chewy as well as fluffy!! Yummy!

 The second batch- chewy and delicious!

And fluffy inside!

My husband was bowled over (yes, he was at home today because of the snow......remember?) and could not believe that I made those cookies without eggs and butter! My kids were thrilled! And as ever, I was pretty pleased with myself!

A few more rounds of cookie-baking and I will succeed in finishing all that oatmeal. Yes, yes, I have promised myself not to buy huge boxes of oatmeal and hummus from Costco!!

Thursday, November 18, 2010

The latest sensation- Naanizza!

A few weekends ago we went to Pallino Pastaria and my daughter and I ordered two individual pizzas- one was a chicken-pesto and the other supposedly a "four seasons" pizza. We were all excited (and we were super-hungry) until the waiter brought our orders. I mean, literally, our faces fell upon seeing those little itsy-bitsy things that were placed on our table. To elaborate- the pizza base was basically a naan (we all know what a naan is, right?), floppy, that too! The chicken-pesto naan, oops, I mean, pizza was basically topped with 4 really tiny pieces of chicken, half a teaspoon of pesto and 1 slice of tomato, while the "four seasons" kind was topped with exactly 1 slice of prosciutto, 1 miniature slice of salami, 1 artichoke piece (definitely from a can) and 1 slice of tomato (aah, "four" seasons indeed!). Dunno where the mushroom(s) went! The menu mentioned mushrooms too......... oh well, so it was a total rip-off and we decided never to go there again.

Last week I bought a bag of naan from Costco. You get 8 lovely naans from one bag which is great. What do you think I did with those naans? One guess!
  • I pre-heated the oven to 400 degrees
  • Placed a couple naans on a lightly greased baking sheet
  • Topped each naan with the desired toppings
  • Threw it in the oven and baked for about 5 minutes and then switched it to the broiler mode and broiled for about 7-8  minutes (basically until the cheese got bubbly and the naan base got brown)
  • And I created some out-of-this world pizzas--- well, definitely a thousand times better than that restaurant pizza!
Toppings:
  •  The son had pepperoni, tomatoes and cheddar cheese; the daughter had canadian bacon, mushrooms, tomatoes and chipotle jack cheese; the husband and I had Supreme pizza (basically with everything!). 
  • For the kids I used some plain old tomato ketchup and spruced it up with italian seasoning- hey, it was yummy! While for us two, I used a gourmet spicy sauce. 

Broiling is on.......the cheese is melting.....

Ready to eat-- crisp and delicious!

I got so excited with the success of my pizza, that I even made a dessert pizza. So I topped half a naan with some fresh blueberries and some brown sugar and a few chunks of chocolate and just baked and broiled like I did for the other pizzas. It was fantastic!!

Note to Self: Next time, I should omit the brown sugar and just use chocolate and fresh fruit and maybe some kind of jelly/jam.

Blueberry and chocolate pizza--- mmm!

Apparently now this kind of pizza actually has a name--- a Naanizza! Wow!

So will I order pizza from one of those pizza places now that I can create my own gourmet pizza, or should I say, Naanizza, at home? Heck, yeah!! But, but, but---- I am certainly not going to that restaurant to get ripped off again!